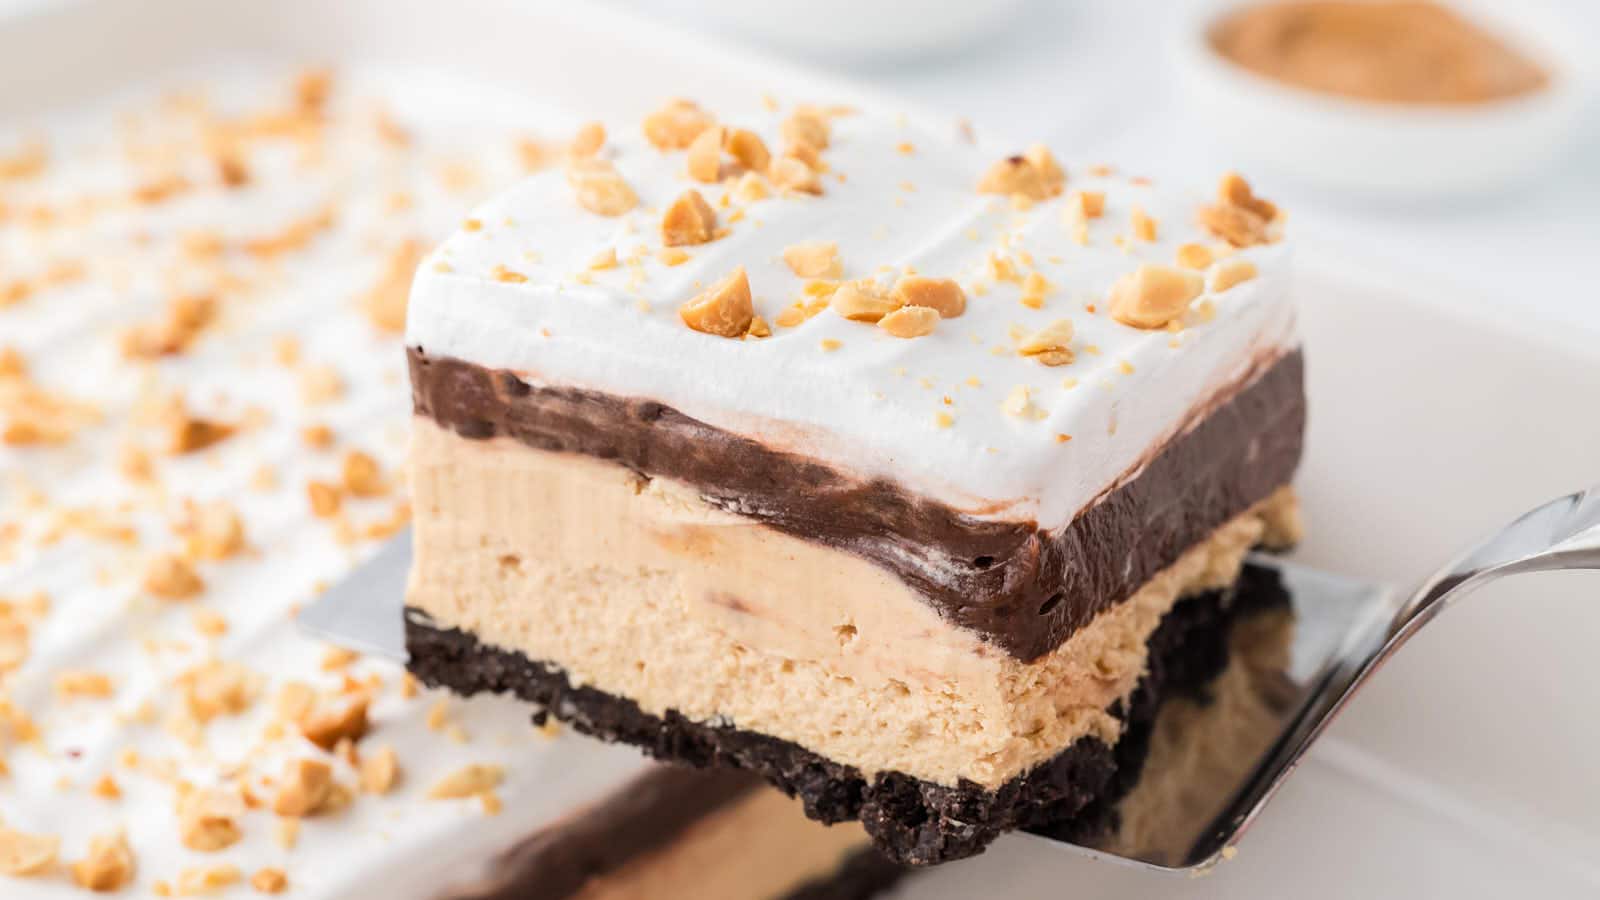
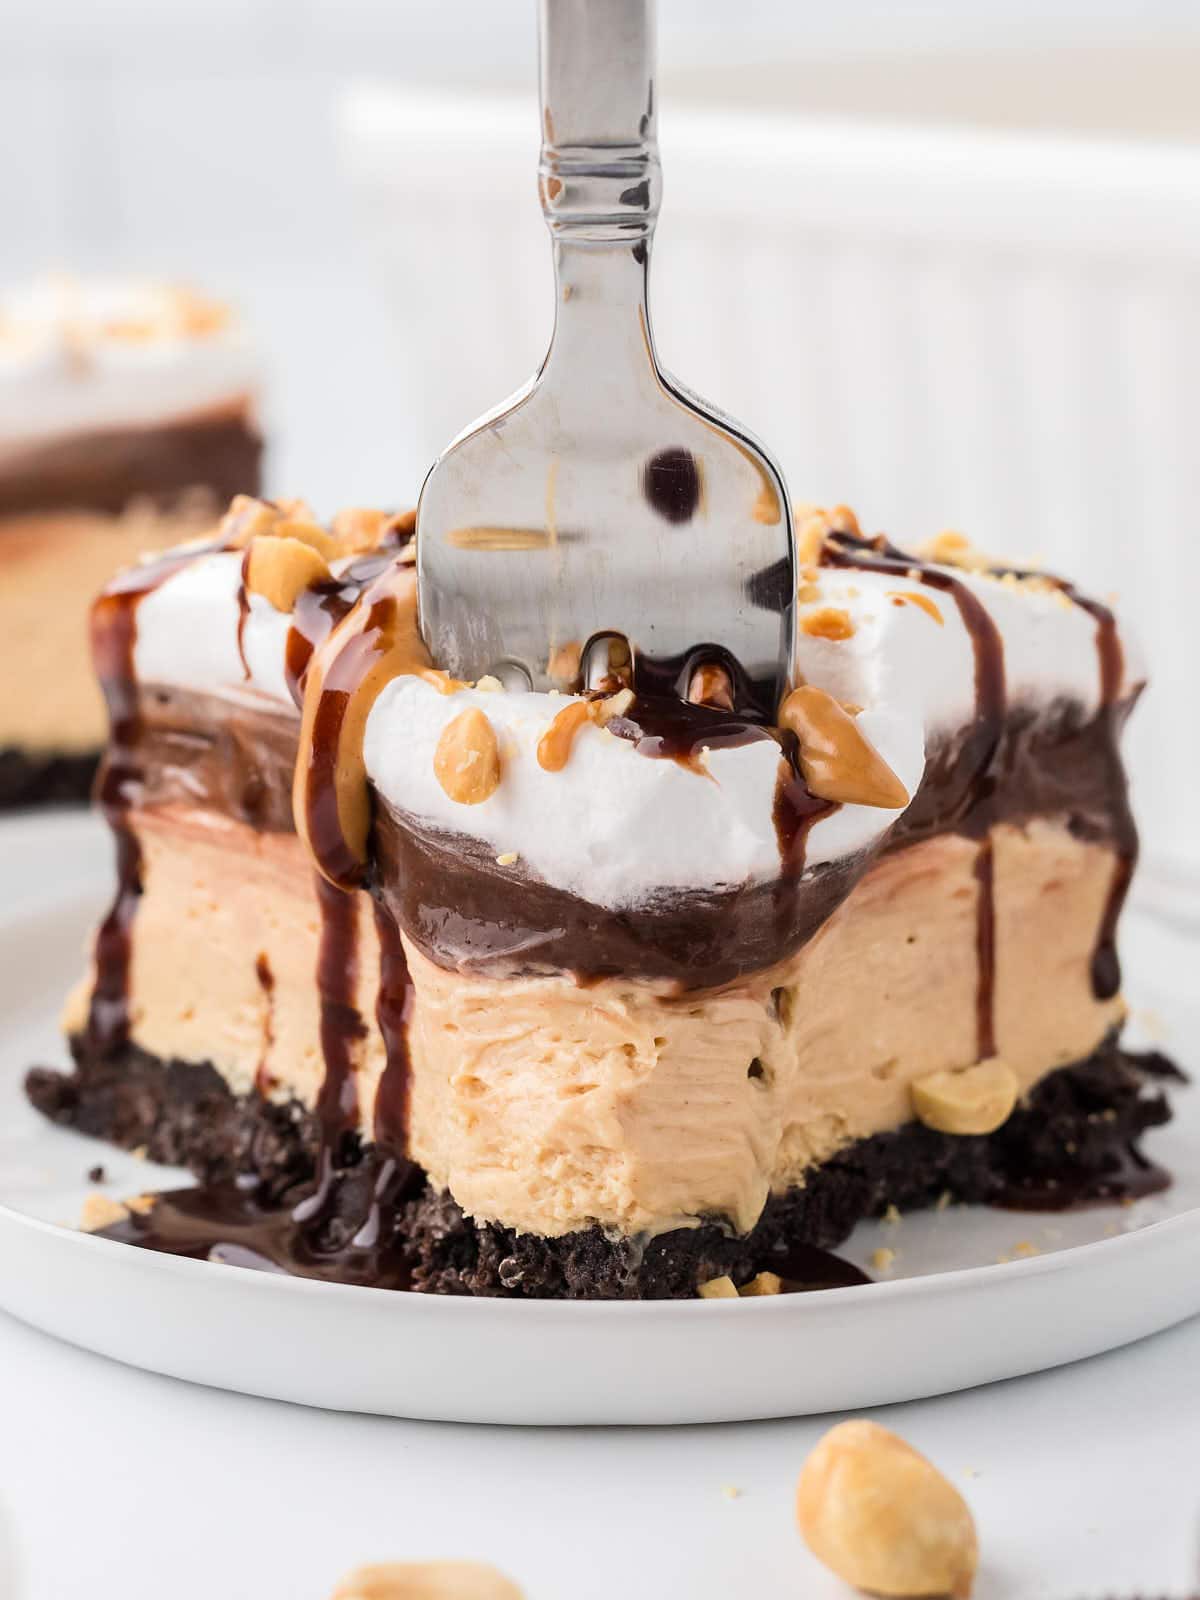
Peanut Butter Lasagna
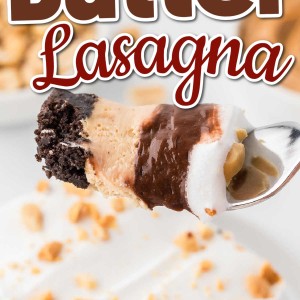
Peanut Butter Lasagna is a no-bake, layered dessert that brings together the best flavors of chocolate, peanut butter, and cream for a treat that’s hard to resist.
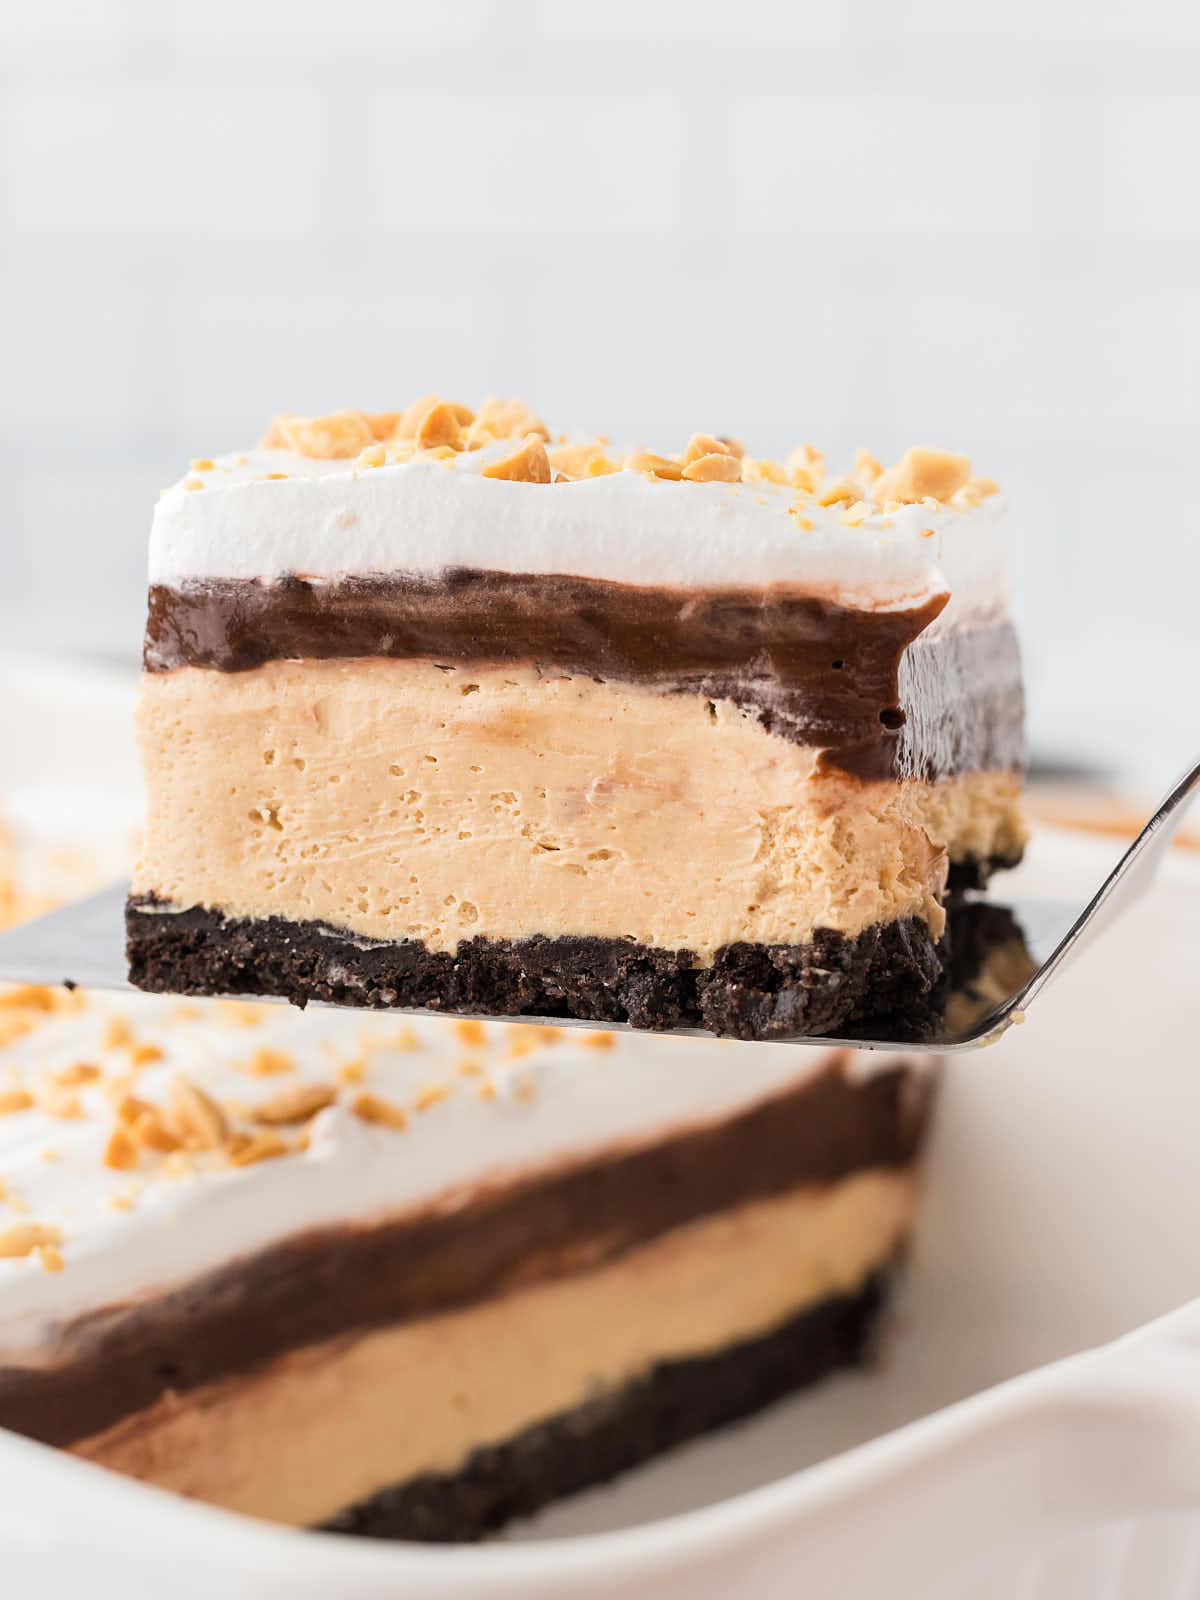
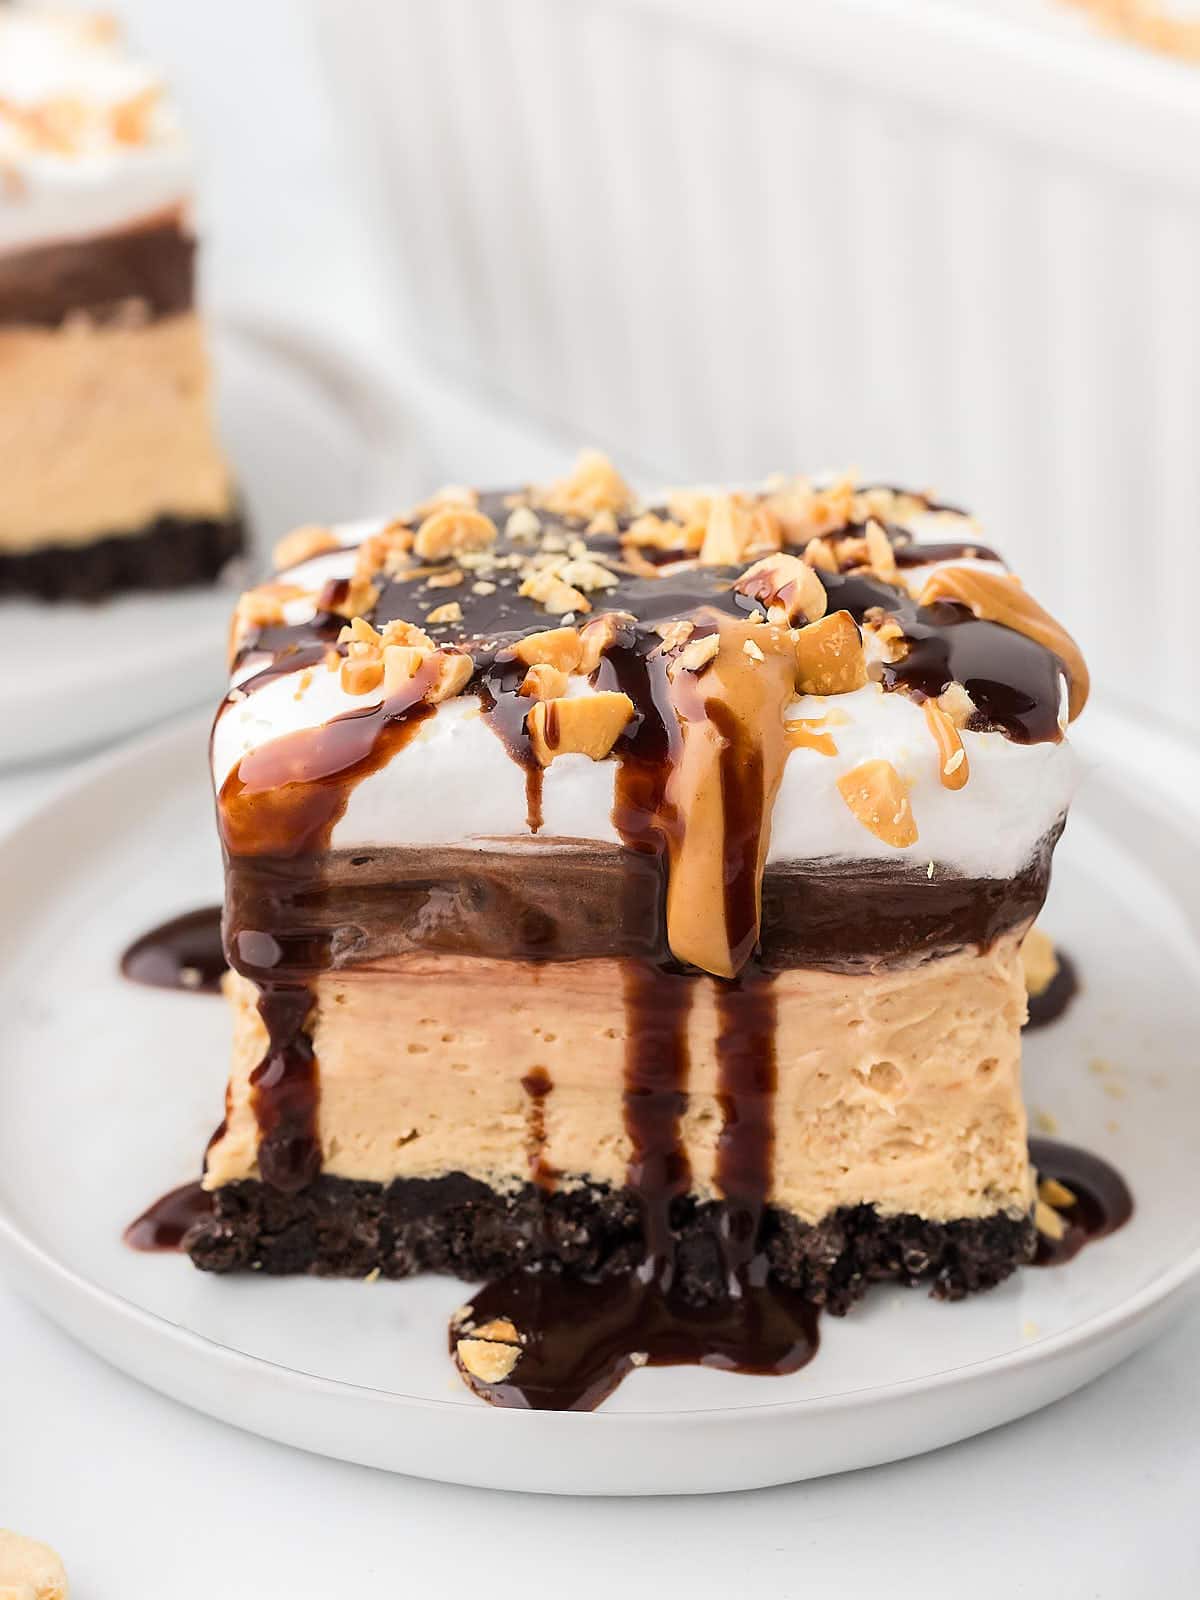
With creamy layers of peanut butter and chocolate pudding, plus a crunchy Oreo base, this dessert has it all.

Whether you’re a peanut butter lover or just in need of a quick and easy crowd-pleaser, this dessert delivers on both taste and convenience.
No-Bake Peanut Butter Lasagna Recipe Highlights
- Just 30-Minute Active Time
- No-Bake Dessert, Perfect for Any Occasion
- Layers of Creamy Peanut Butter and Rich Chocolate
- Family-Friendly and Great for Gatherings
- Super Simple Steps for a Stunning Treat
Ingredient Notes
Please check the recipe card below for a detailed, printable ingredient list.
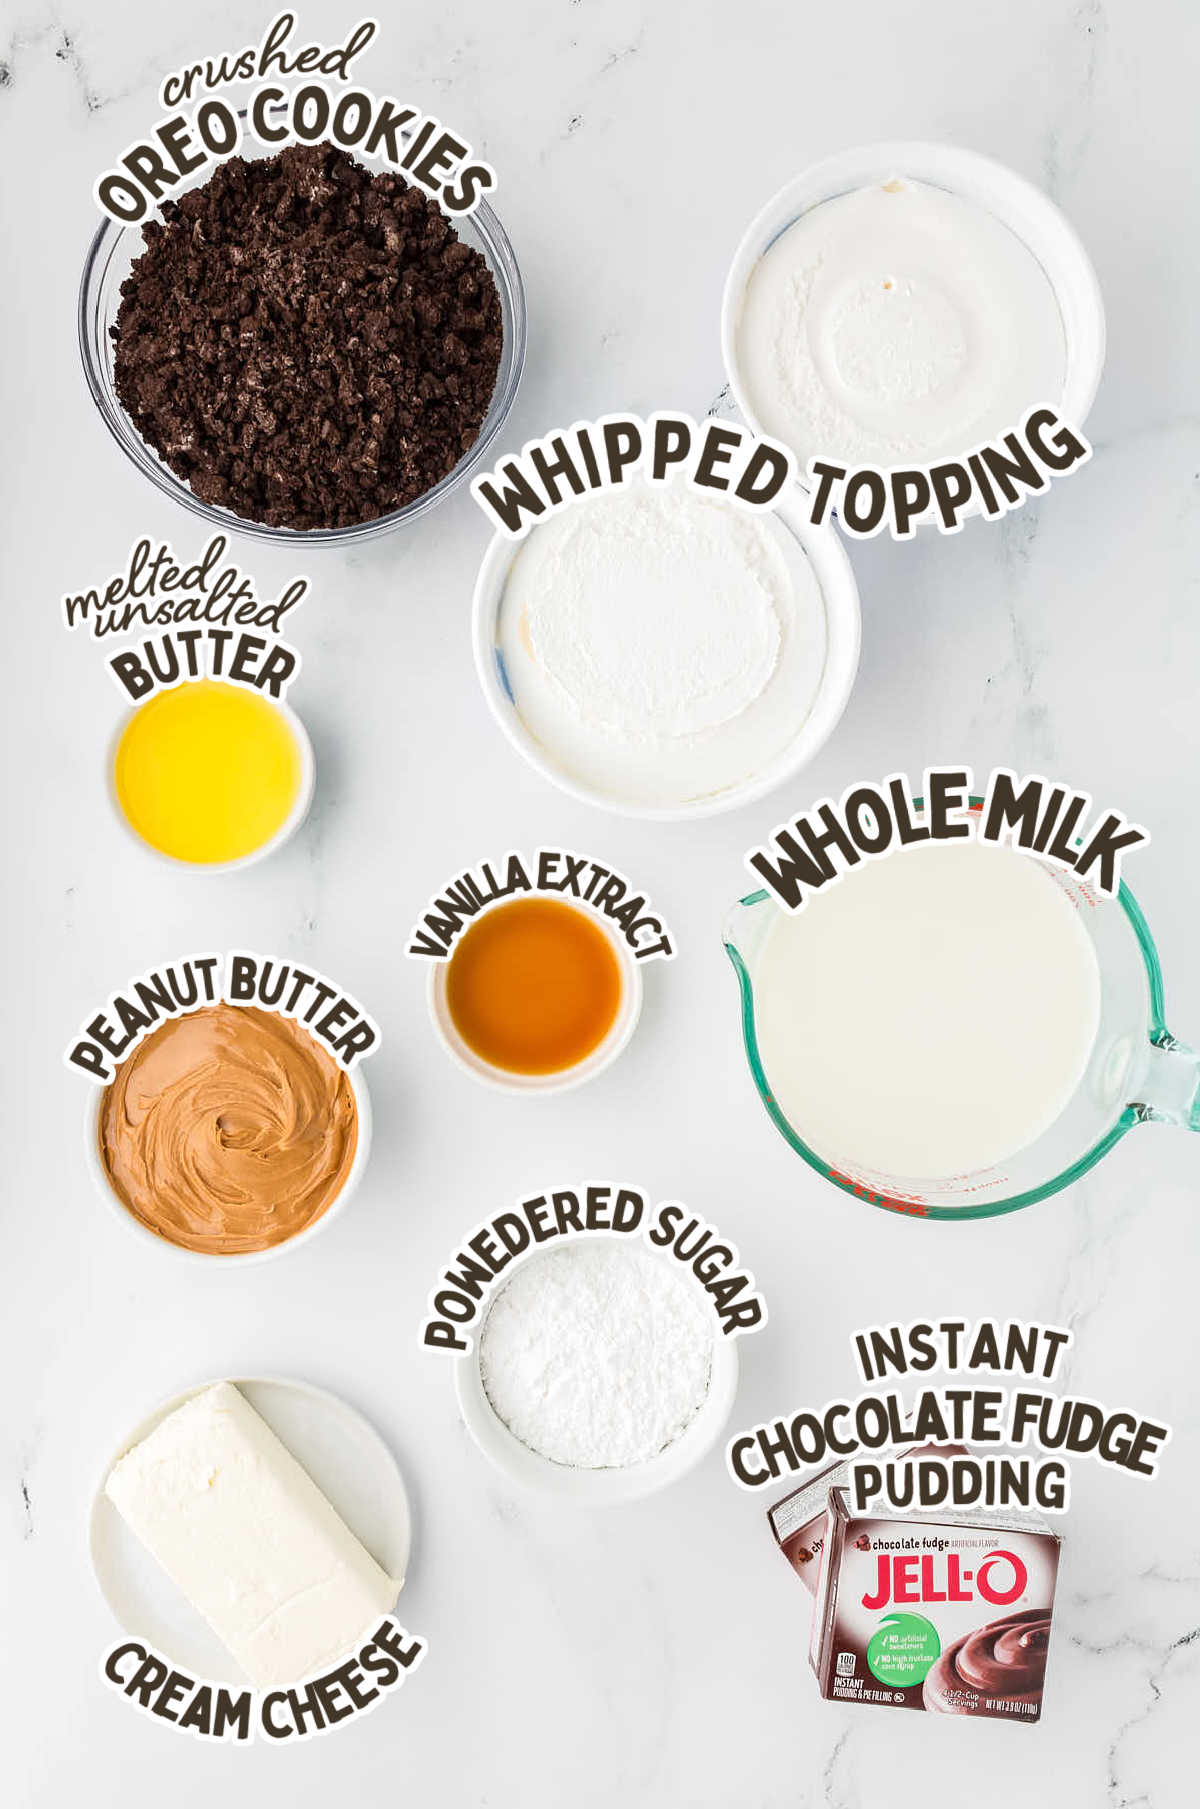
OREO – You’ll crush the Oreo cookies to create a crunchy base with a blend of chocolate flavor and a hint of salt that enhances the creamy layers. I recommend crushing them finely to press them easily into a solid crust that holds the layers well.
BUTTER – You’ll need melted butter to bind the Oreo crumbs, giving a sturdy base when you slice and serve. It also adds a bit of richness, balancing the sweetness of the dessert.
CREAM CHEESE – I love using cream cheese here to add just a touch of tanginess that balances out the sweetness. Let it soften to room temperature for easy mixing, and you’ll get a smooth, creamy peanut butter layer without any lumps.
PEANUT BUTTER – Peanut butter brings that classic, nutty sweetness to the dessert, pairing perfectly with chocolate. Go for creamy peanut butter to keep the layer smooth, but if you prefer a bit of crunch, feel free to use crunchy peanut butter instead.
POWDERED SUGAR – I use powdered sugar to sweeten the peanut butter layer without making it gritty. It blends smoothly and helps stabilize the layer, so each slice holds up nicely.
VANILLA – A little bit of vanilla extract adds depth to the peanut butter. I find a teaspoon is all you need.
WHIPPED TOPPING – I use Cool Whip, but any brand works. It lightens up the peanut butter layer and adds a fluffy finish on top. Make sure it’s fully thawed before you start mixing, so it spreads easily and stays smooth. This layer is a nice contrast to the dense layers beneath.
CHOCOLATE FUDGE PUDDING – I love using instant pudding here; it’s quick, easy, and gives a deep chocolate flavor that complements the peanut butter. This layer sets up thick and creamy, creating the distinct layers we all love in this dessert.
MILK – Cold milk helps the pudding reach the perfect creamy consistency without overwhelming the flavor. You’ll want to use whole milk to keep the chocolate layer rich and smooth, ensuring each layer stays distinct and satisfying.
How To Make A No-Bake Peanut Butter Lasagna
Please check the printable recipe card below for more detailed instructions.
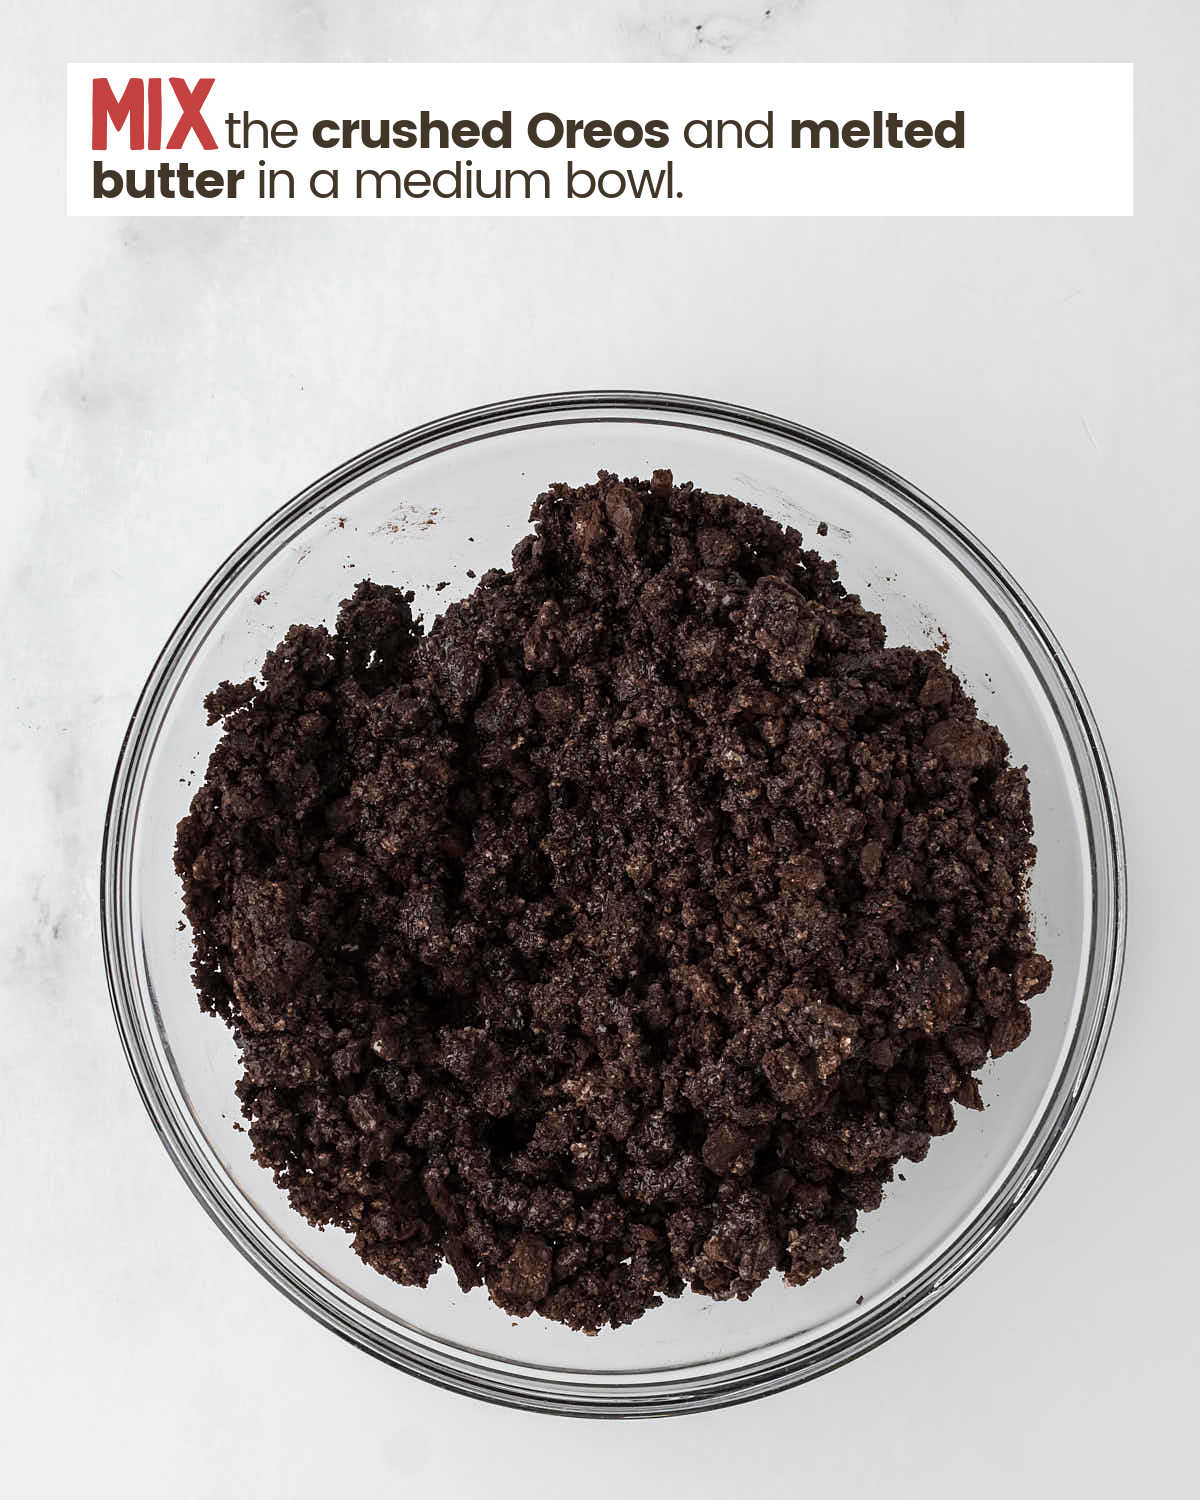
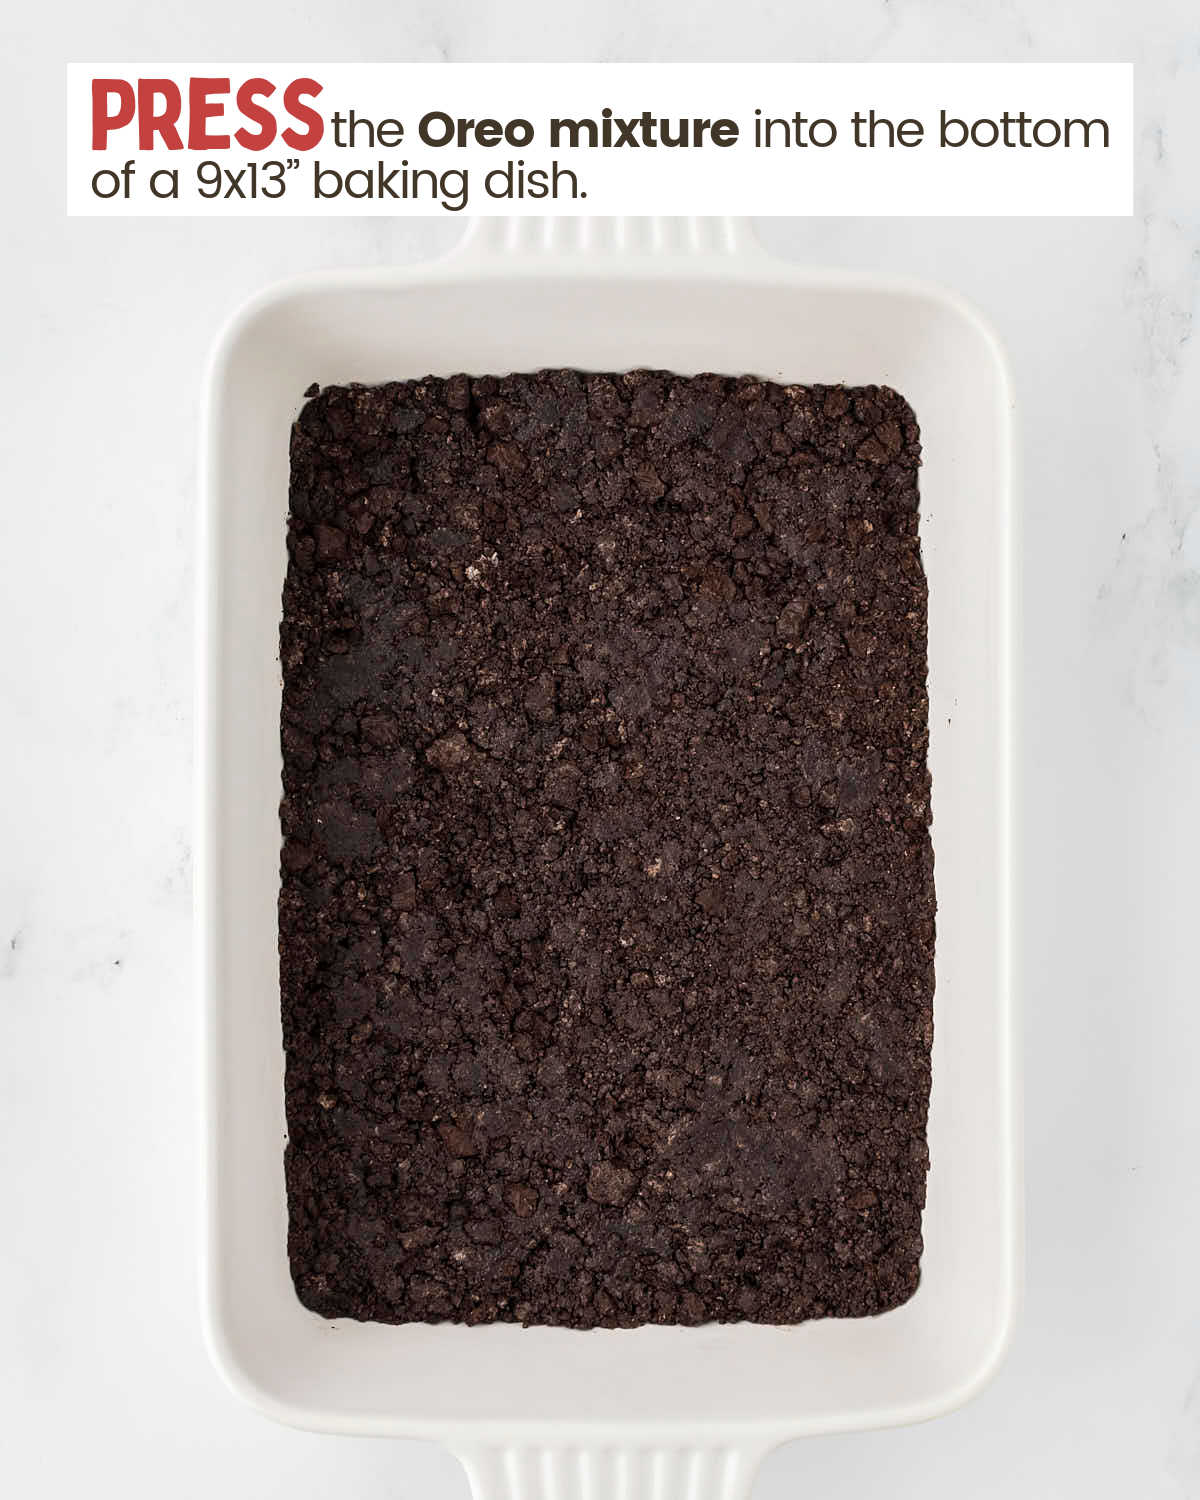
- Mix crushed Oreos and melted butter, pressing firmly into a baking dish for the base.
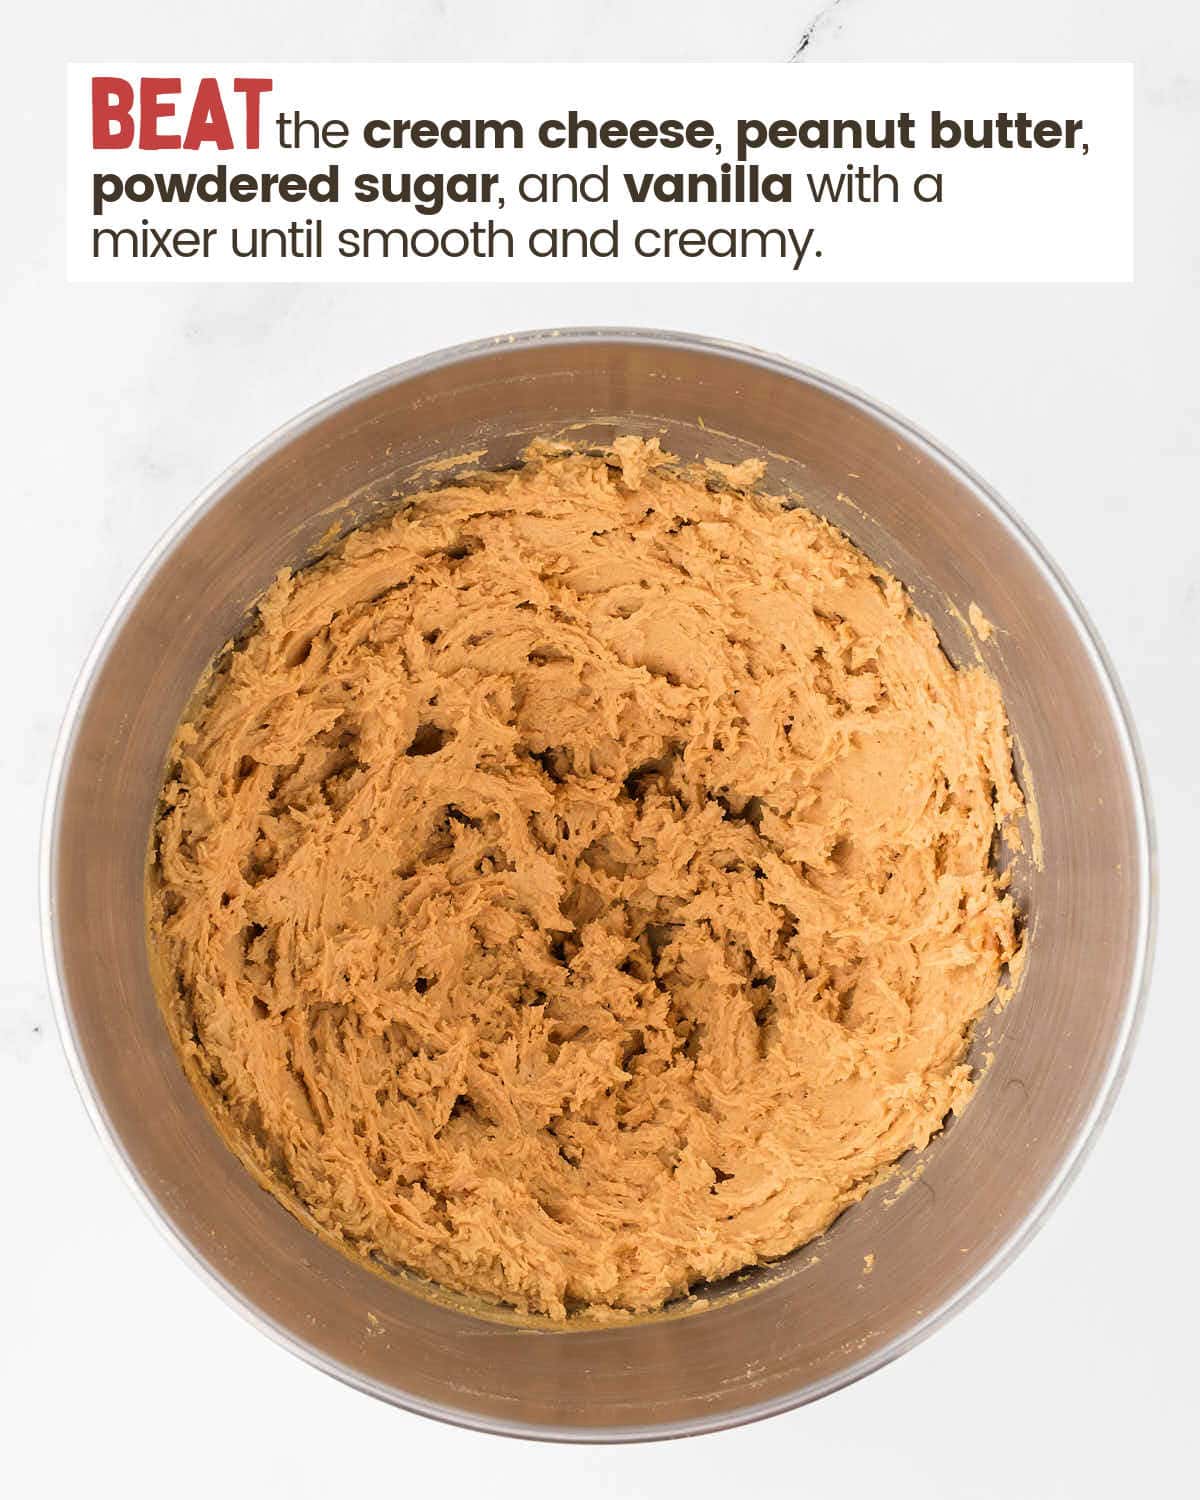
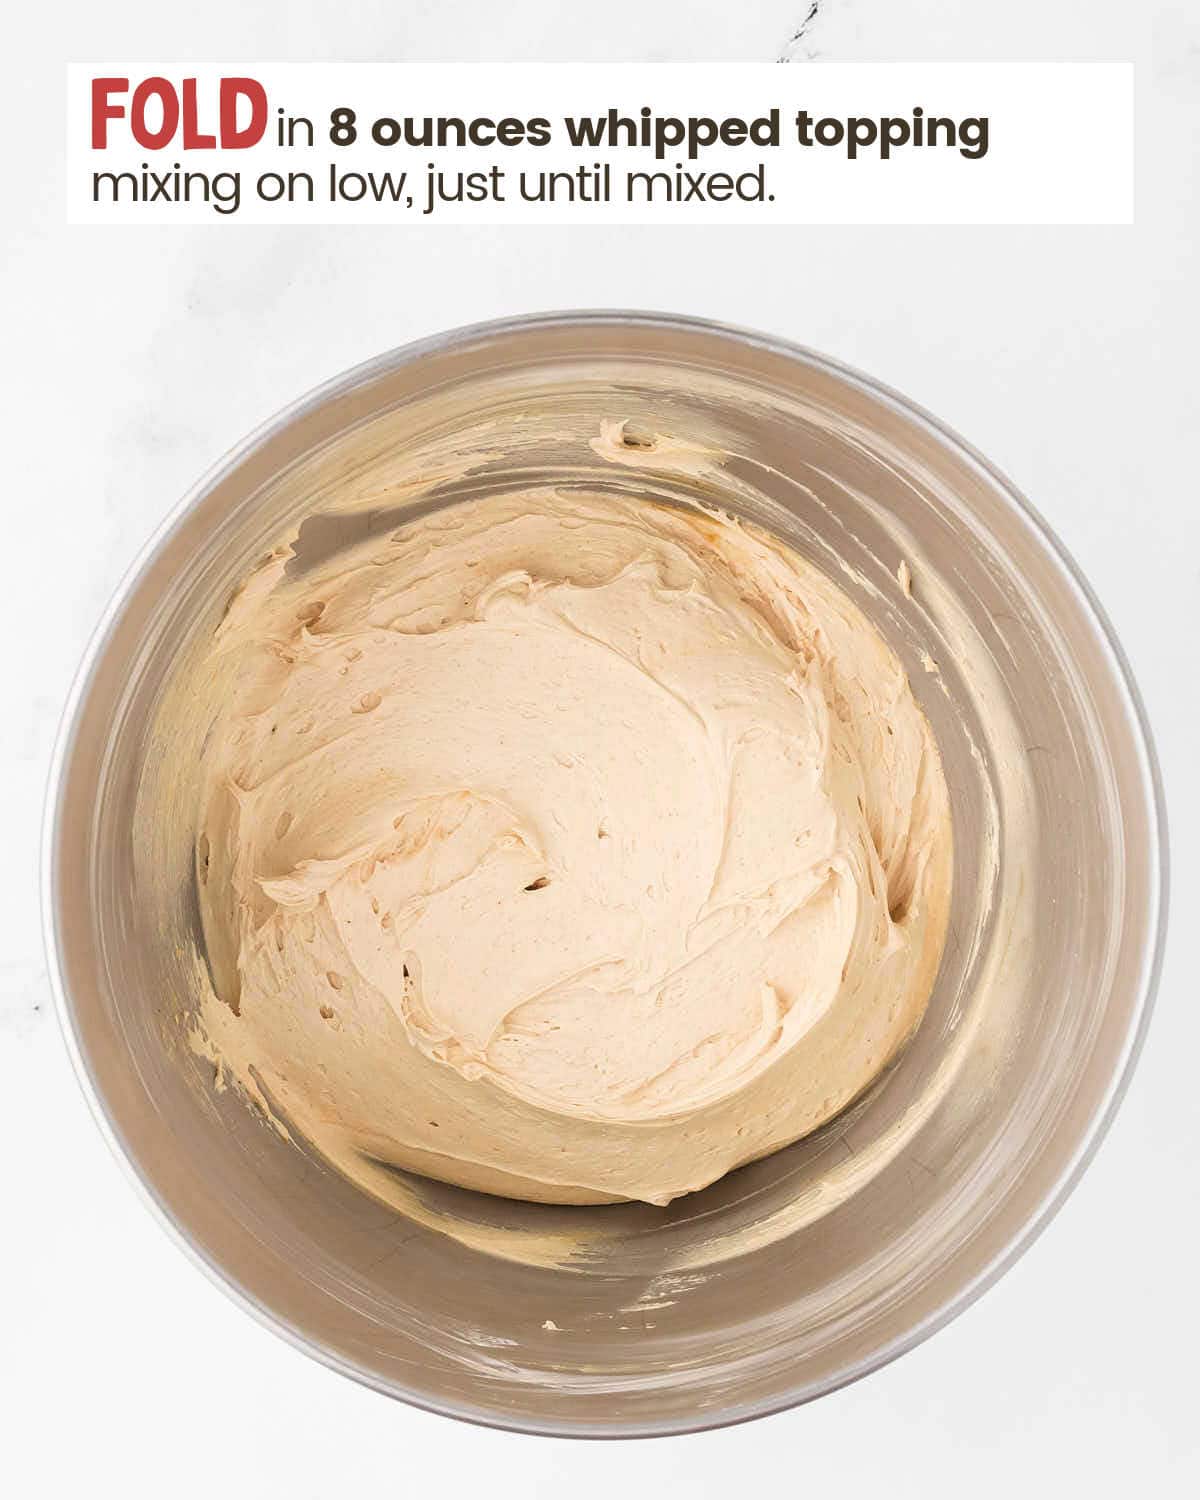
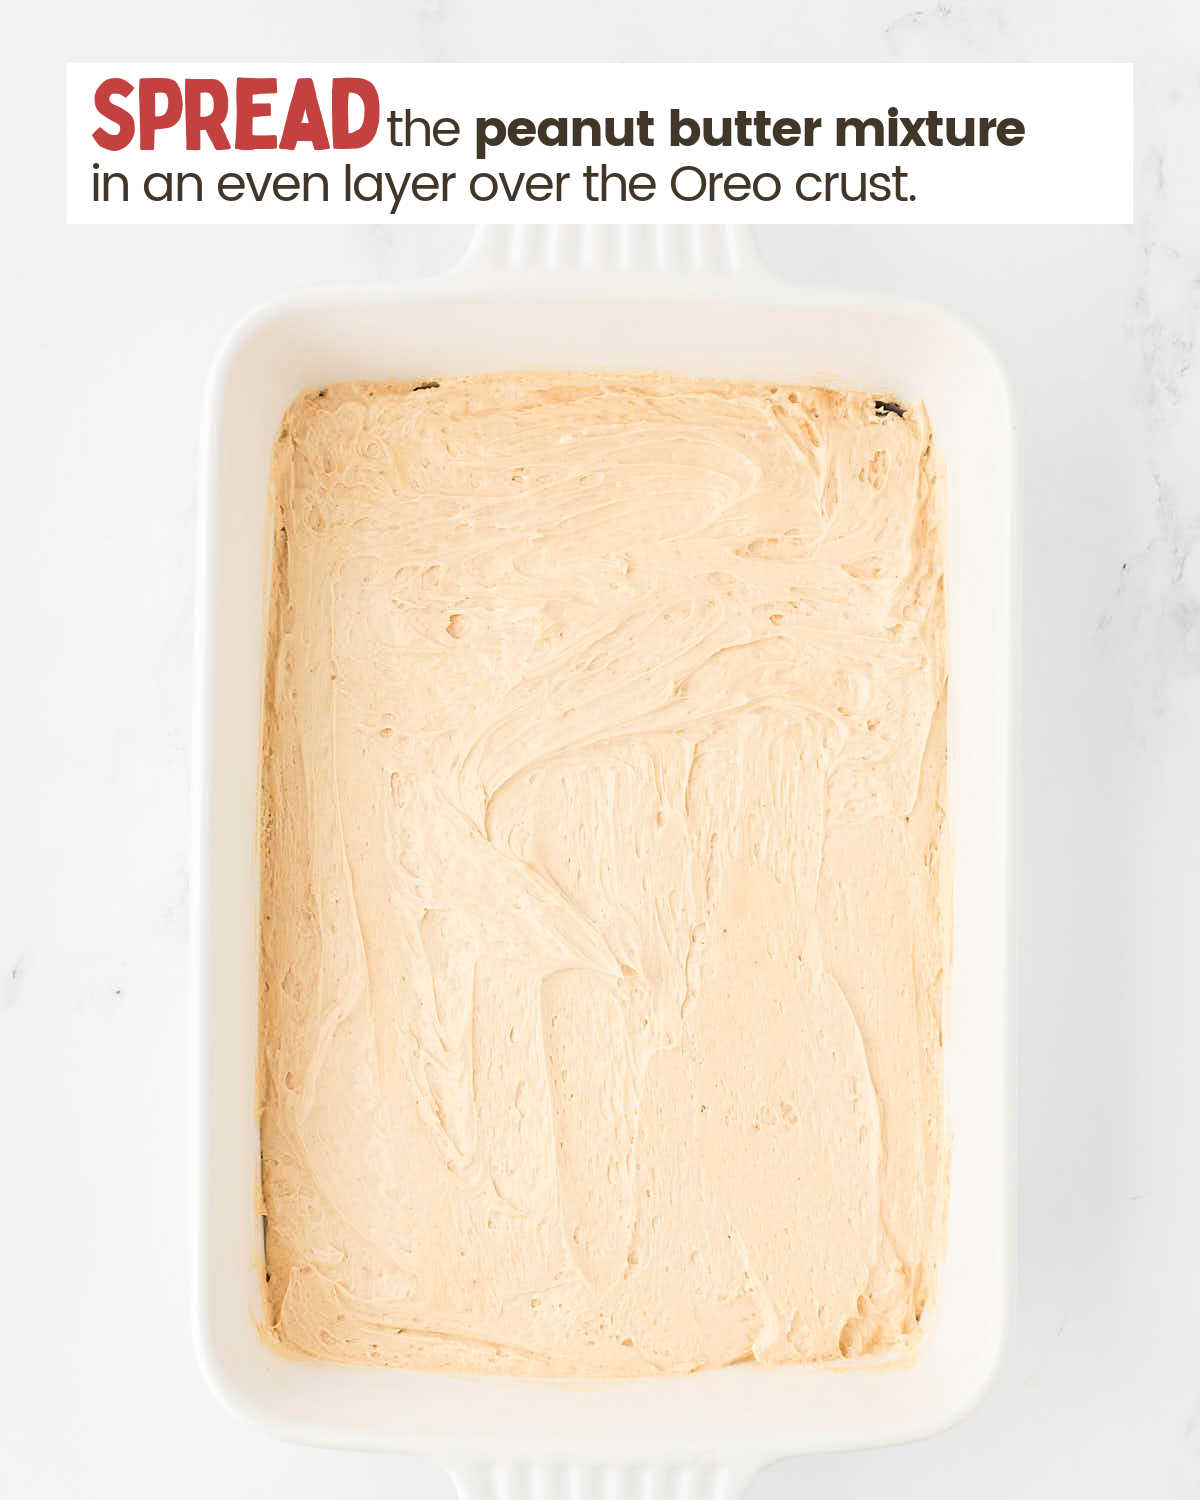
- Beat cream cheese, peanut butter, powdered sugar, and vanilla until smooth. Fold in half of the whipped topping, spreading evenly over the crust.
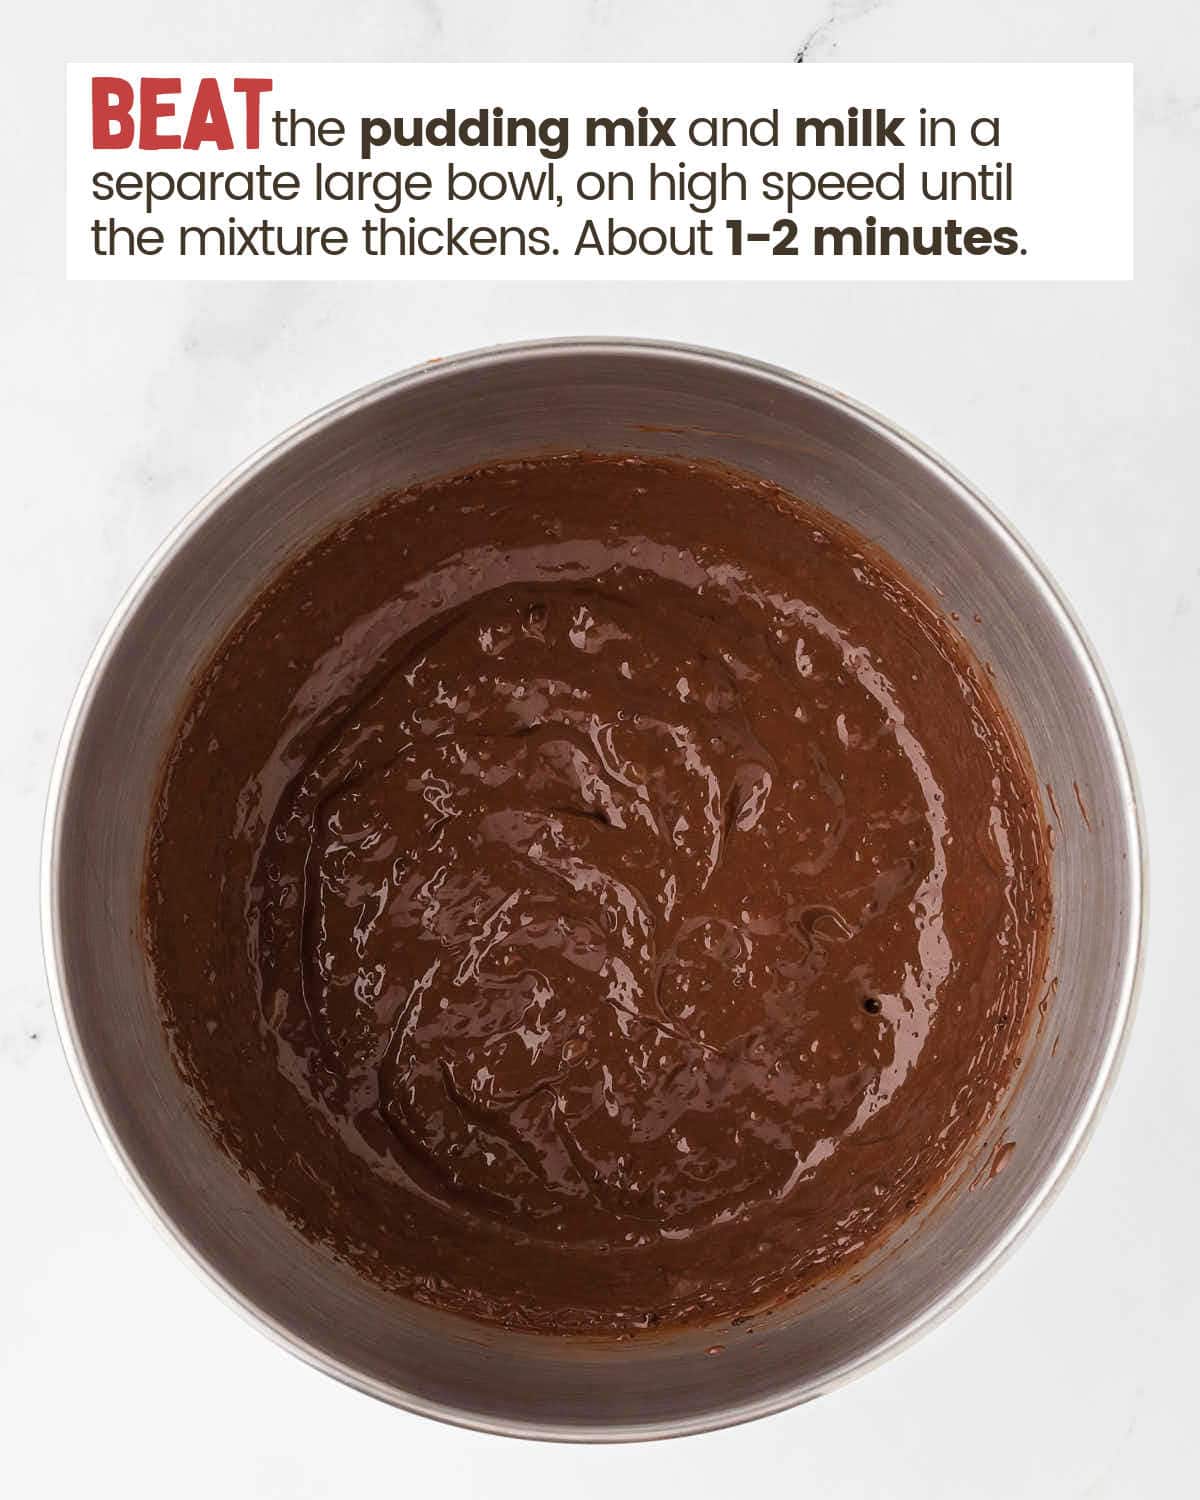
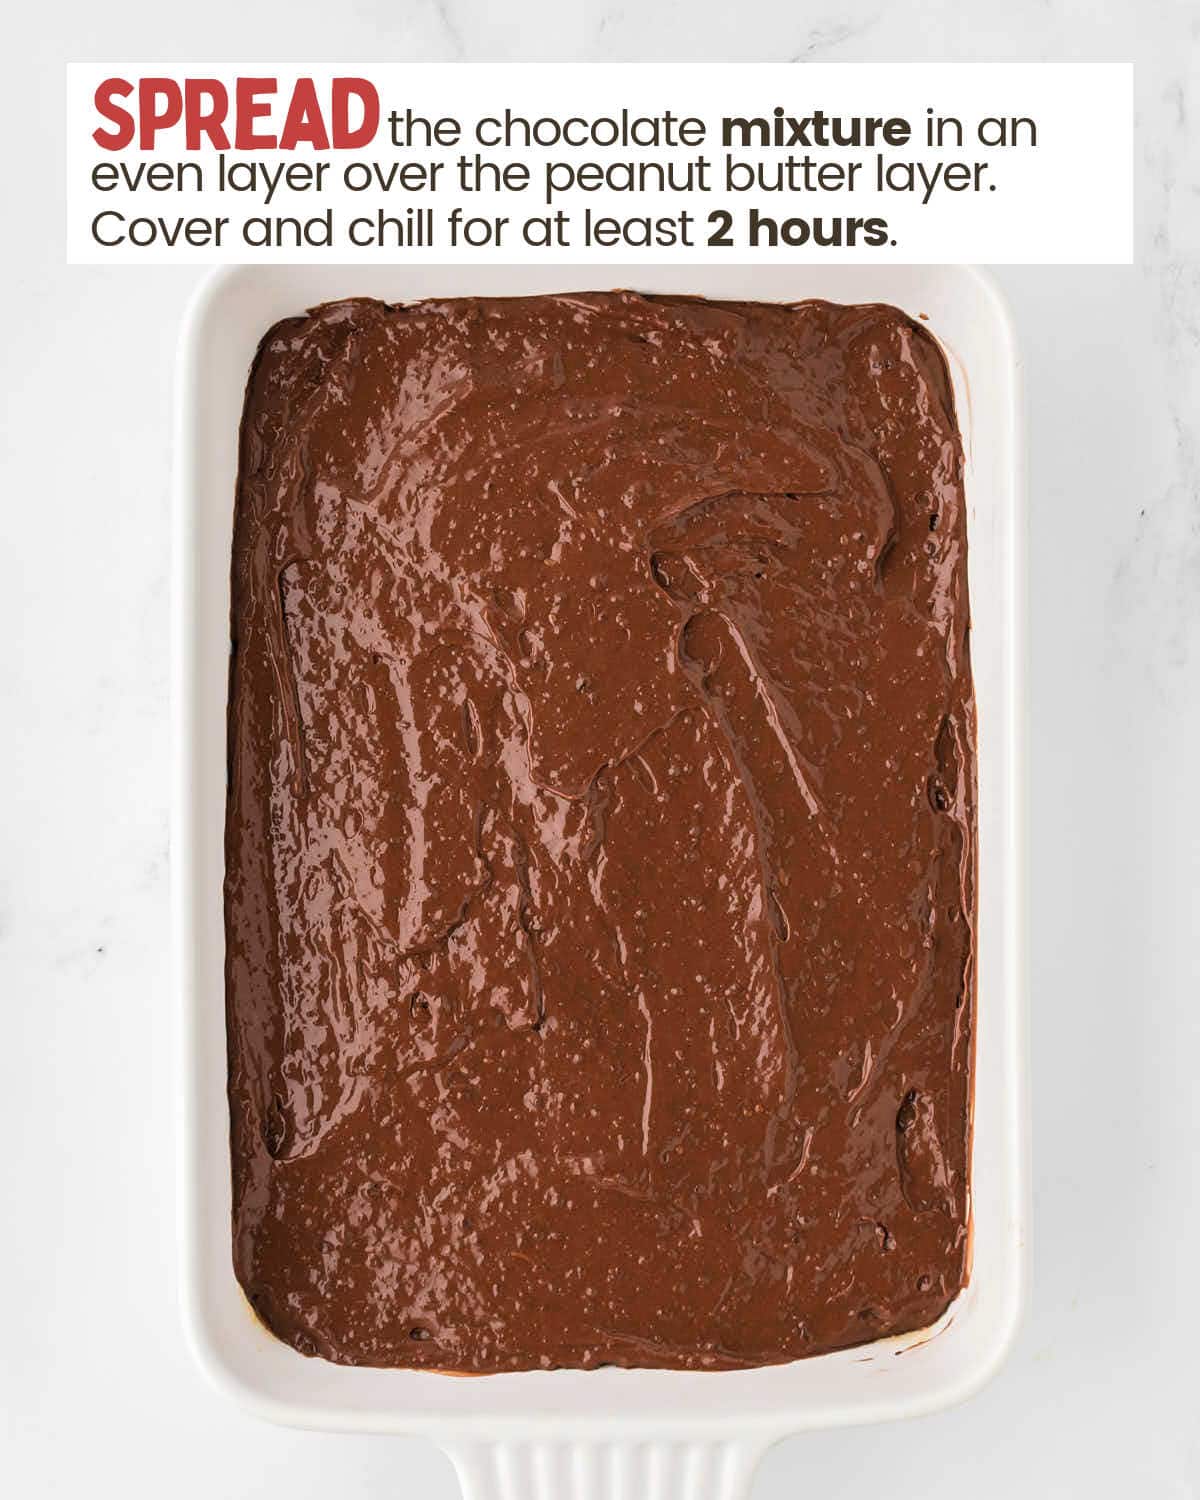
- Prepare pudding mix with milk until thickened. Spread gently over the peanut butter layer.
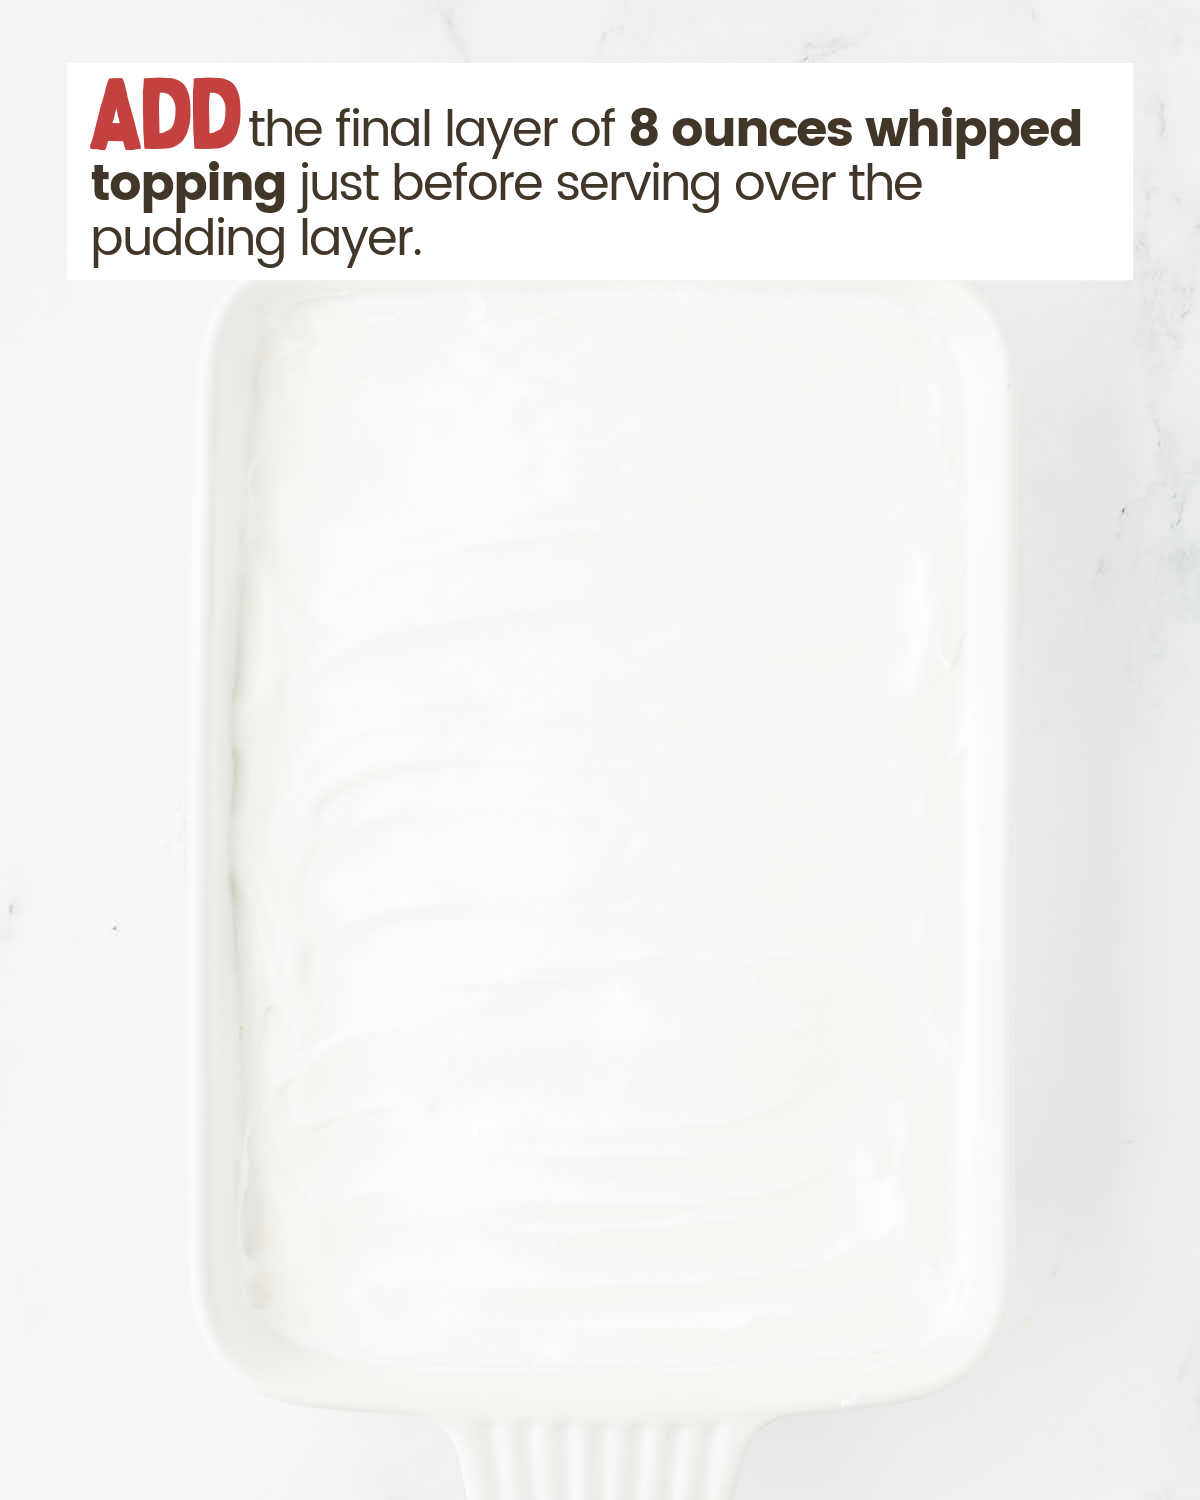
- Cover and chill for 2 hours. Before serving, spread remaining whipped topping on top and garnish as desired.
Leftovers and Storage
STORE – Keep leftovers covered tightly in the refrigerator to prevent drying out and to help preserve the flavor. The dessert will stay fresh and delicious for up to 3 days. Storing it cold also keeps the creamy layers firm, making it easy to serve straight from the fridge.
FREEZE – For longer storage, wrap the dessert tightly in plastic wrap, then place it in an airtight container to prevent freezer burn and help maintain its texture. You can freeze it for up to 2 months. When you’re ready to enjoy, thaw it in the refrigerator overnight for the best, freshest taste and smooth texture.
REHEAT – Since this dessert is enjoyed cold, reheating isn’t necessary. When you’re ready to serve, simply take it out of the refrigerator, slice, and serve immediately. Keeping it cold preserves the creamy layers and Oreo crust at their best consistency.
MAKE AHEAD – This dessert is perfect for prepping ahead of time! Prepare all layers, excluding the final whipped topping, up to 1 day in advance and store in the refrigerator, covered. Just before serving, add the whipped topping layer and any garnishes. This way, the topping stays fluffy and fresh, and the whole dessert is ready to enjoy in no time.
Serving Suggestions
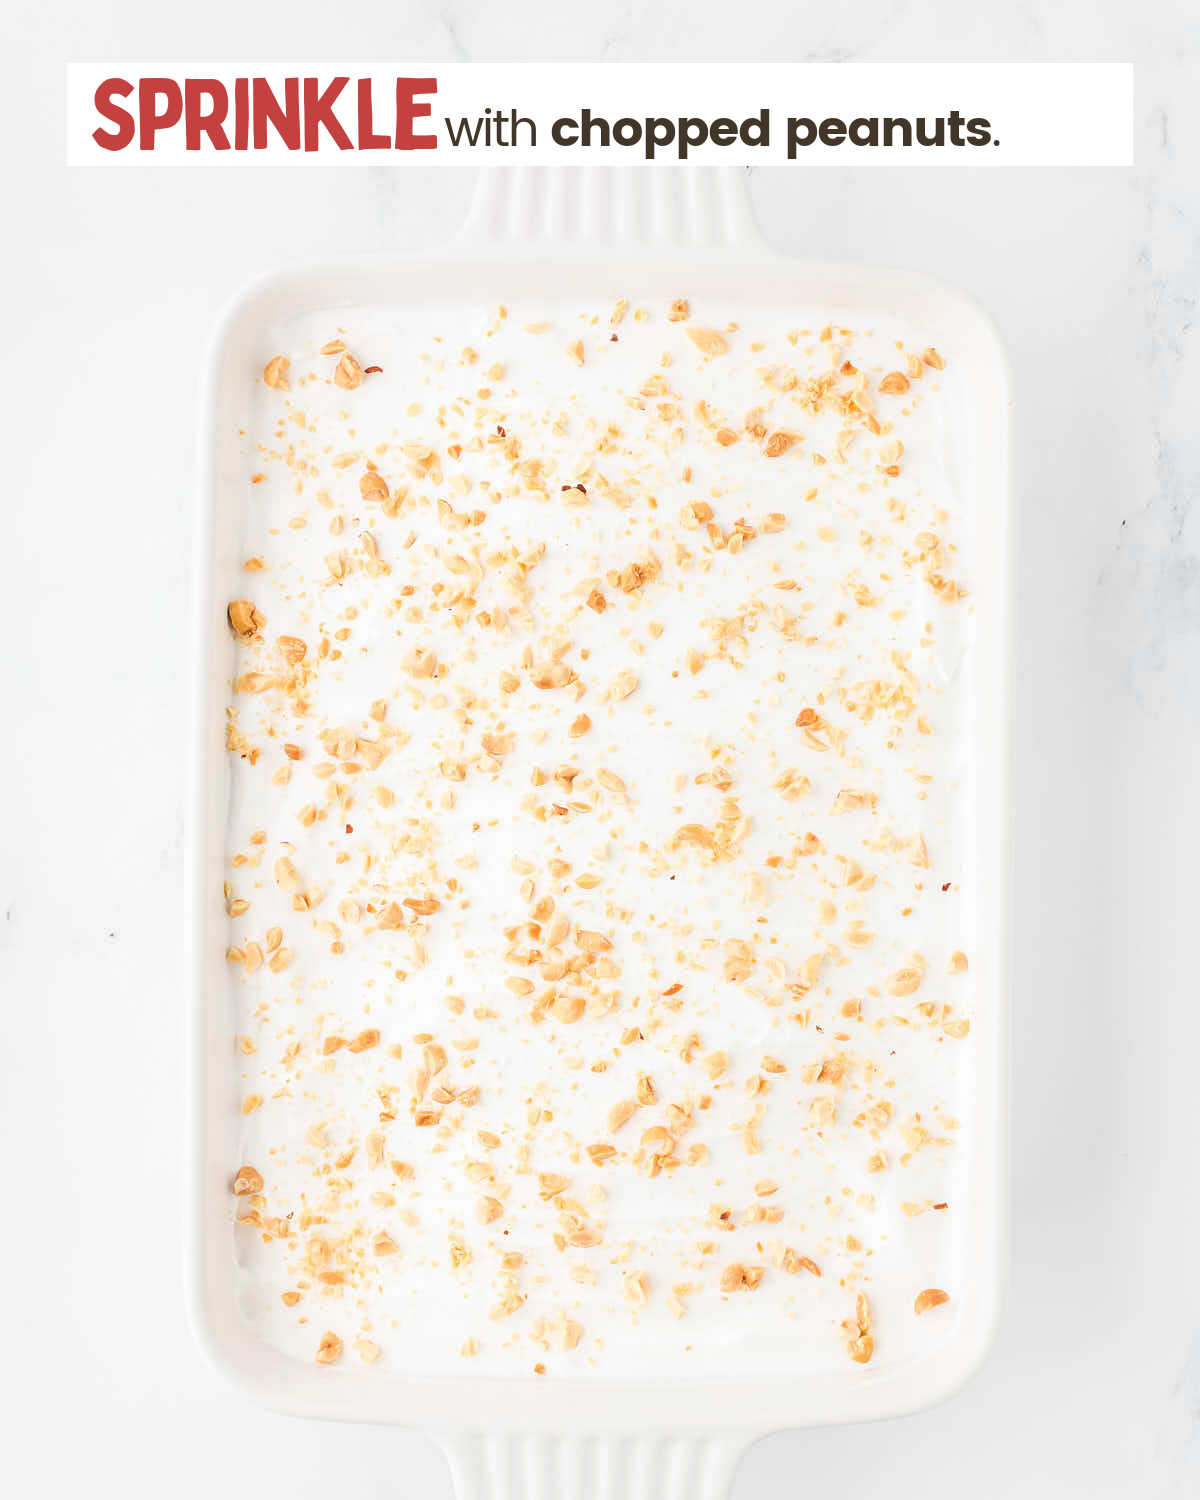
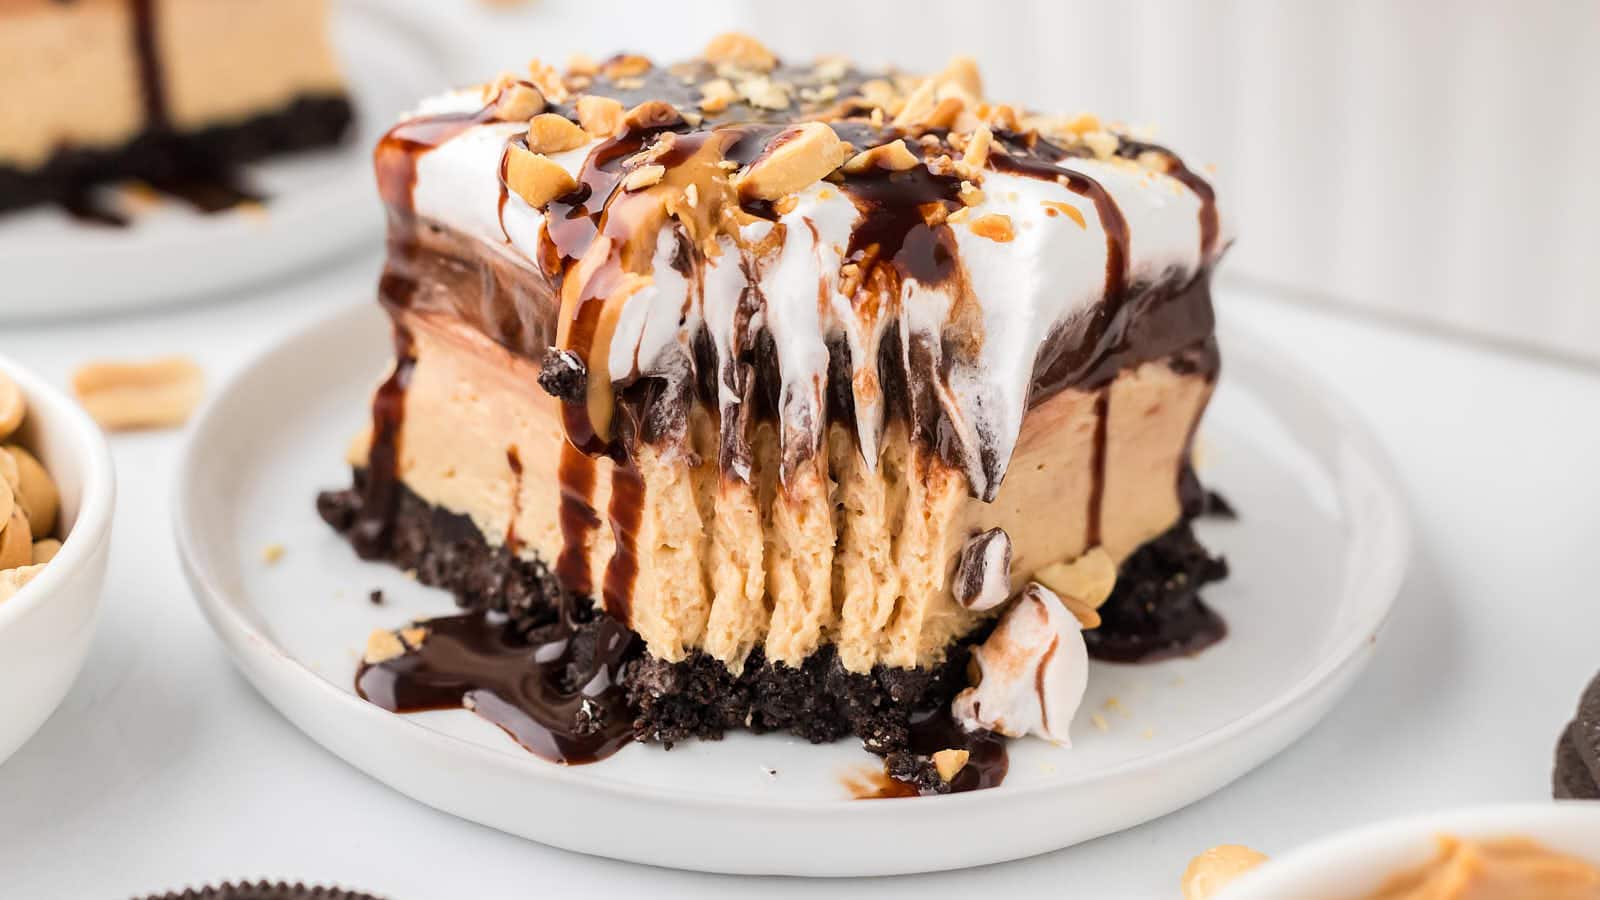
PEANUTS – Sprinkle a handful of chopped peanuts on top just before serving. They add a nice crunch that balances the creamy layers and gives each bite a satisfying texture. This also brings out the peanut butter flavor in a subtle, delicious way.
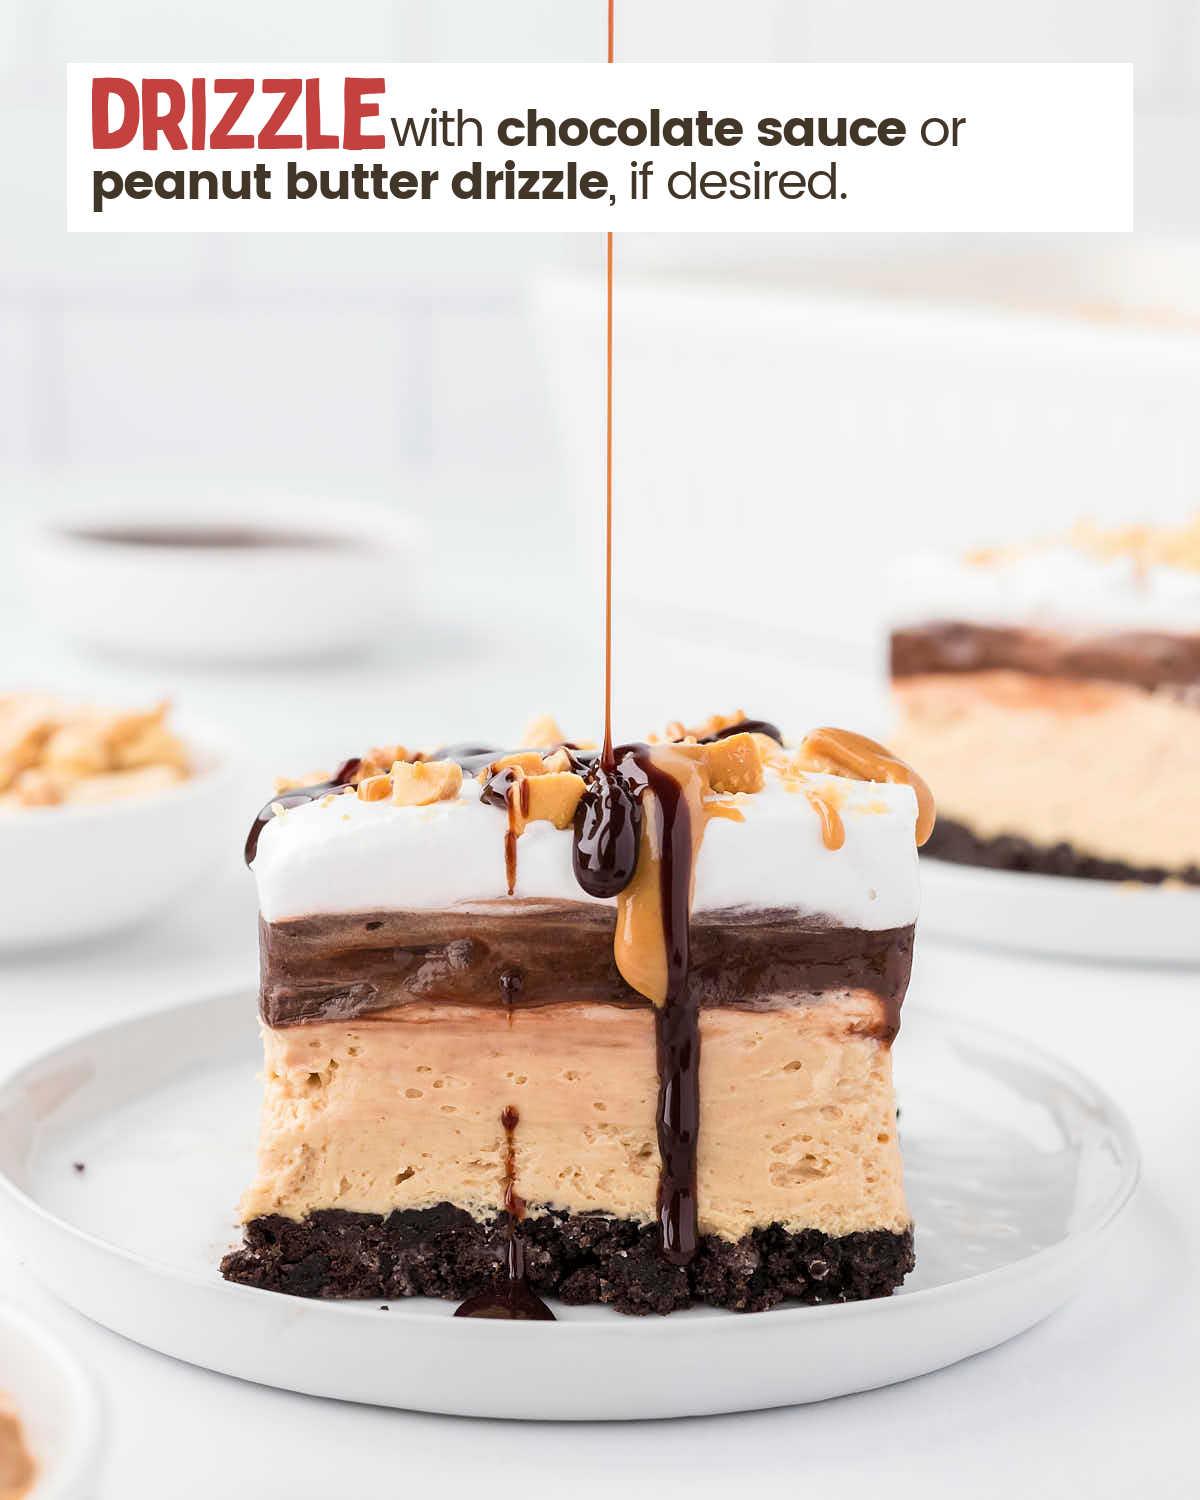
CHOCOLATE SAUCE – For extra richness, drizzle chocolate sauce over the whipped topping layer. Use a squeeze bottle or spoon to create thin, even lines across the top, or let everyone add a bit to their own slice. This touch of chocolate makes each piece look extra special and amps up the chocolatey flavor.
PEANUT BUTTER DRIZZLE – Melt a few tablespoons of peanut butter in the microwave until it’s smooth and easy to pour (about 10-15 seconds). Drizzle it over the whipped topping layer in a fun design, or go for a swirl effect with both chocolate and peanut butter drizzles. This adds a pretty finishing touch and boosts the peanut butter flavor in every bite.
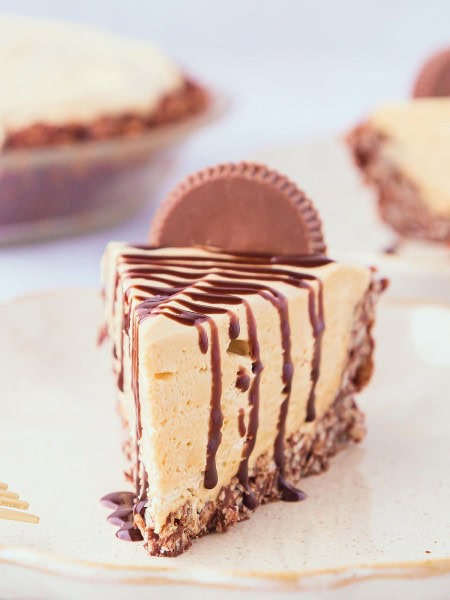
OREOS – Sprinkle some extra crushed Oreo crumbs on top for added texture and visual appeal. This ties the flavors together and gives a nice contrast against the whipped topping, making each bite a little crunchier and chocolatey.
MINI CHOCOLATE CHIPS – Scatter a handful of mini chocolate chips over the top for a fun, chocolate-packed addition. They add just a bit of crunch and make the dessert look even more inviting, while also enhancing the chocolate layer flavor for anyone who loves chocolate in every bite.
More Easy and Delicious Peanut Butter Recipes


Recipe Success Tips
CHILLING TIME – Be sure to chill the dessert for at least 2 hours, or longer if you have the time. This allows the layers to fully set, making it easier to cut clean slices without the layers sliding. For best results, consider chilling it overnight if you’re making it a day ahead.
SOFTEN CREAM CHEESE – Allow the cream cheese to soften to room temperature before mixing. Softened cream cheese will blend more smoothly with the peanut butter, creating a creamy layer without any lumps. If you’re short on time, microwave the cream cheese in 10-second intervals until just soft.
THAW WHIPPED TOPPING – Ensure the whipped topping is completely thawed in the refrigerator before adding it to the recipe. This keeps it fluffy and easy to spread, so each layer remains light and smooth. A partially thawed topping may create lumps, so check that it’s fully thawed before use.
USE COLD MILK – For the chocolate pudding layer, use very cold milk. Cold milk helps the instant pudding mix set up quickly, resulting in a thick, creamy consistency that holds up well between the layers.
EVEN SPREADING – When layering, use a spatula to spread each layer evenly and carefully to avoid mixing the layers. Gently dollop the mixture over the base, then spread it out to the edges. This keeps each layer clean, ensuring a picture-perfect dessert every time.
Commonly Asked Questions
Can I use homemade whipped cream instead of whipped topping?
Yes, you can use homemade whipped cream in this recipe. Make sure it is stiff so that the layers hold up nicely.
What can I use instead of Oreo cookies for the base layers?
Nutter Butter cookies are also a great crust option. You’ll want to use about 3 cups of crushed Nutter Butters to replace the Oreos.
Can I use instant chocolate pudding instead of chocolate fudge flavor?
Yes, you can also use chocolate pudding or even vanilla and instant pudding flavors (let me know if you ever try it with instant butterscotch pudding) to change up the recipe.
Do I have to use Whole Milk?
You can use other types of milk and even half and half can be used in place of the whole milk. Just keep in mind that a higher fat content also helps for the layers to hold up well.
More Easy and Delicious No-Bake Dessert Recipes
Pumpkin Delight – easy no-bake pumpkin lasagna
Peanut Butter Lasagna
Ingredients
Crust
- 32 Oreo cookies crushed or processed into crumbs
- 6 tablespoons butter unsalted, melted
Peanut Butter Layer
- 8 ounces cream cheese softened
- 1 cup peanut butter
- ¾ cup powdered sugar
- 1 teaspoon vanilla extract
- 8 ounces whipped topping thawed
Chocolate Layer
- 2 3.4-ounce boxes instant chocolate fudge pudding
- 3 cups whole milk
Final Layer
- 8 ounces whipped topping thawed
Instructions
Oreo Layer
- Mix Oreo crumbs and melted butter in a medium bowl and press the Oreo crumbs into the bottom of a 9×13” baking dish.
Peanut Butter Layer
- Beat the cream cheese, peanut butter, powdered sugar, and vanilla with a hand or stand mixer in a large bowl, on high speed until the mixture is smooth and creamy.
- Add 8 ounces whipped topping to the peanut butter mixture and mix on low, just until well combined. Gently spread the peanut butter mixture with a spatula into an even layer over the Oreo crust.
Chocolate Layer
- Beat the pudding and milk in a separate large bowl, on high speed until the mixture thickens. About 1-2 minutes. Use a spatula to gently spread the chocolate pudding into an even layer over the peanut butter layer.
- Cover and chill the prepared layers in the fridge for at least two hours or until the layers are set and firm.
Finishing Layer
- When ready to serve, remove from the fridge and add the final layer of 8 ounce whipped topping with a spatula in an even layer over the pudding layer.
- Garnish to your own liking with peanuts, chocolate sauce, and/or a peanut butter drizzle, slice and serve chilled
Equipment
Nutritional Information
Nutritional Disclaimer
Cheerful Cook team members are not trained nutritionists or medical professionals. Calorie information and nutritional values are estimates. If you have nutritional concerns, we recommend using a nutritional calculator.
Maike Corbett grew up in German kitchens learning to cook and bake alongside her Omas before spending over a decade running full-service restaurants in the US. She founded Cheerful Cook in 2017 to share practical, tested comfort food recipes that actually work on busy weeknights, drawing on both her American restaurant experience and her German home-cooking roots. Her work has been featured on MSN, Yahoo, the Associated Press, and other major media outlets.