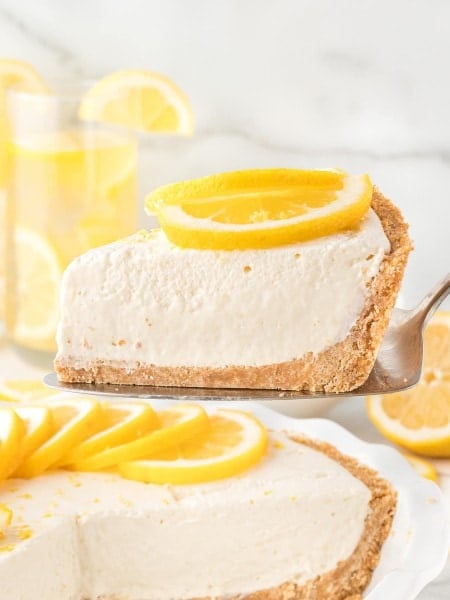
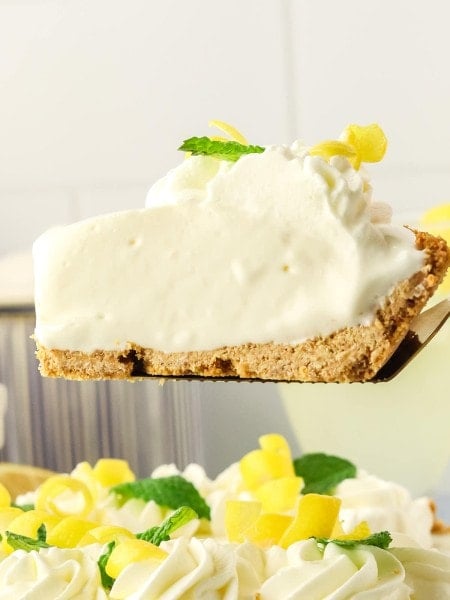
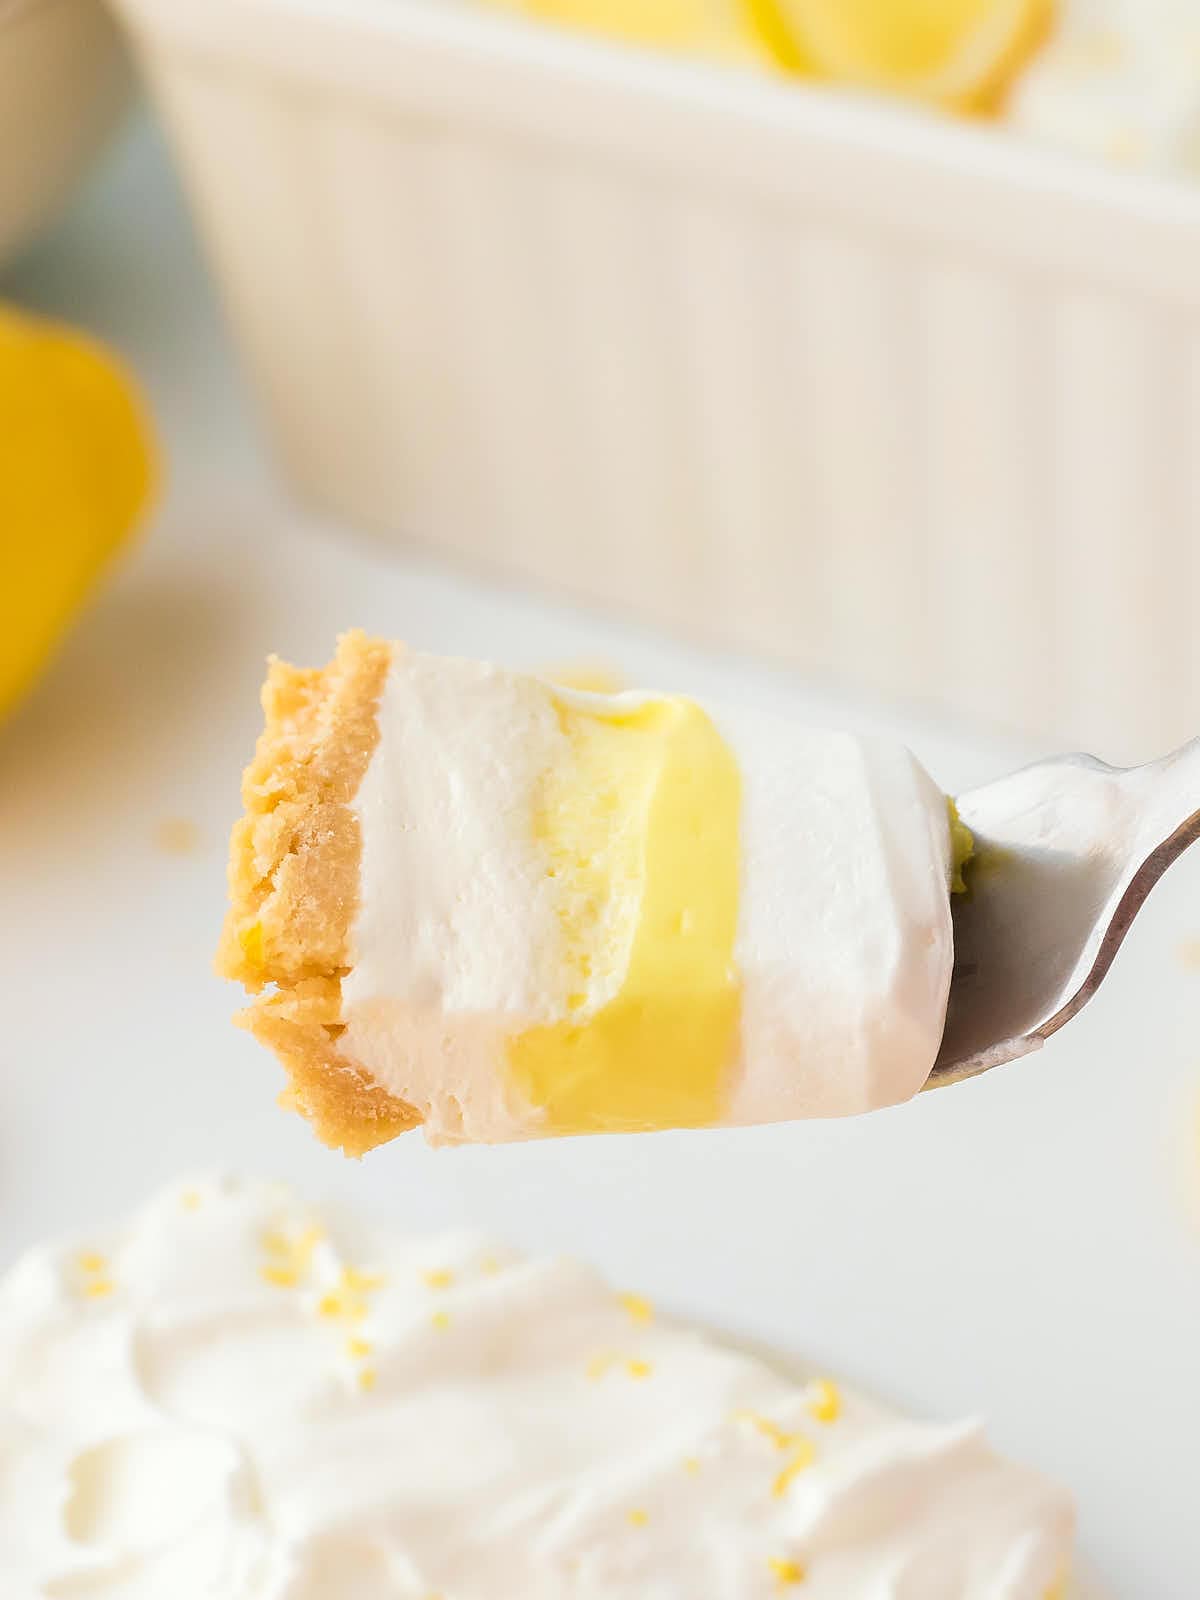
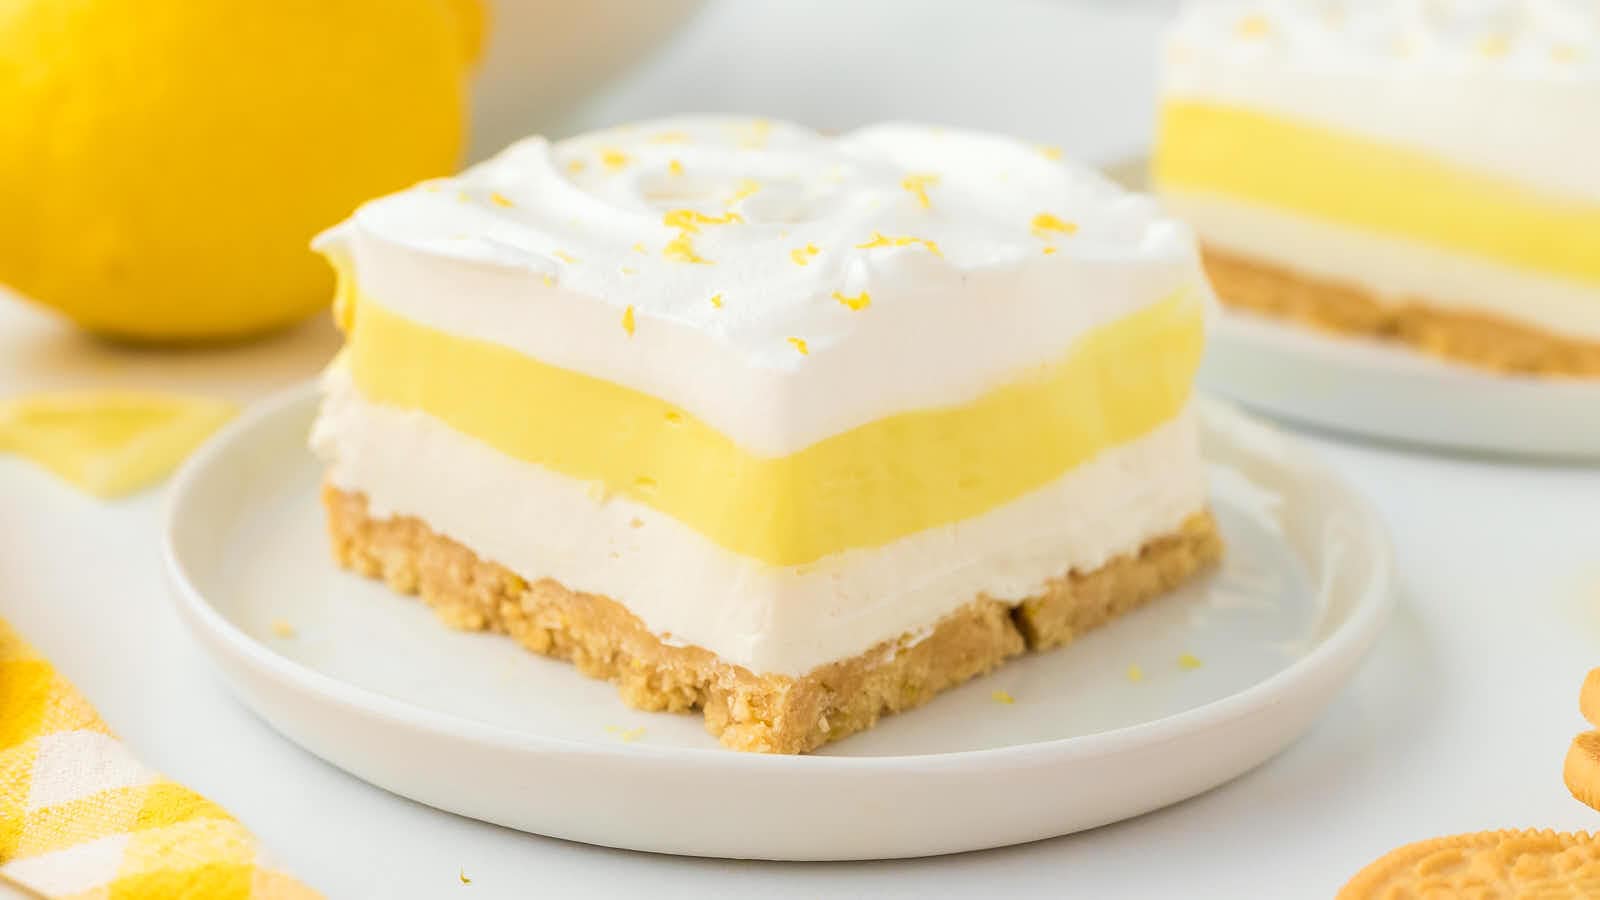
Lemon Lush

Our easy no-bake Lemon Lush recipe is a creamy, dreamy layered dessert that’s perfect for any occasion.
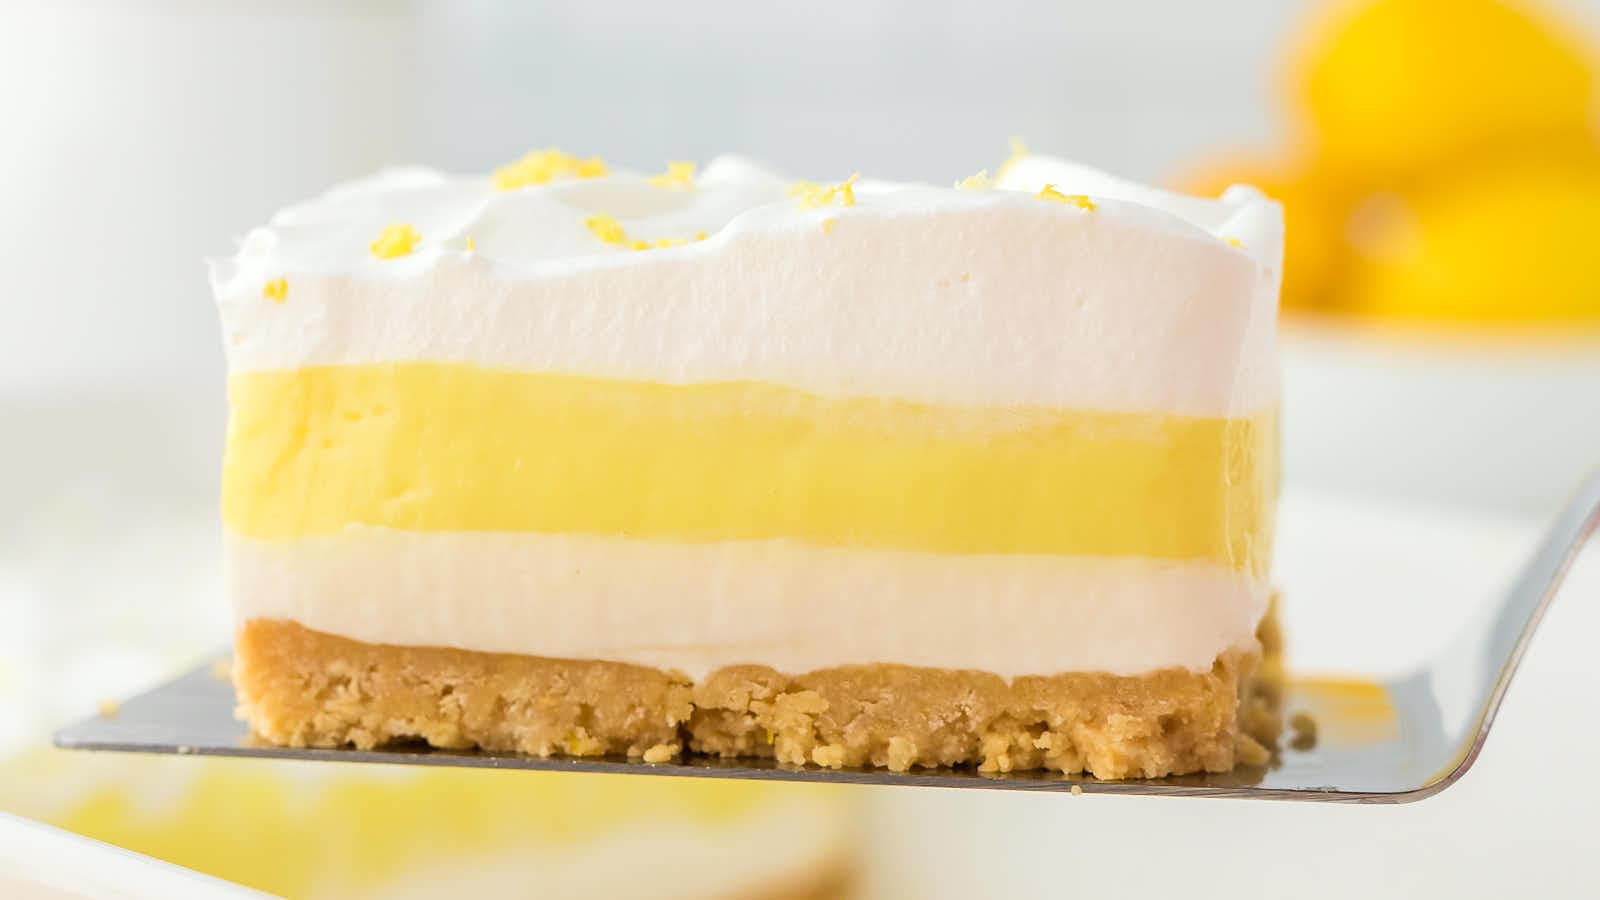
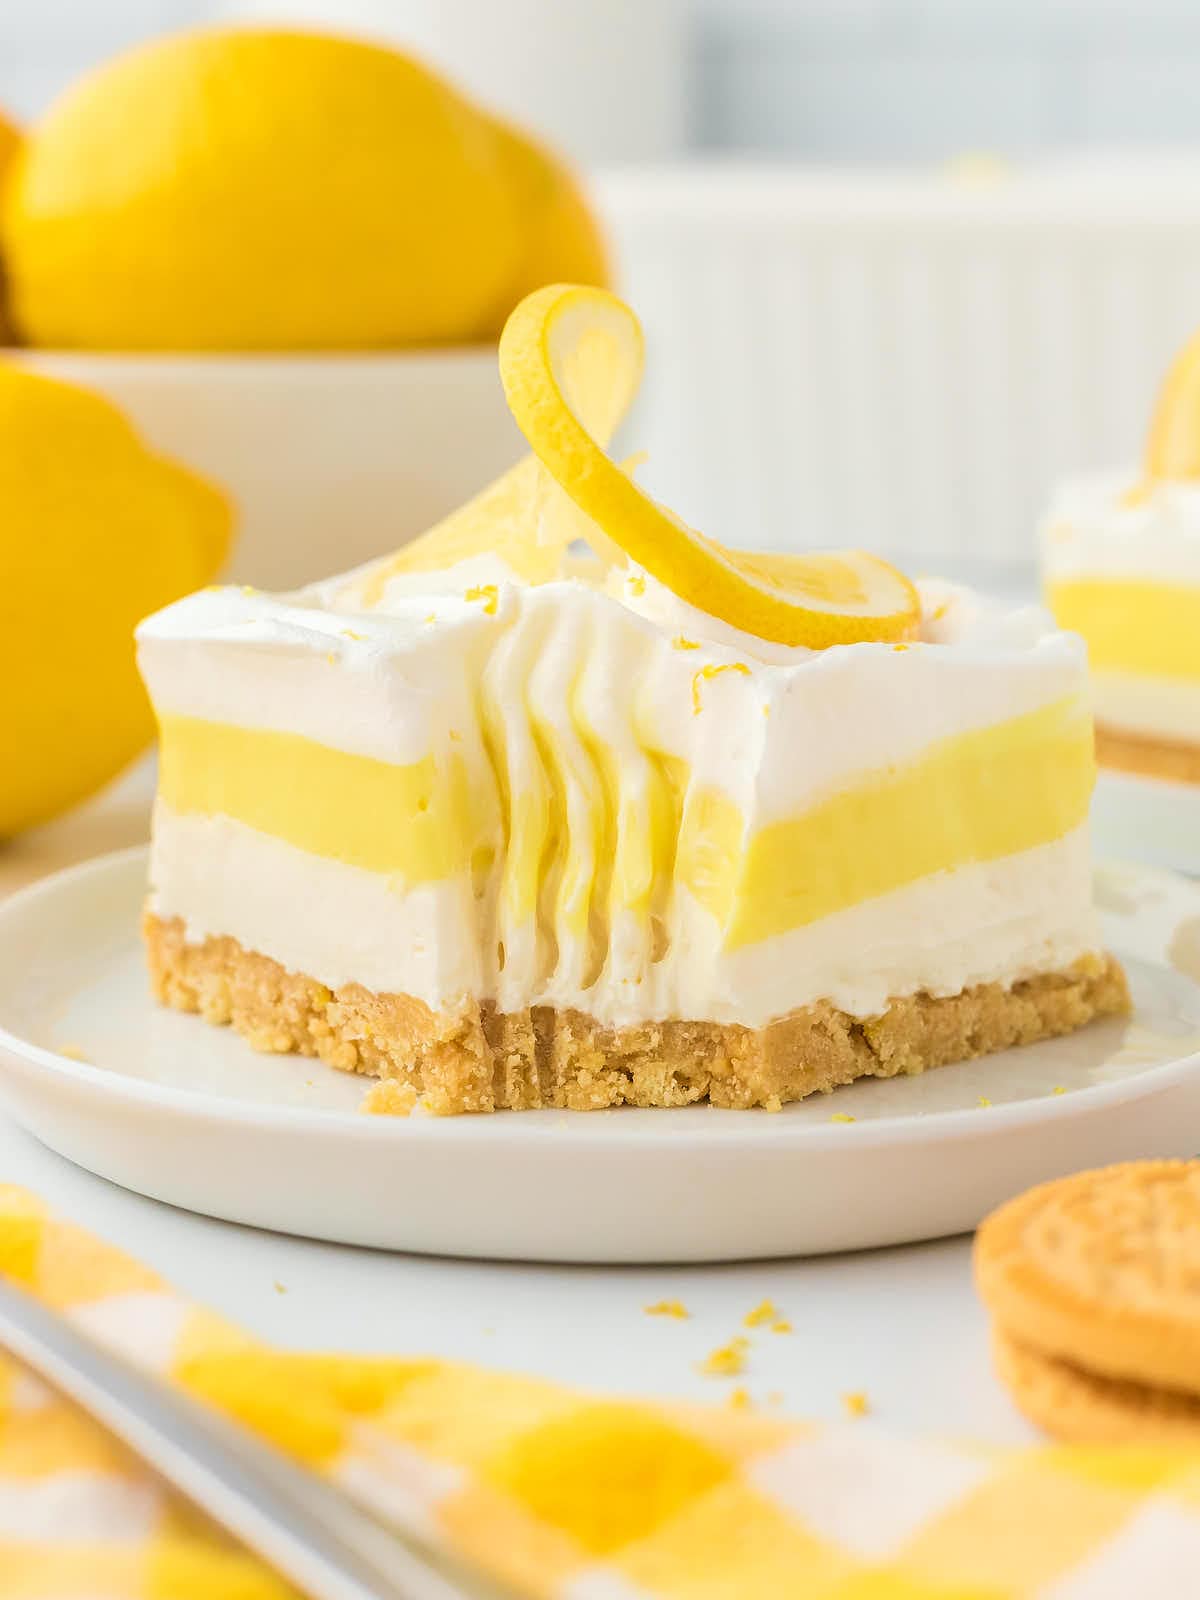
With a buttery Oreo crust, tangy cheesecake filling, and refreshing lemon pudding, it’s a treat that brings a burst of sunshine to your table.
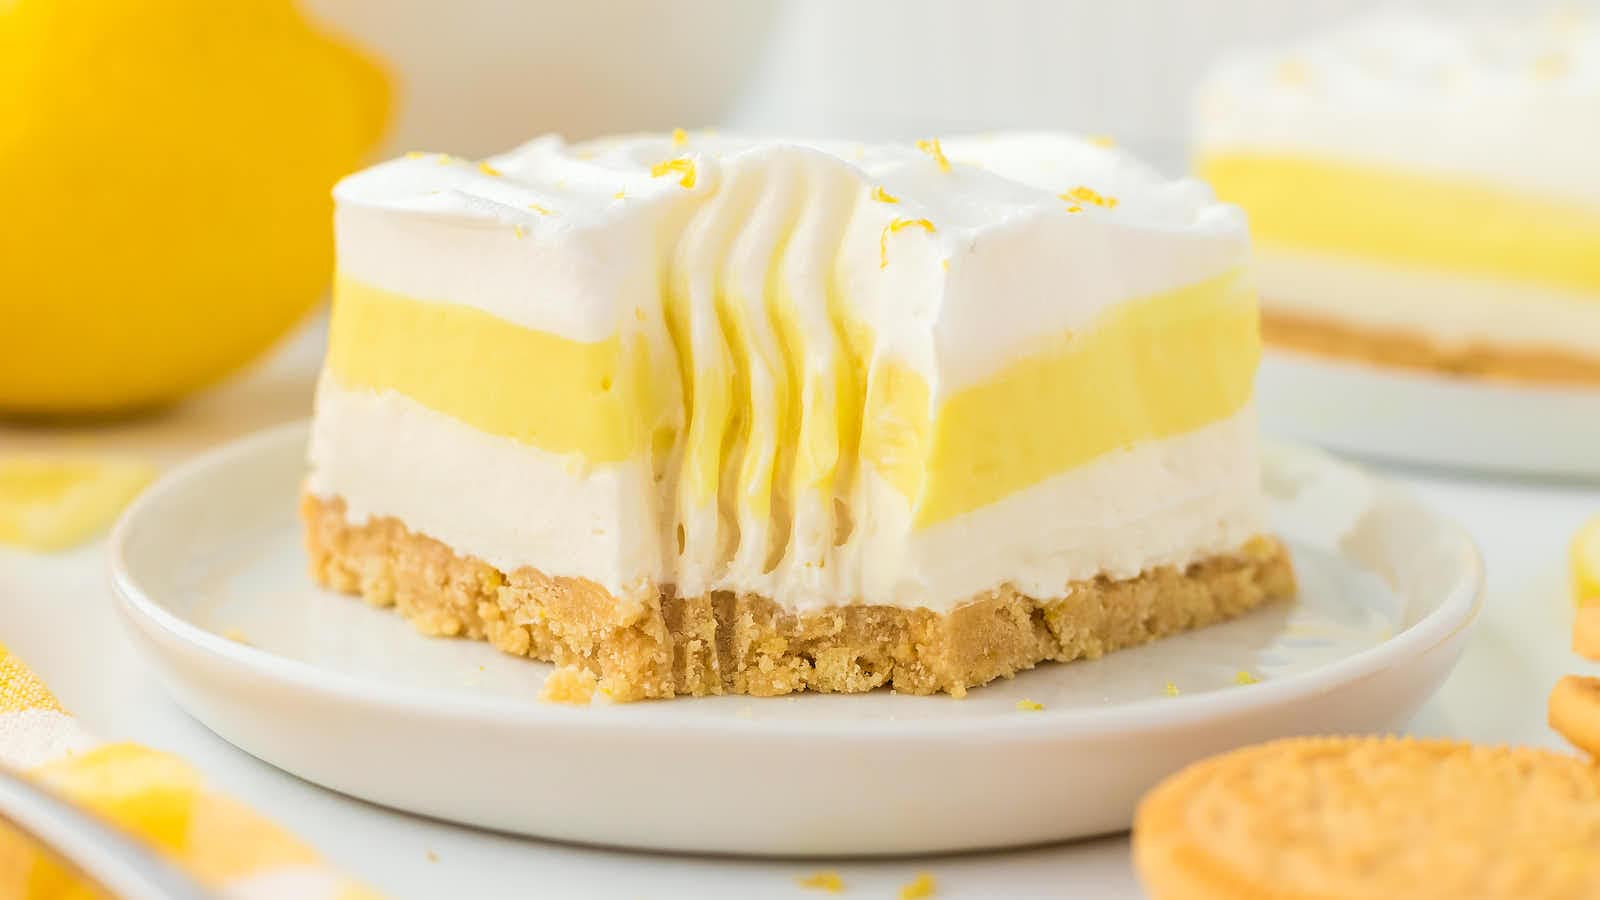
Whether you’re hosting a party, planning a holiday dessert, or simply craving something sweet, this recipe is easy to make and sure to impress.
Lemon Lush Recipe Highlights
- Easy to make with no baking required
- Perfectly balanced layers of creamy, tangy, and sweet
- Great for parties, holidays, or just a special treat
- Can be made ahead for convenience
- Customizable with graham cracker crust or homemade whipped cream
Ingredient Notes
Please check the recipe card below for a detailed, printable ingredient list.
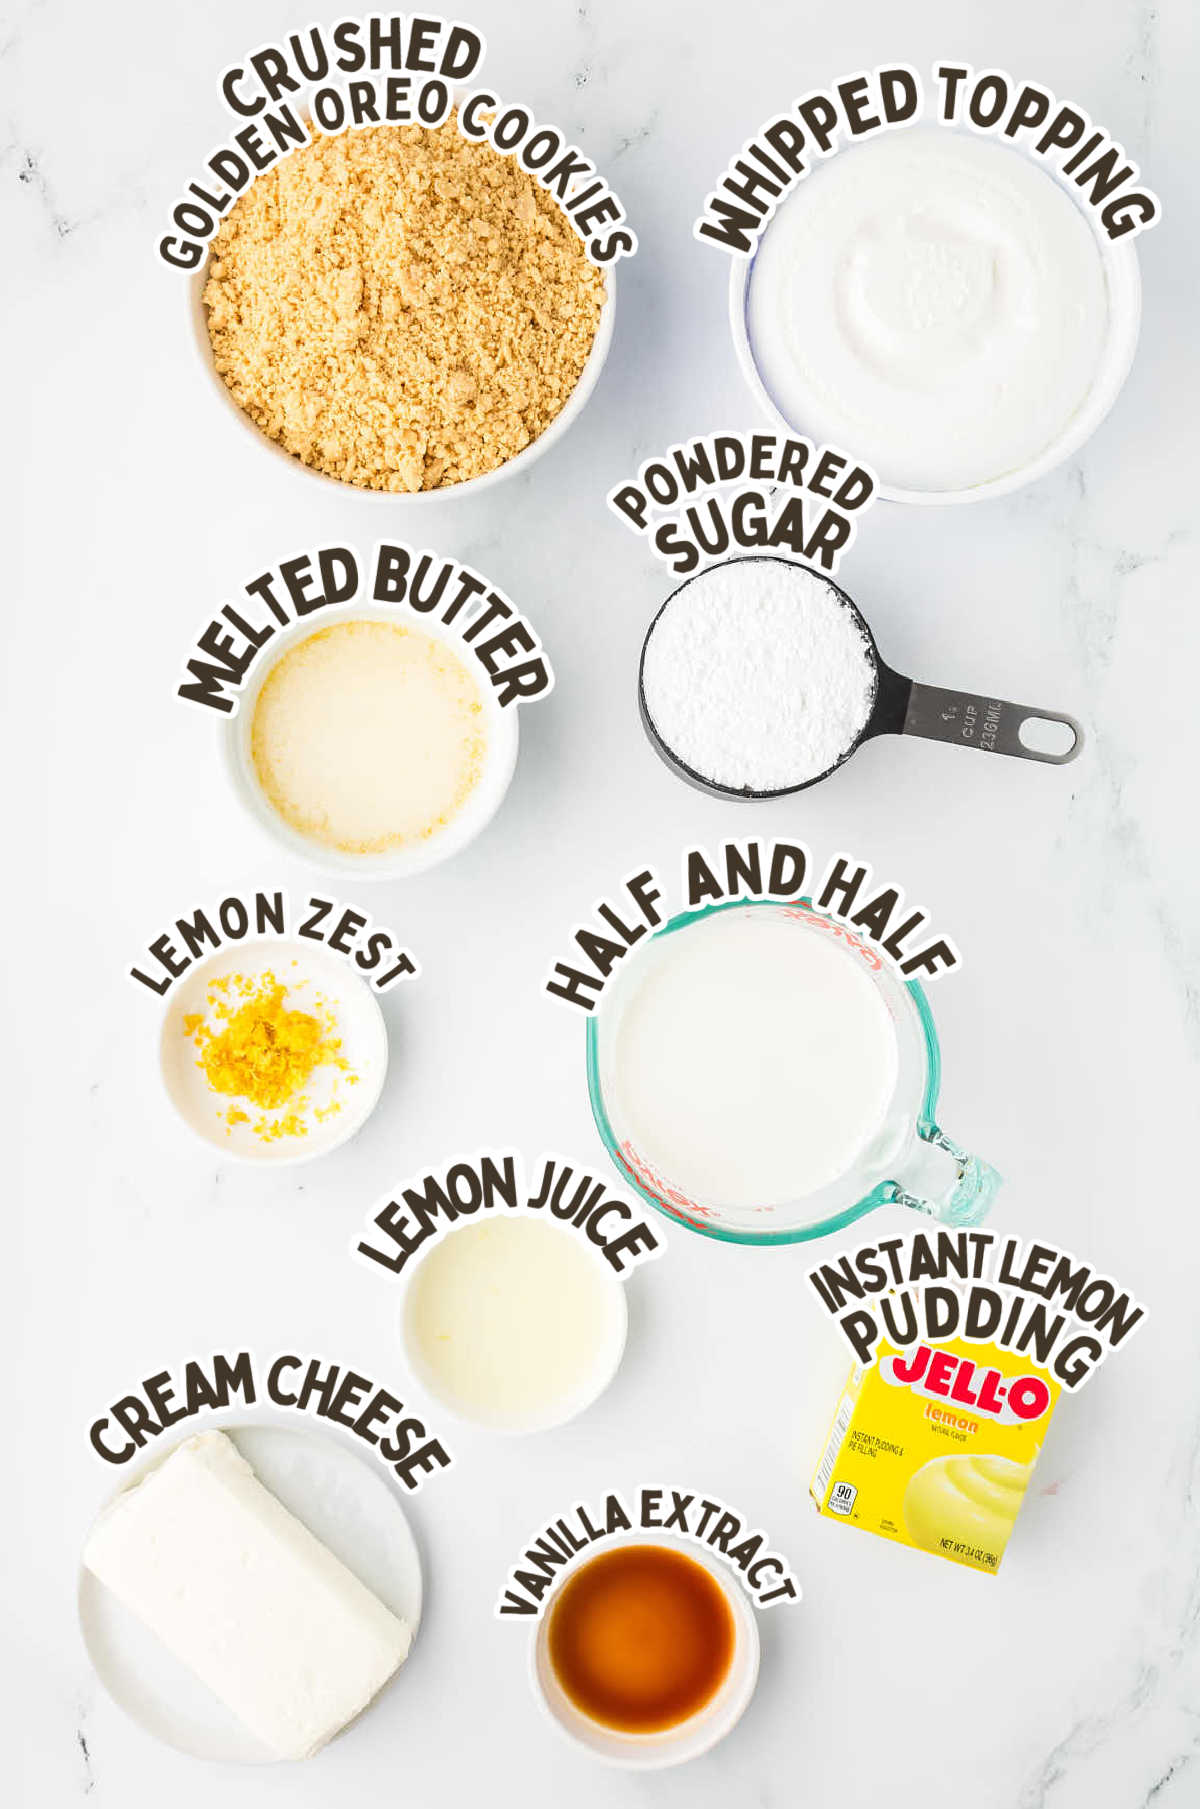
OREOS – We’re using Golden Oreos to create a buttery, slightly sweet crust that holds up perfectly under all the creamy layers. If you’d like to switch things up, graham cracker crumbs are a great alternative and give the dessert a classic touch.
BUTTER – Melted butter binds the crushed Oreos together into a solid, sturdy crust. Unsalted butter works best to keep the sweetness balanced, but you can use salted butter if that’s what you have.
LEMON – We use both lemon juice and zest to bring a bright, tangy citrus flavor to the dish. The lemon juice adds a burst of freshness to the cheesecake layer, while the zest enhances the crust and makes a beautiful garnish. Fresh lemons will give you the best results, so skip the bottled juice if you can.
CREAM CHEESE – This gives the cheesecake layer its rich, creamy base with just a touch of tanginess. Full-fat cream cheese works best here because it creates a smooth, sturdy layer that won’t collapse under the pudding.
POWDERED SUGAR – Powdered sugar blends easily into the cream cheese without making it grainy, sweetening the layer without any extra effort. Avoid swapping this with granulated sugar, which won’t dissolve as smoothly.
VANILLA EXTRACT – Vanilla balances the tangy cream cheese with a touch of warmth and rounds out the flavors in the cheesecake layer.
WHIPPED TOPPING – Whipped topping is key to making the cheesecake layer light and fluffy while also serving as the final layer of creamy goodness. If you prefer to make your own whipped cream, whip it to stiff peaks to ensure the layers hold their shape.
LEMON PUDDING – Instant lemon pudding mix is the star of this recipe, giving the dessert its signature citrus flavor and creamy texture. Be sure to use instant pudding instead of cook-and-serve, as it sets quickly and keeps this recipe no-bake and simple.
HALF AND HALF – Half and half creates a rich, velvety pudding layer that holds up beautifully without being too heavy. While you can substitute whole milk, half and half’s higher fat content makes the pudding set more firmly for clean, defined layers.
How To Make a Lemon Lush
Please check the printable recipe card below for more detailed instructions.
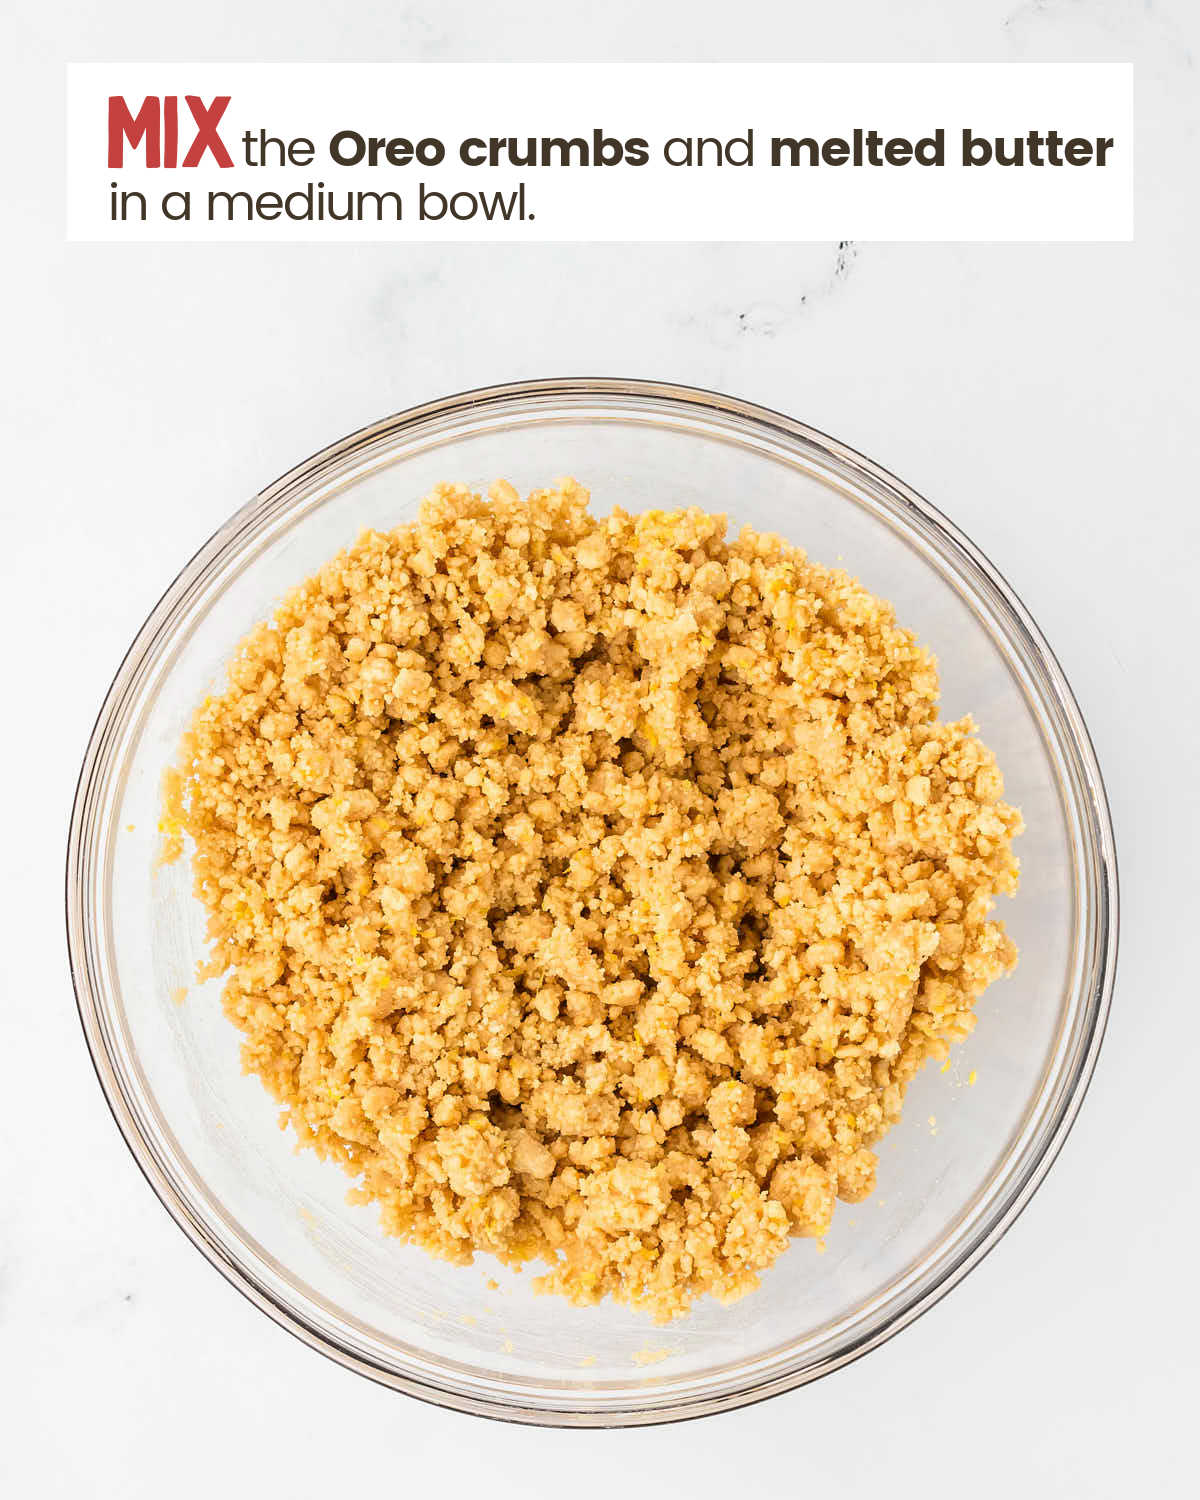
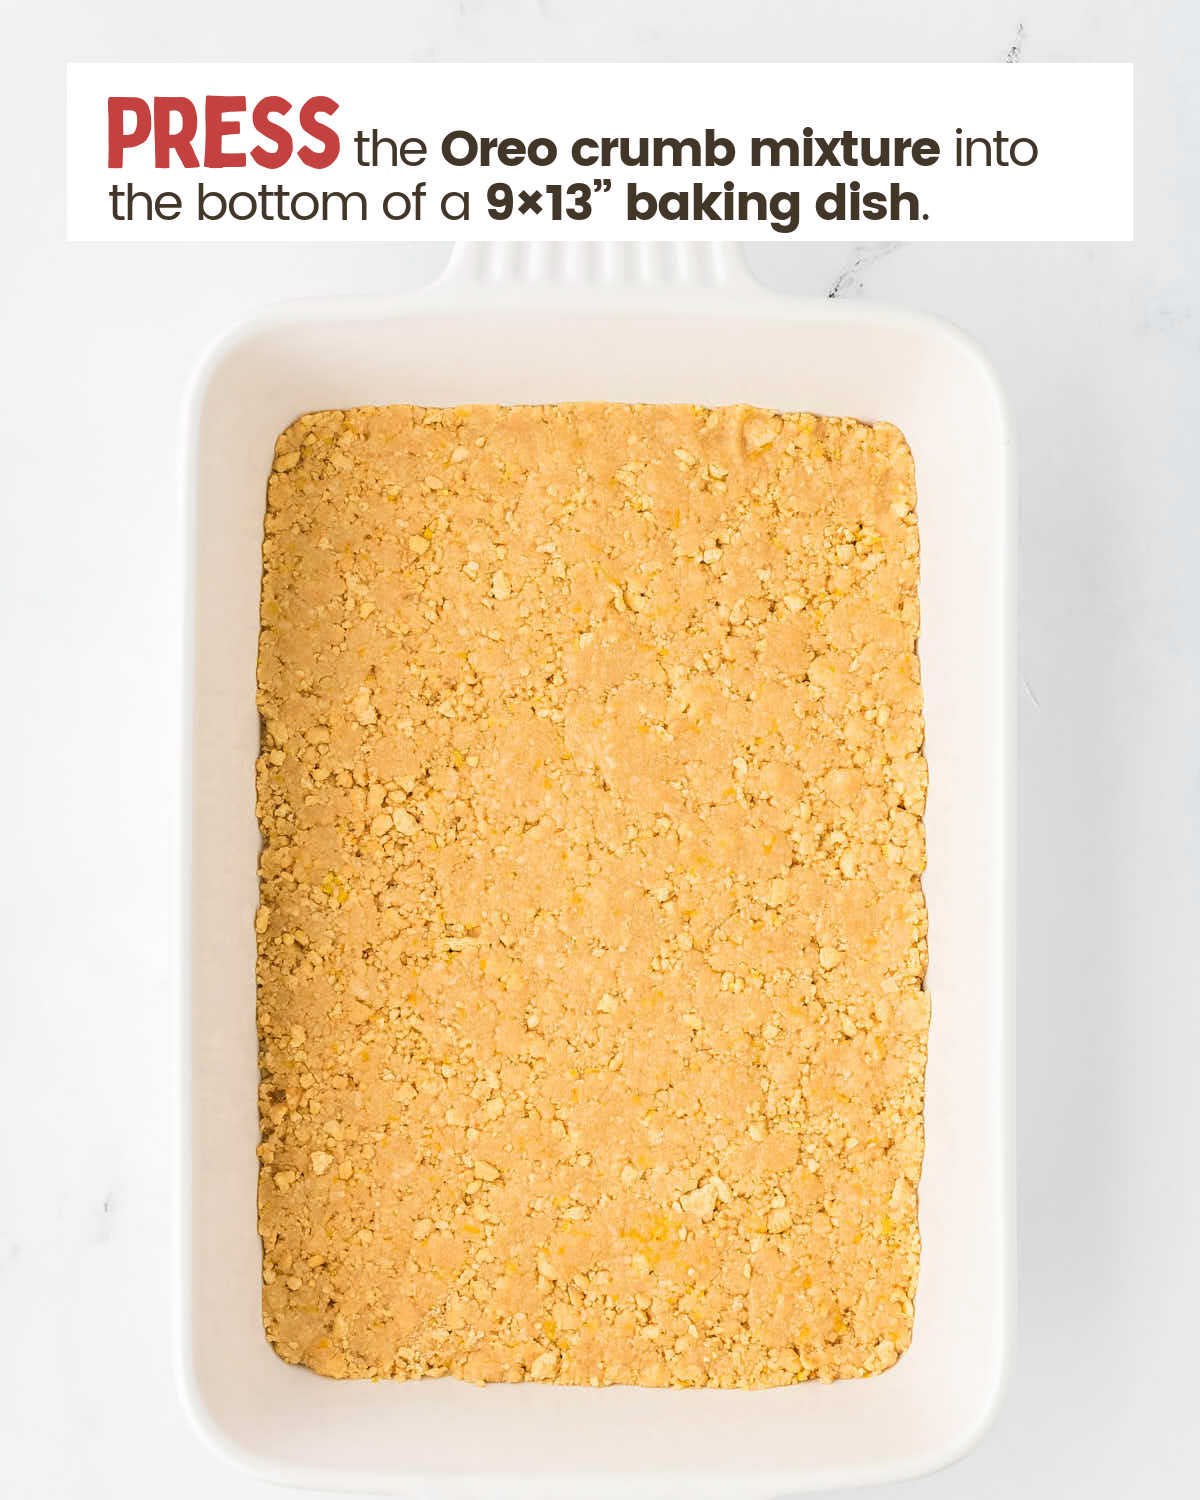

- Mix crushed Oreos with melted butter and press into a baking dish to form the crust.
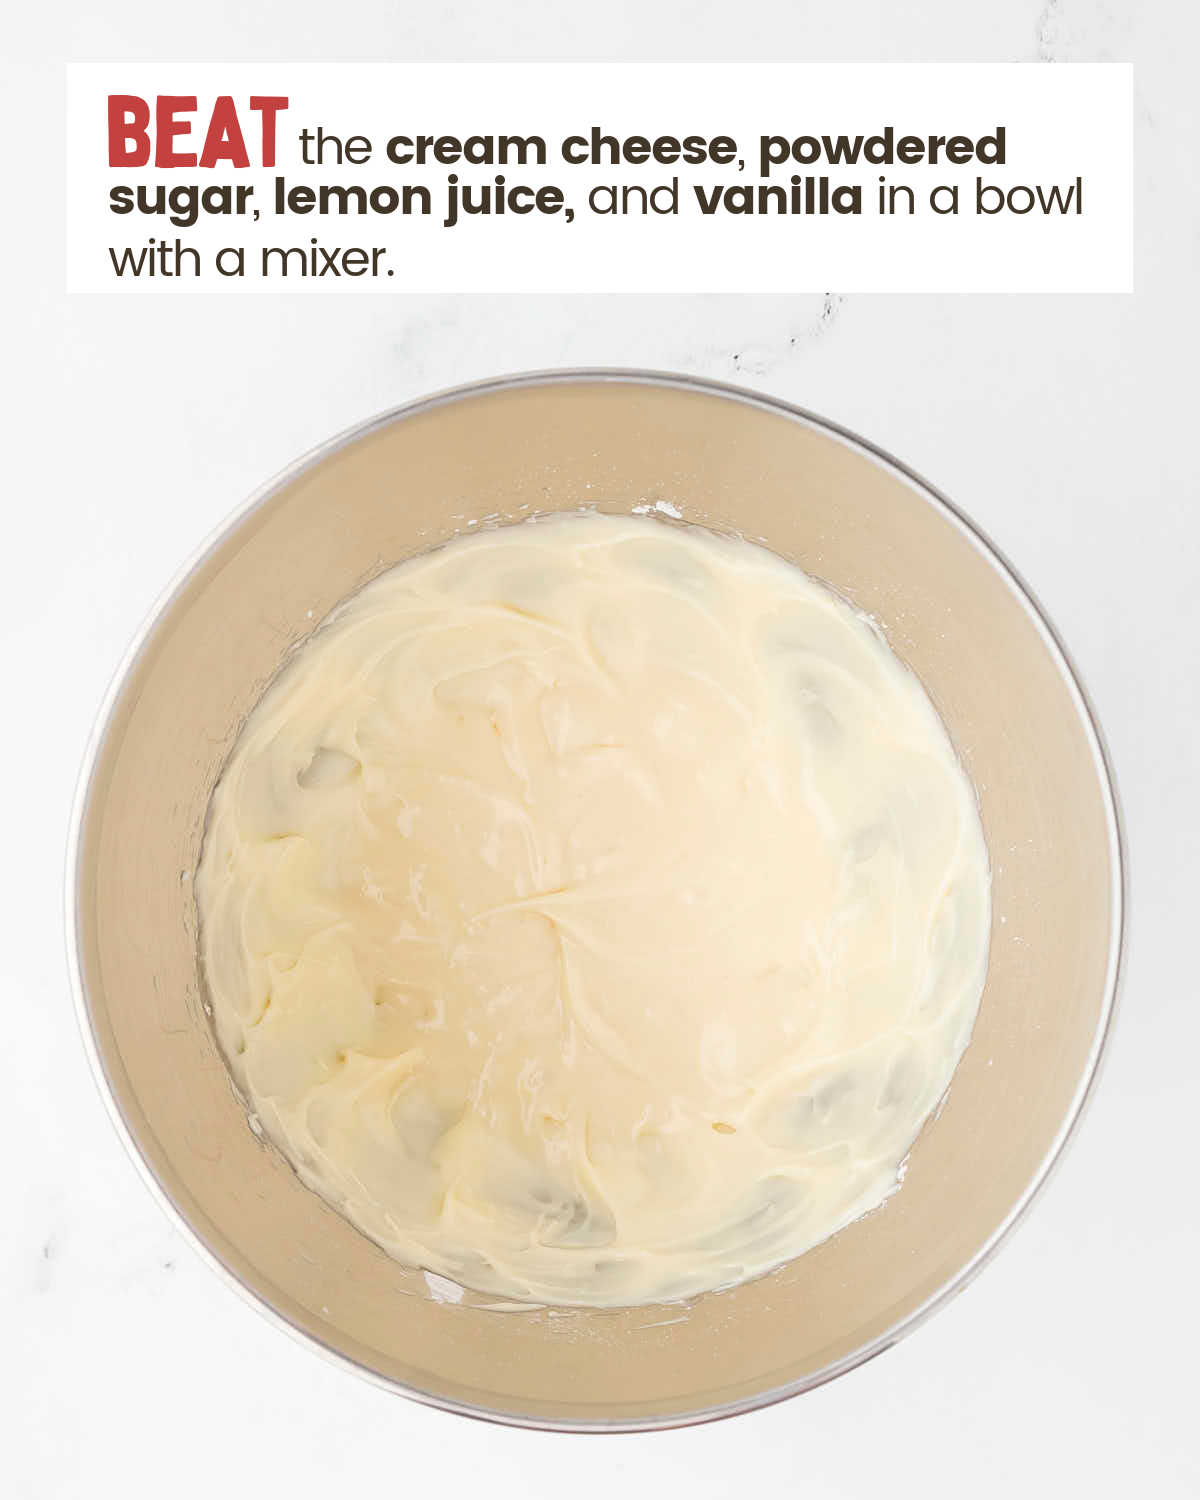
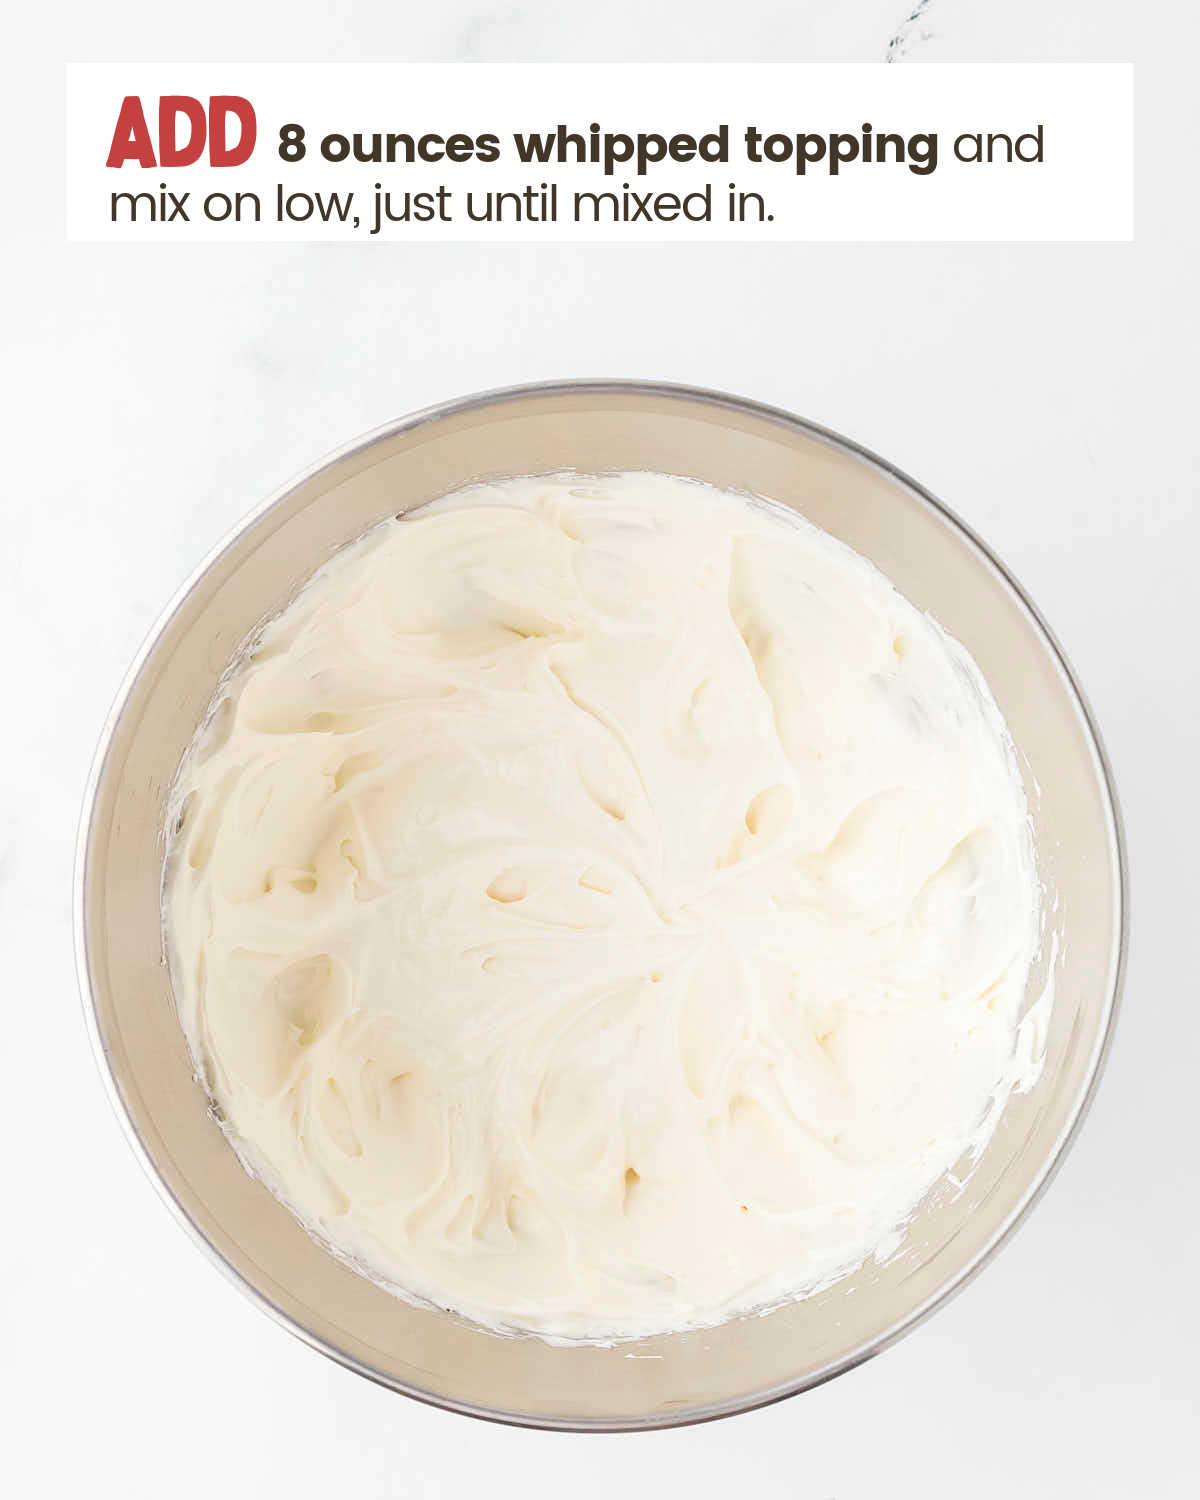
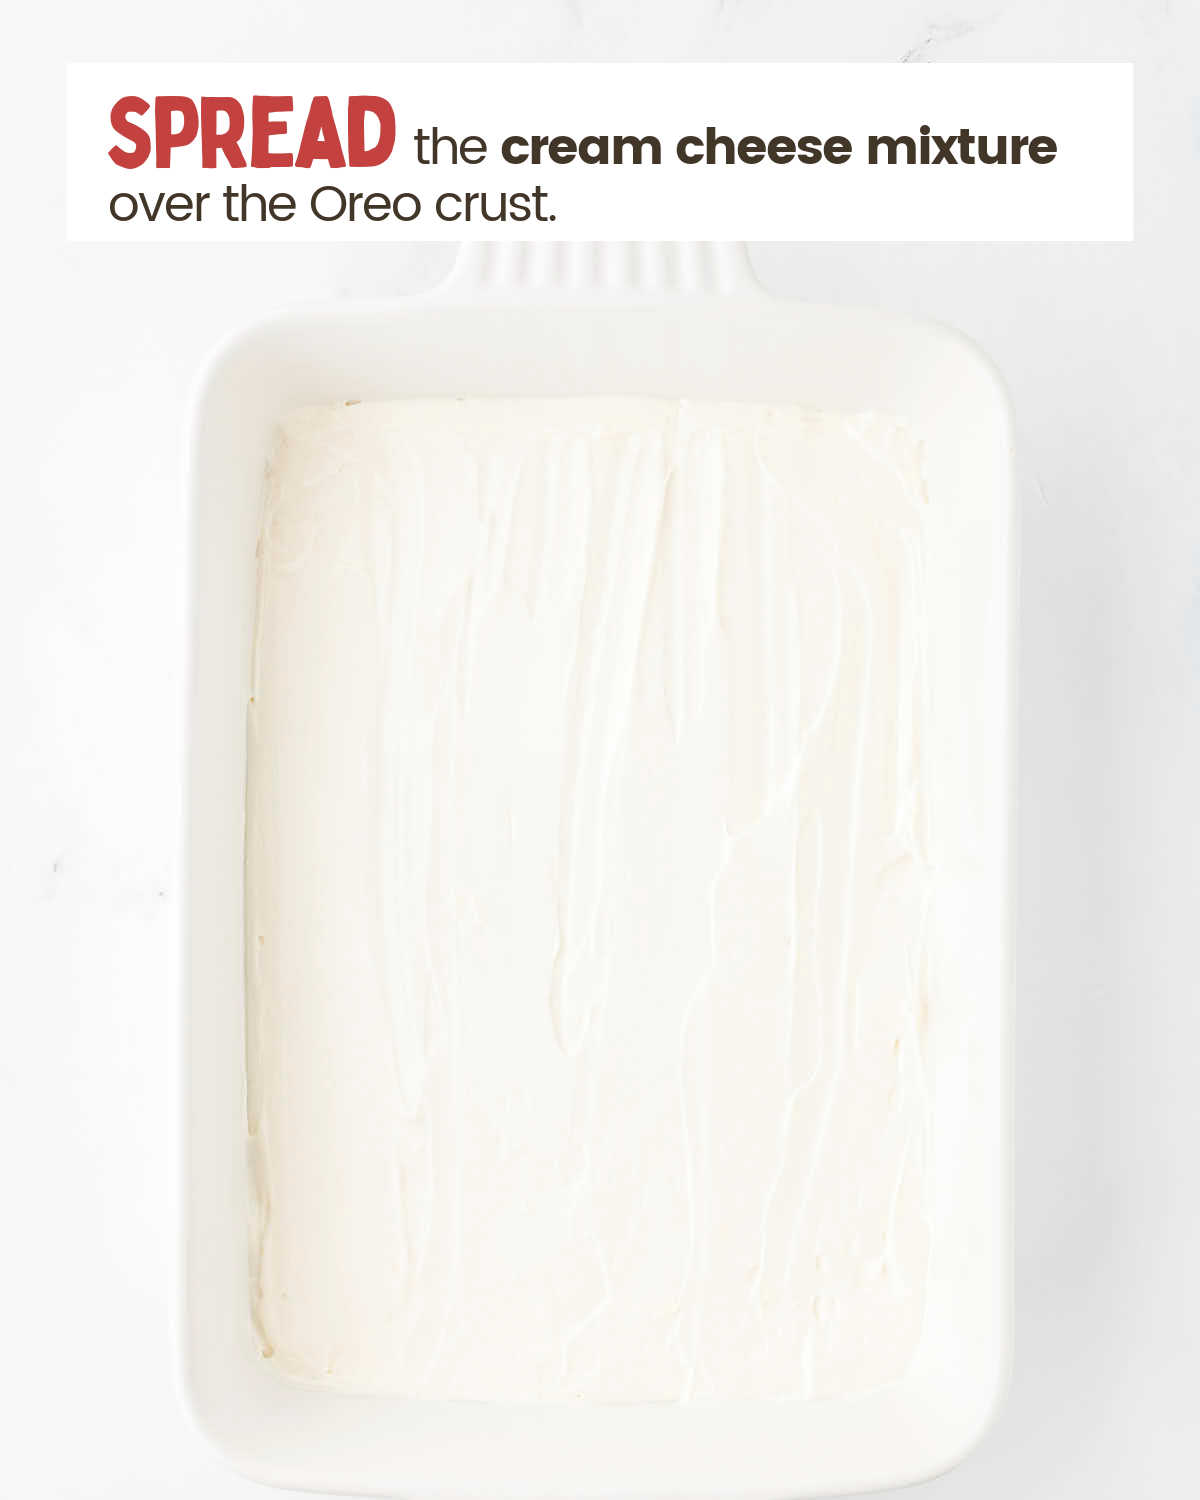
- Beat cream cheese, powdered sugar, lemon juice, and vanilla until smooth. Fold in whipped topping and spread over the crust.
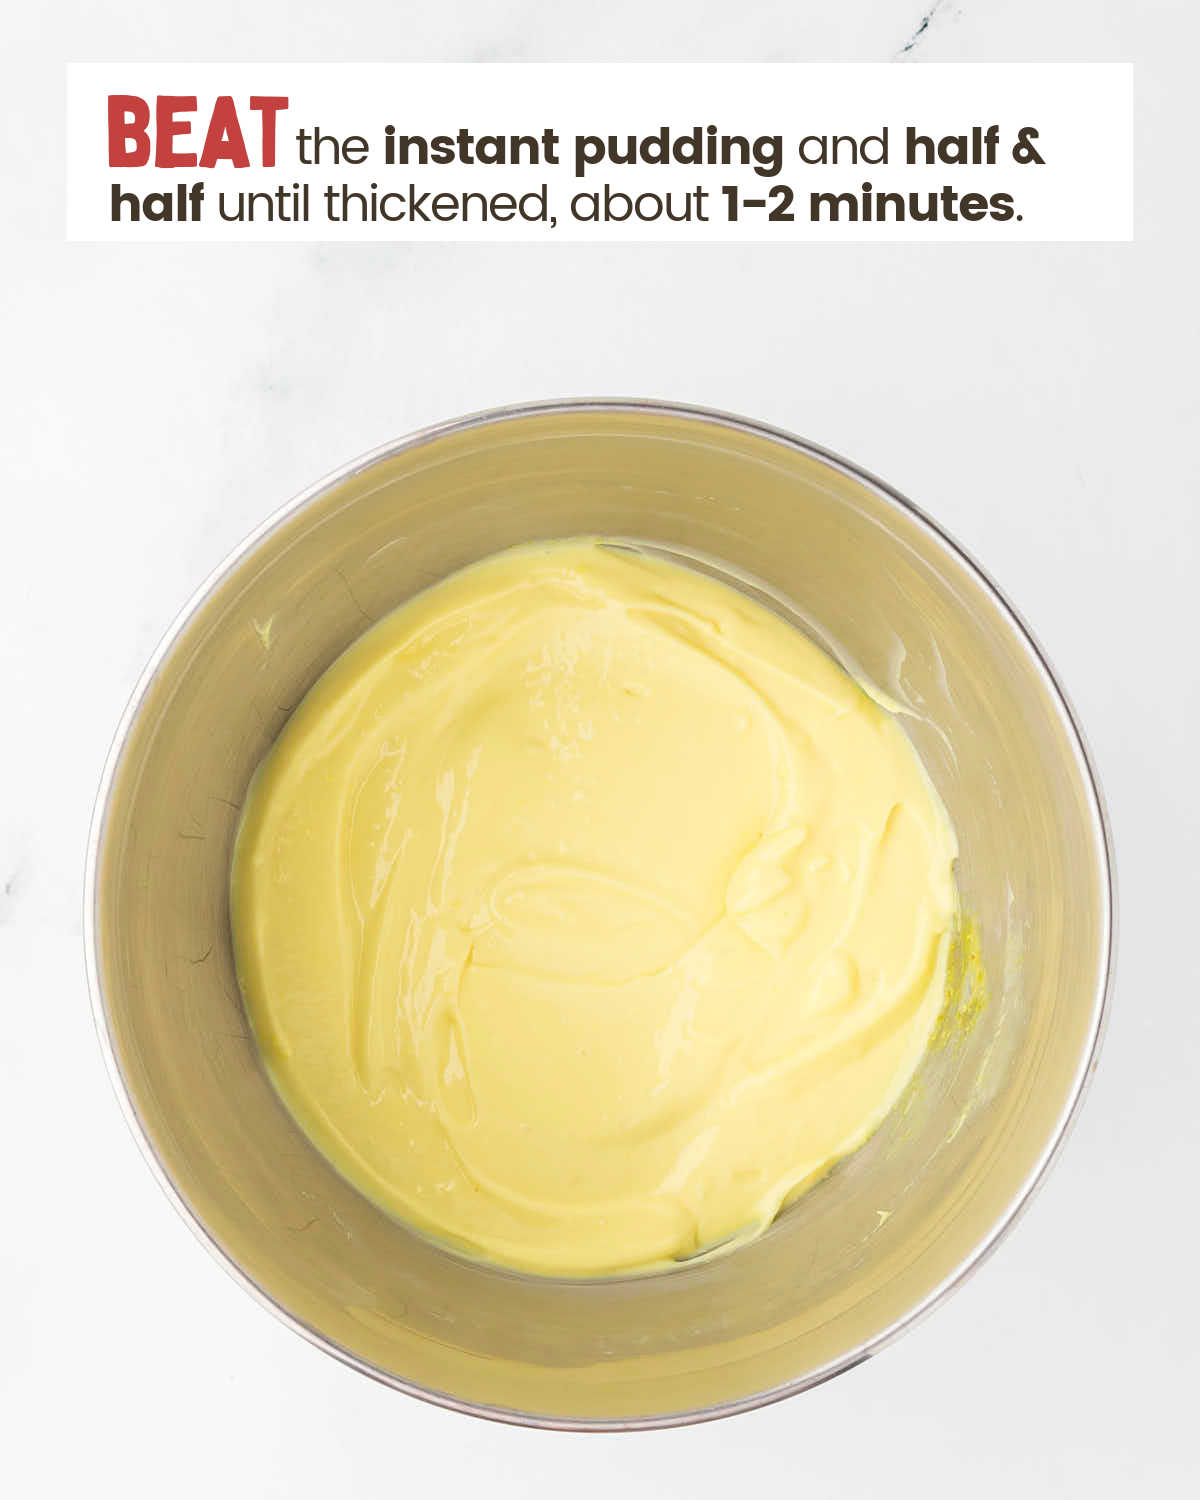
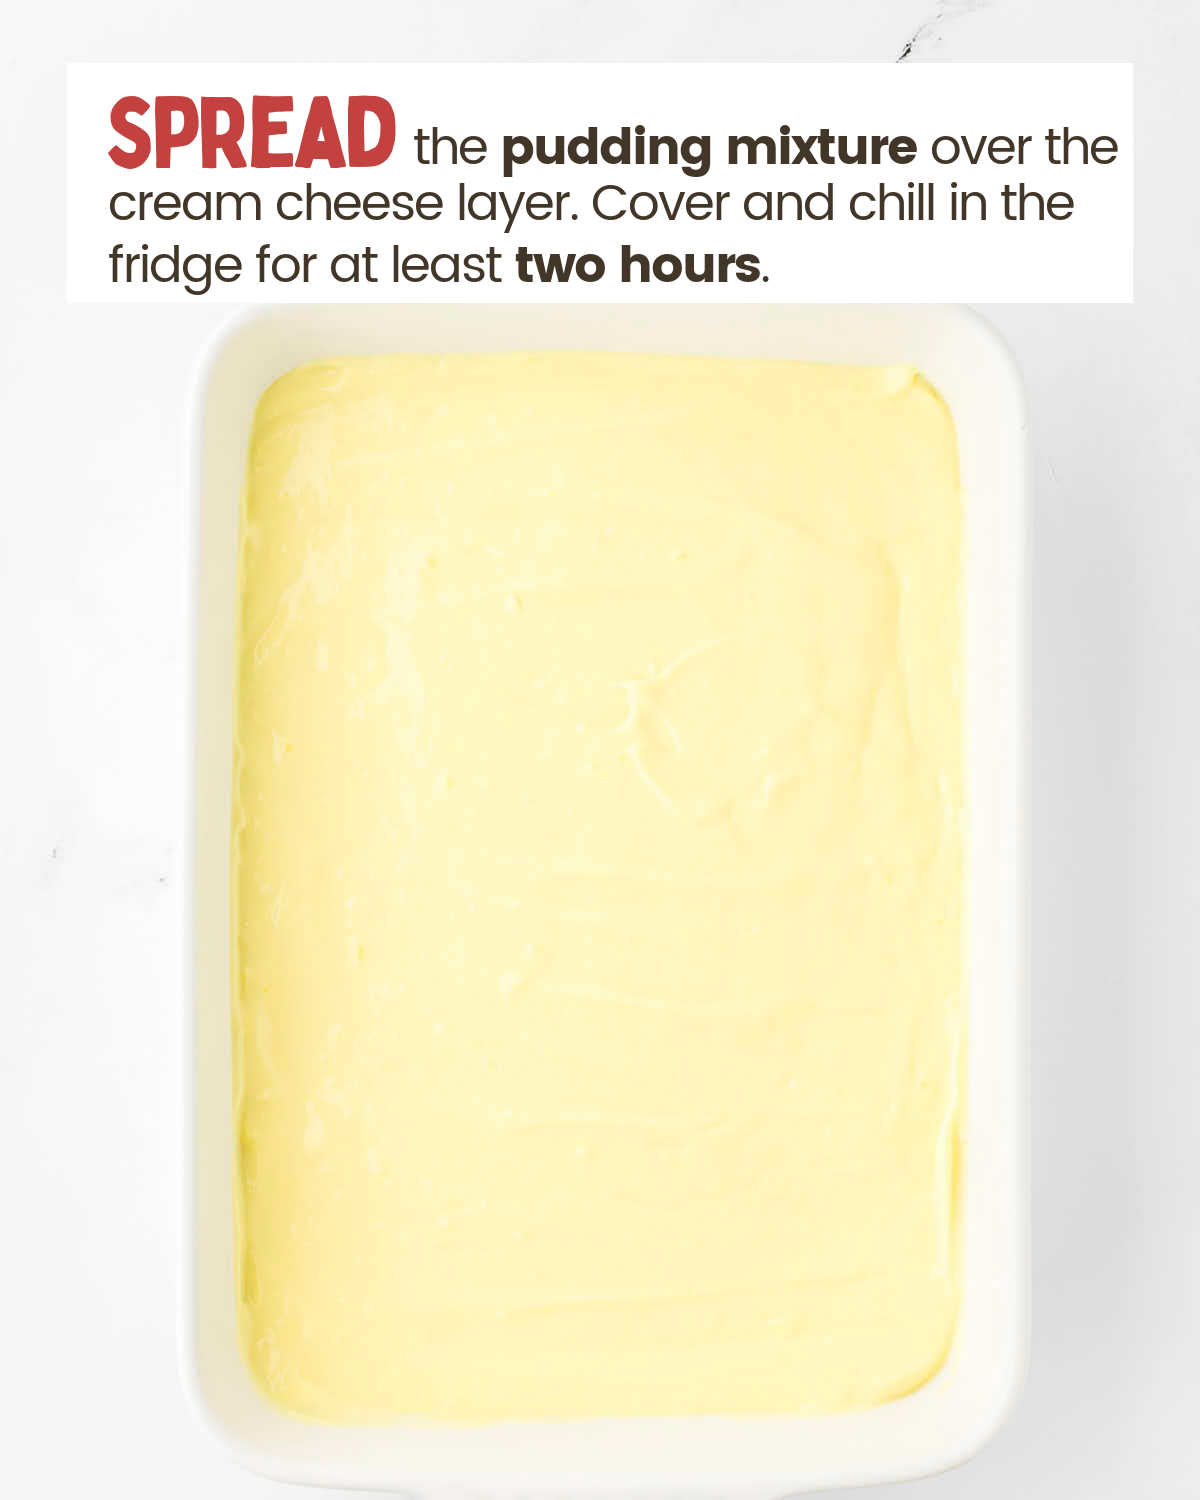
- Whisk lemon pudding mix with half and half until thickened, then spread over the cream cheese layer.
- Chill for 2 hours, top with whipped topping, and serve chilled.
Leftovers and Storage
STORE – Keep leftovers in the fridge for up to three days in an airtight container. Serve chilled to maintain the layers.
FREEZE – You can freeze Lemon Lush for 30 minutes to 1 hour before serving to make cutting easier. For long-term storage, freeze individual slices wrapped tightly in plastic wrap for up to a month.
REHEAT – Serve cold. If frozen, thaw individual slices in the fridge for a few hours.
MAKE AHEAD – Assemble the crust and layers up to a day in advance, adding the final whipped topping layer just before serving.
Serving Suggestions
FRESH BERRIES – Sliced strawberries, blueberries, or raspberries make an excellent addition to this dessert, adding natural sweetness and a pop of vibrant color. They also balance the creamy layers with their juicy texture, making every bite feel even more refreshing.
CANDIED LEMON SLICES – For an elegant touch, top each slice with a candied lemon slice. These not only look beautiful but also add a sweet and tangy bite that complements the dessert’s citrus flavors. They’re perfect for special occasions like Easter or dinner parties.
COFFEE OR TEA – Pair this creamy, citrusy dessert with a cup of coffee or hot tea. The warmth and richness of the drink balance the cool, refreshing flavors of the Lemon Lush, creating a satisfying end to your meal.
WHIPPED CREAM DOLLAPS WITH ZEST – Add an extra dollop of whipped cream to each slice and sprinkle a little lemon zest on top. This simple addition enhances the citrus theme and makes each serving feel extra special.
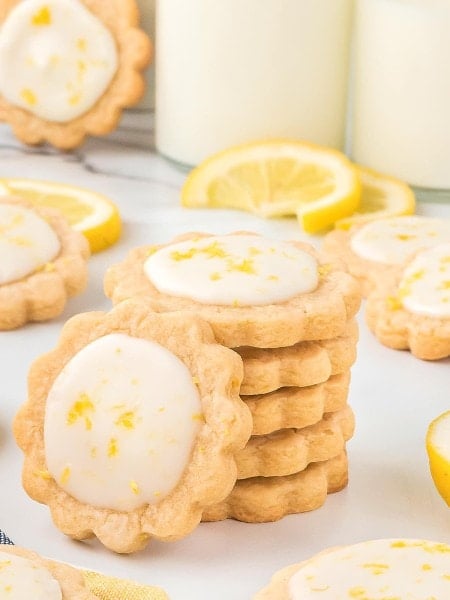
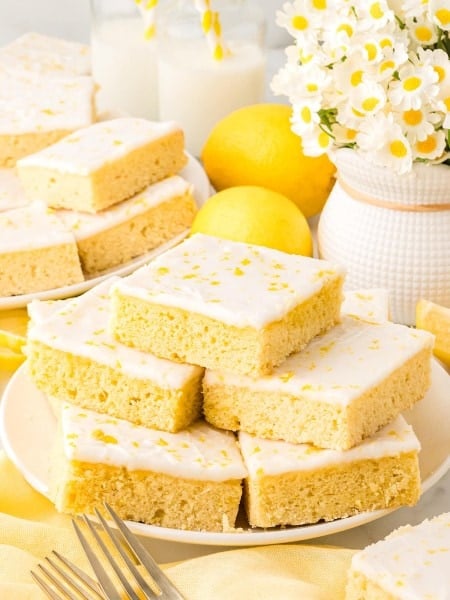
More Easy and Delicious Lemon Desserts

Recipe Success Tips
CHILL TIME IS KEY – Give the dessert at least 2 hours in the fridge to allow the layers to firm up. If you rush this step, the layers may slide when slicing, and you’ll miss those neat, clean lines that make this dessert so impressive.
SPREAD CAREFULLY – Take your time when spreading each layer. Use a spatula and work gently to avoid pressing too hard or disturbing the layer underneath. If a layer starts to mix, don’t worry—just pop it in the freezer for 10 minutes to help firm it up before moving on.
CLEAN KNIFE FOR CLEAN CUTS – Use a sharp knife to slice the dessert, and wipe it clean with a damp cloth after each cut. This keeps the layers neat and distinct so your slices look as good as they taste.
FREEZE FOR EASIER CUTTING – If you’re serving for a party or want perfect presentation, pop the dessert in the freezer for 30 minutes before slicing. It firms the layers just enough to get clean, even cuts without losing the creamy texture.
KEEP IT COLD UNTIL SERVING – This dessert holds its shape best when chilled. If you’re serving it at a gathering, keep it in the fridge until you’re ready to serve. For warm days or outdoor events, place the dish on a tray of ice to keep it cool and fresh.
Commonly Asked Questions
Can I Use Homemade Whipped Cream Instead Of Whipped Topping?
Yes, you can use homemade whipped cream in this recipe. Make sure it is stiff so that the layers hold up nicely.
More Easy and Delicious No-Bake Desserts
Lemon Lush
Ingredients
Crust
- 33 cookies Golden Oreo cookies (13.29-ounce package) – crushed or processed into crumbs
- 6 tablespoons butter unsalted, melted
- 1 tablespoon lemon zest
Cheesecake Layer
- 8 ounces cream cheese softened
- 1 cup powdered sugar
- 1 tablespoon lemon juice
- 1 teaspoon vanilla extract
- 8 ounces whipped topping thawed
Lemon Layer
- 2 3.4-ounce boxes lemon instant pudding
- 3 ¼ cups half and half
Topping
- 8 ounces whipped topping thawed
Optional garnishes
Instructions
- Mix the Oreo crumbs and melted butter in a medium bowl. Press the Oreo crumbs into the bottom of a 9×13” baking dish.
- Beat the cream cheese, powdered sugar, lemon juice, and vanilla together in a large bowl with a hand or stand mixer on high speed until smooth. Add 8 ounces whipped topping to the cream cheese mixture and mix on low, just until incorporated.
- Use a spatula to gently spread the cream cheese mixture into an even layer over the Oreo crust.
- Use a large bowl and beat the pudding mixture and half & half with a hand or stand mixer on high speed until the mixture thickens – about 1-2 minutes.
- Use a spatula to gently spread the lemon pudding into an even layer over the cream cheese layer.
- Cover and chill the prepared layers in the fridge for at least two hours or until the layers are set and firm.
- When ready to serve add the final layer of 8-ounce whipped topping. Spread with it with a spatula in an even layer over the pudding layer. Cut into squares and garnish with lemon zest and/or slices if desired. Serve chilled.
Equipment
Nutritional Information
Nutritional Disclaimer
Cheerful Cook team members are not trained nutritionists or medical professionals. Calorie information and nutritional values are estimates. If you have nutritional concerns, we recommend using a nutritional calculator.
Maike Corbett is the founder and food blogger of Cheerful Cook, a popular recipe website featuring comfort food recipes from the US and Germany. She has been featured in numerous media outlets, including the AP Wire and MSN.