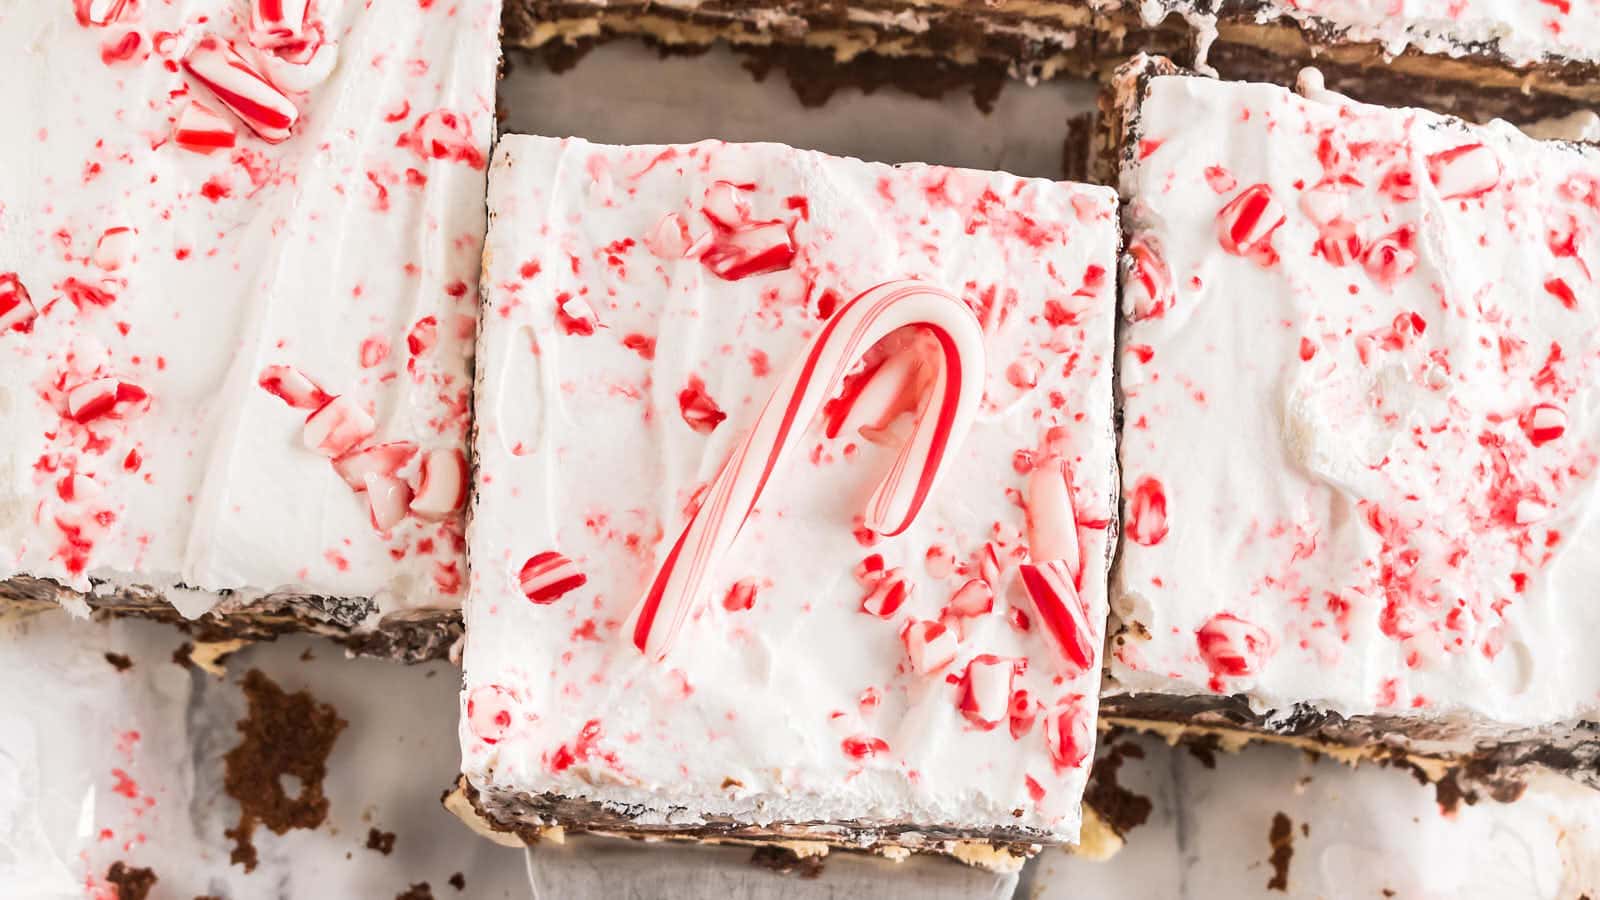
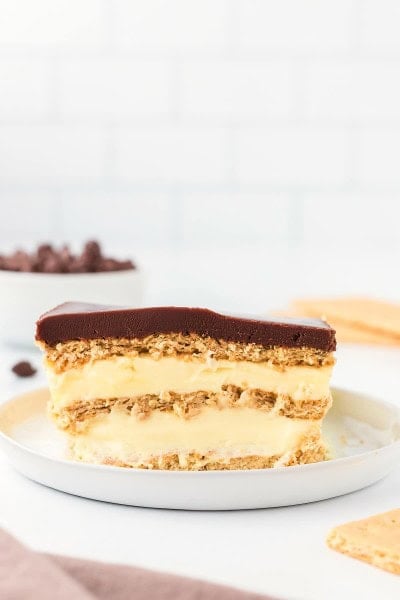
Christmas Icebox Cake
Christmas Icebox Cake is the ultimate no-bake dessert that turns simple ingredients into a festive treat everyone will love.
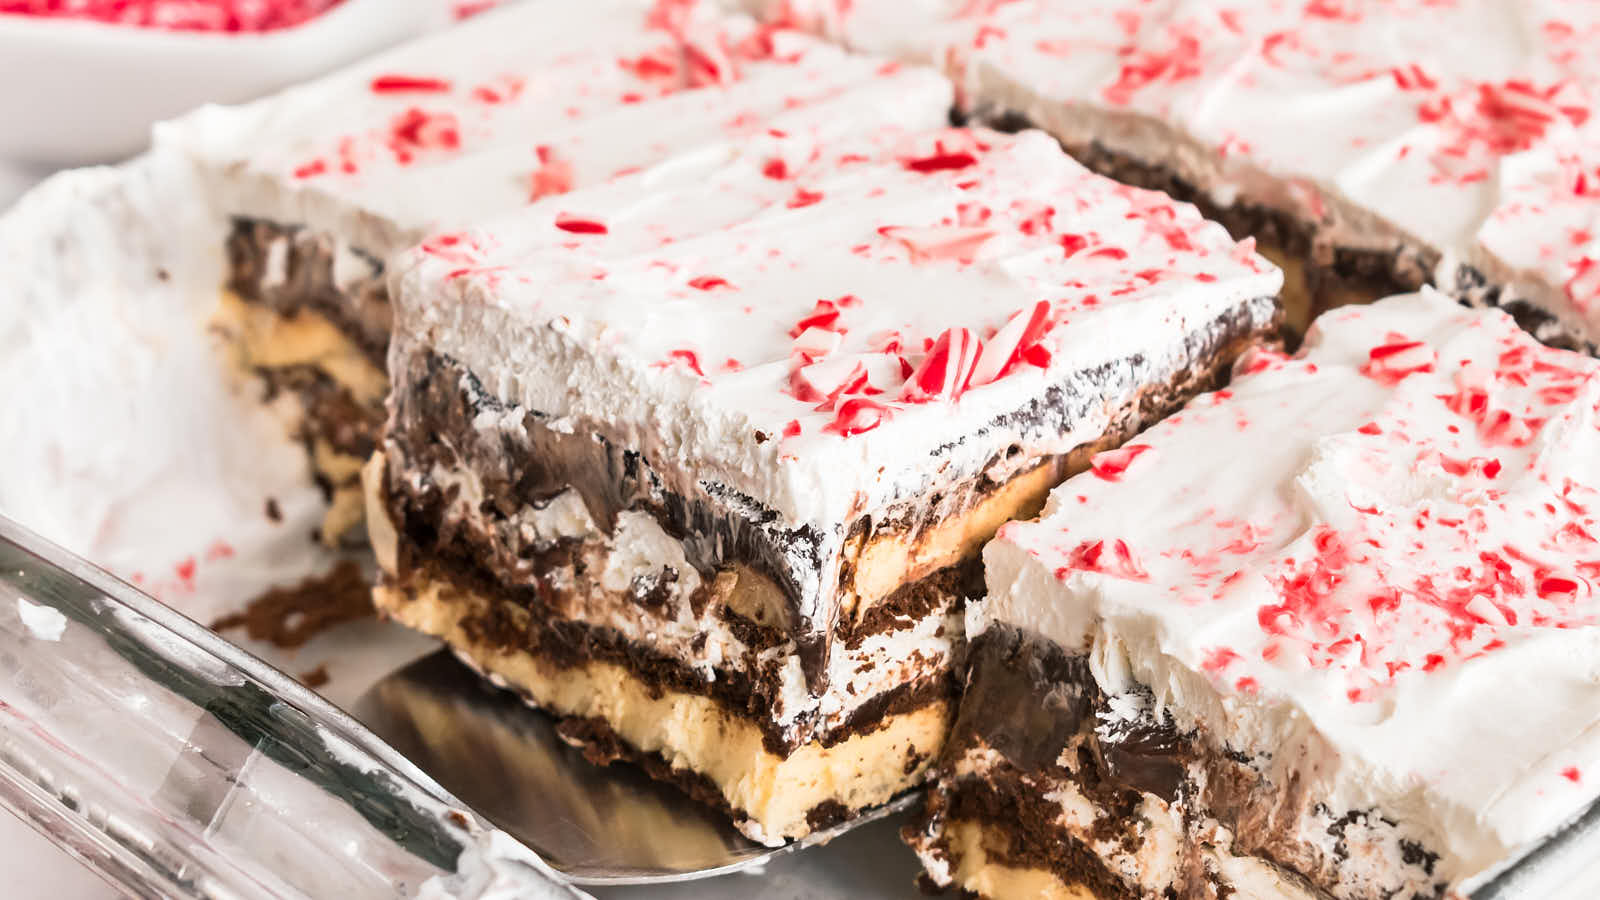
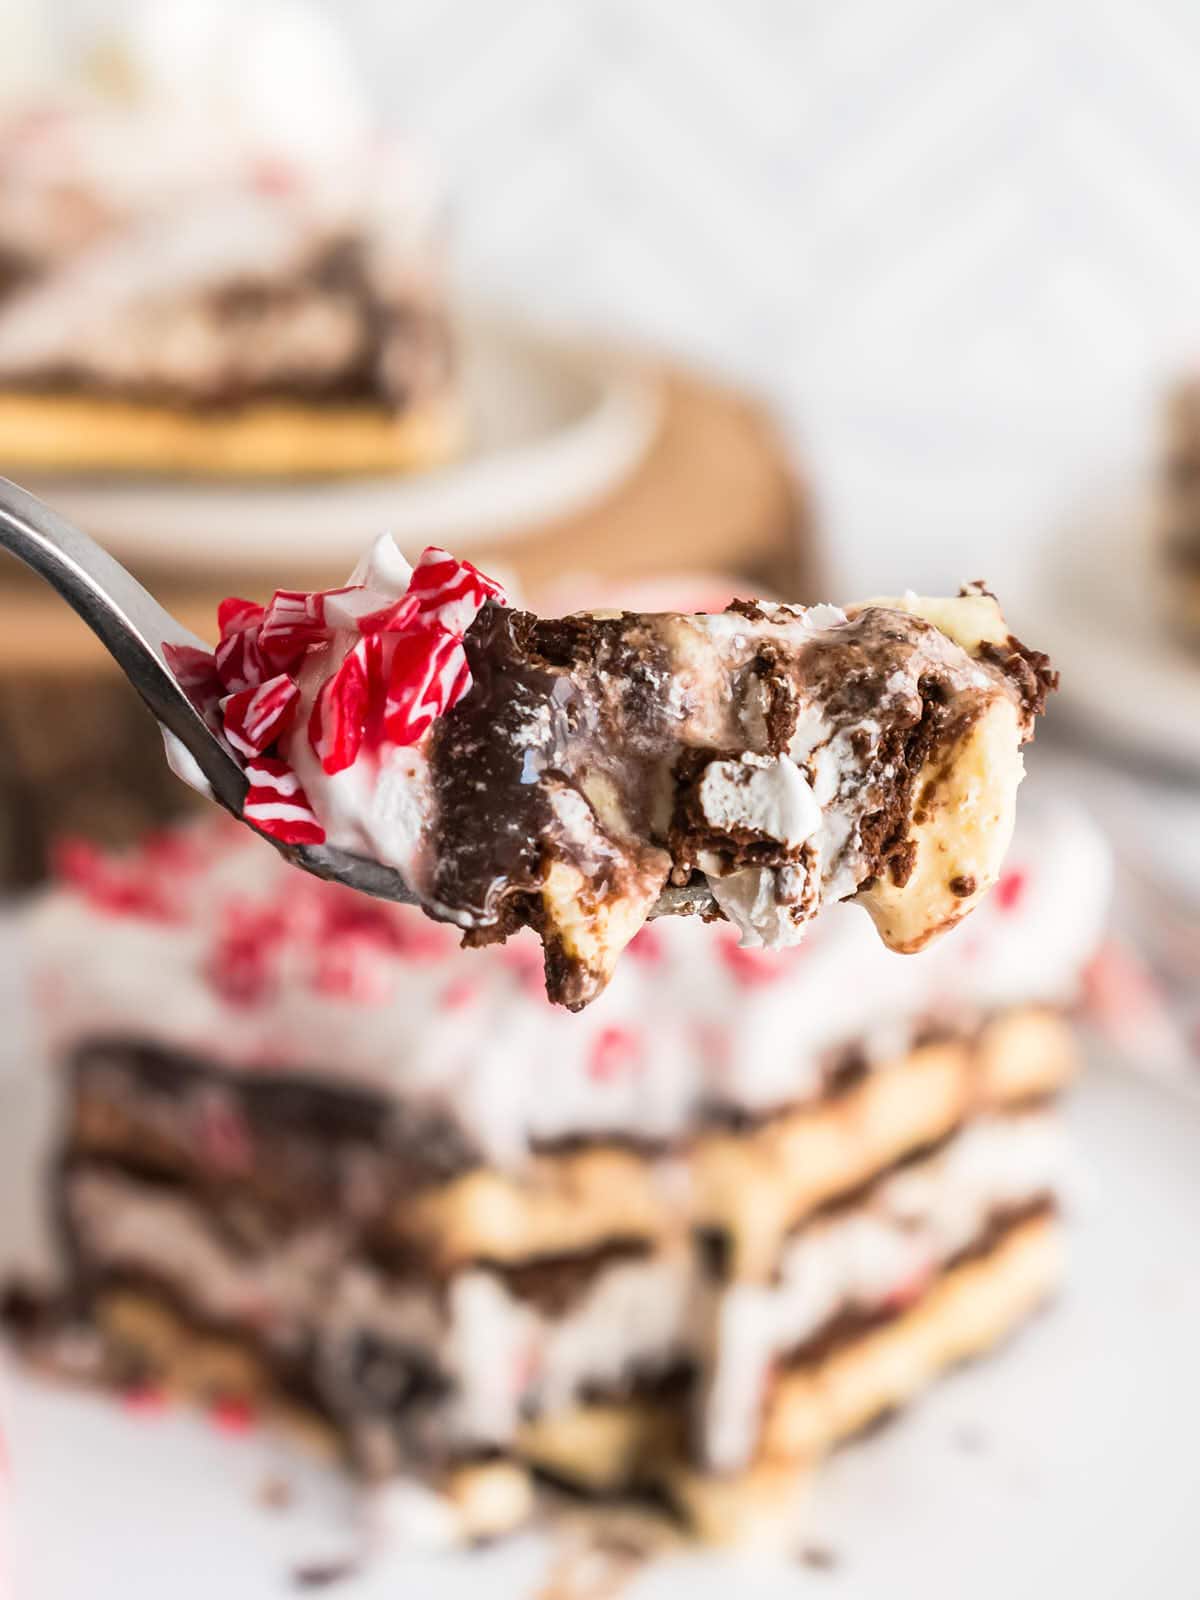
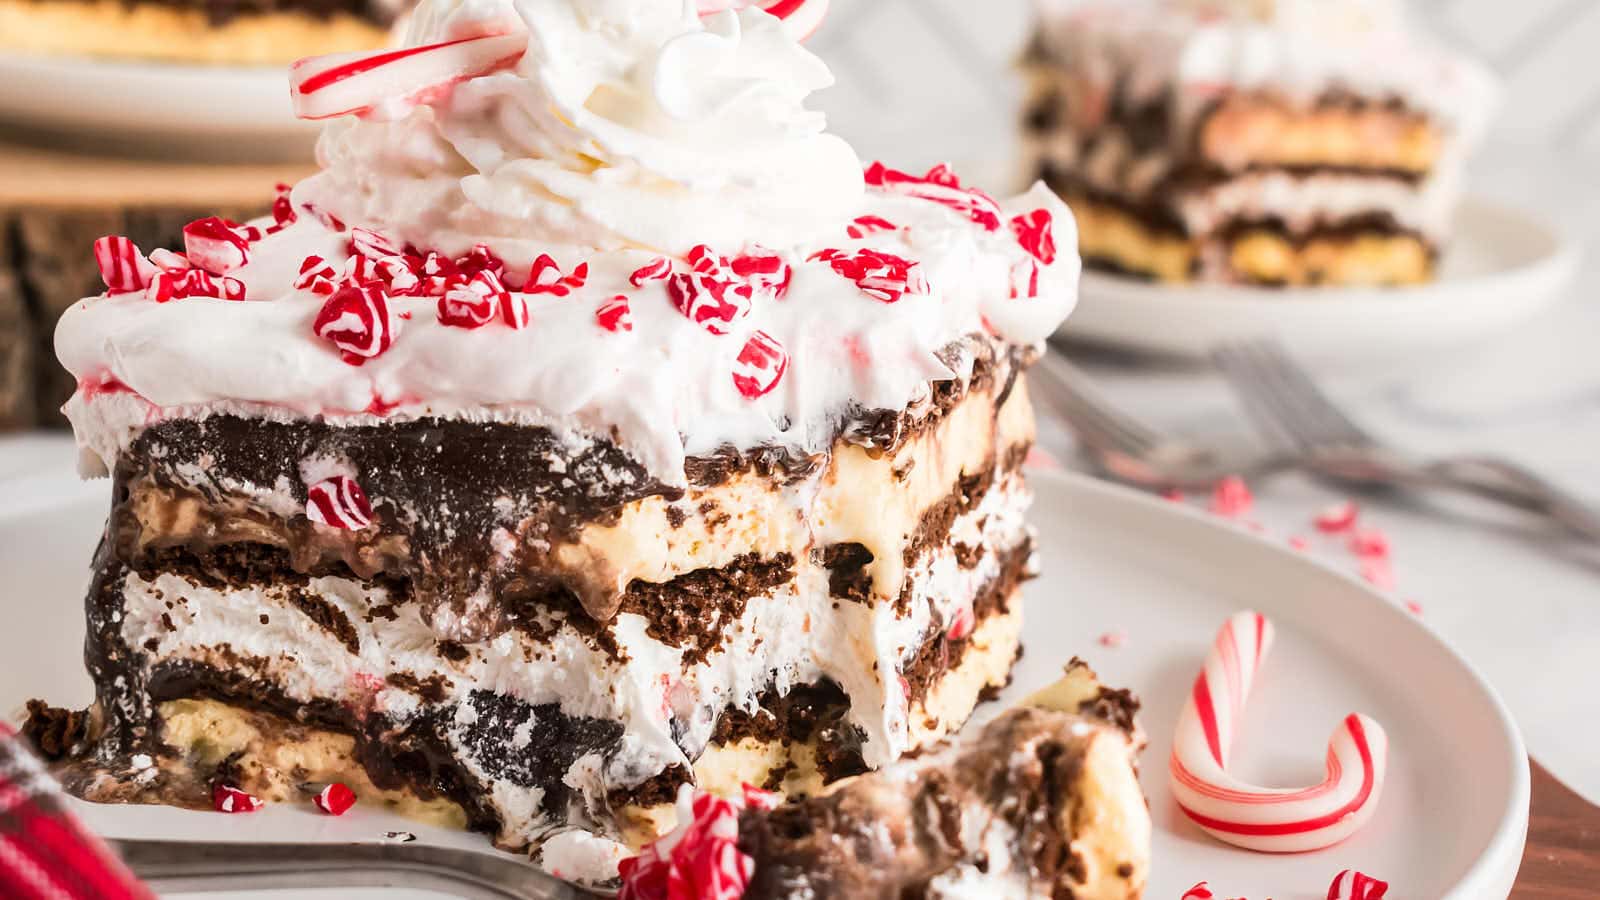
Vanilla ice cream sandwiches, rich hot fudge, and crushed peppermint come together to create layers of creamy, chocolatey, and minty goodness.
This recipe is perfect for holiday gatherings, offering a quick and stress-free way to wow your guests without turning on the oven. Let’s make this holiday season a little easier—and a lot more delicious!
Christmas Icebox Cake Recipe Highlights
- No-bake dessert ready in just 15 minutes of prep.
- Festive layers of chocolate, vanilla, and peppermint.
- Easy to customize with different toppings or candies.
- Feeds a crowd with 12 generous servings.
- Perfect for Christmas parties or as a make-ahead treat.
Ingredient Notes
Please check the recipe card below for a detailed, printable ingredient list.
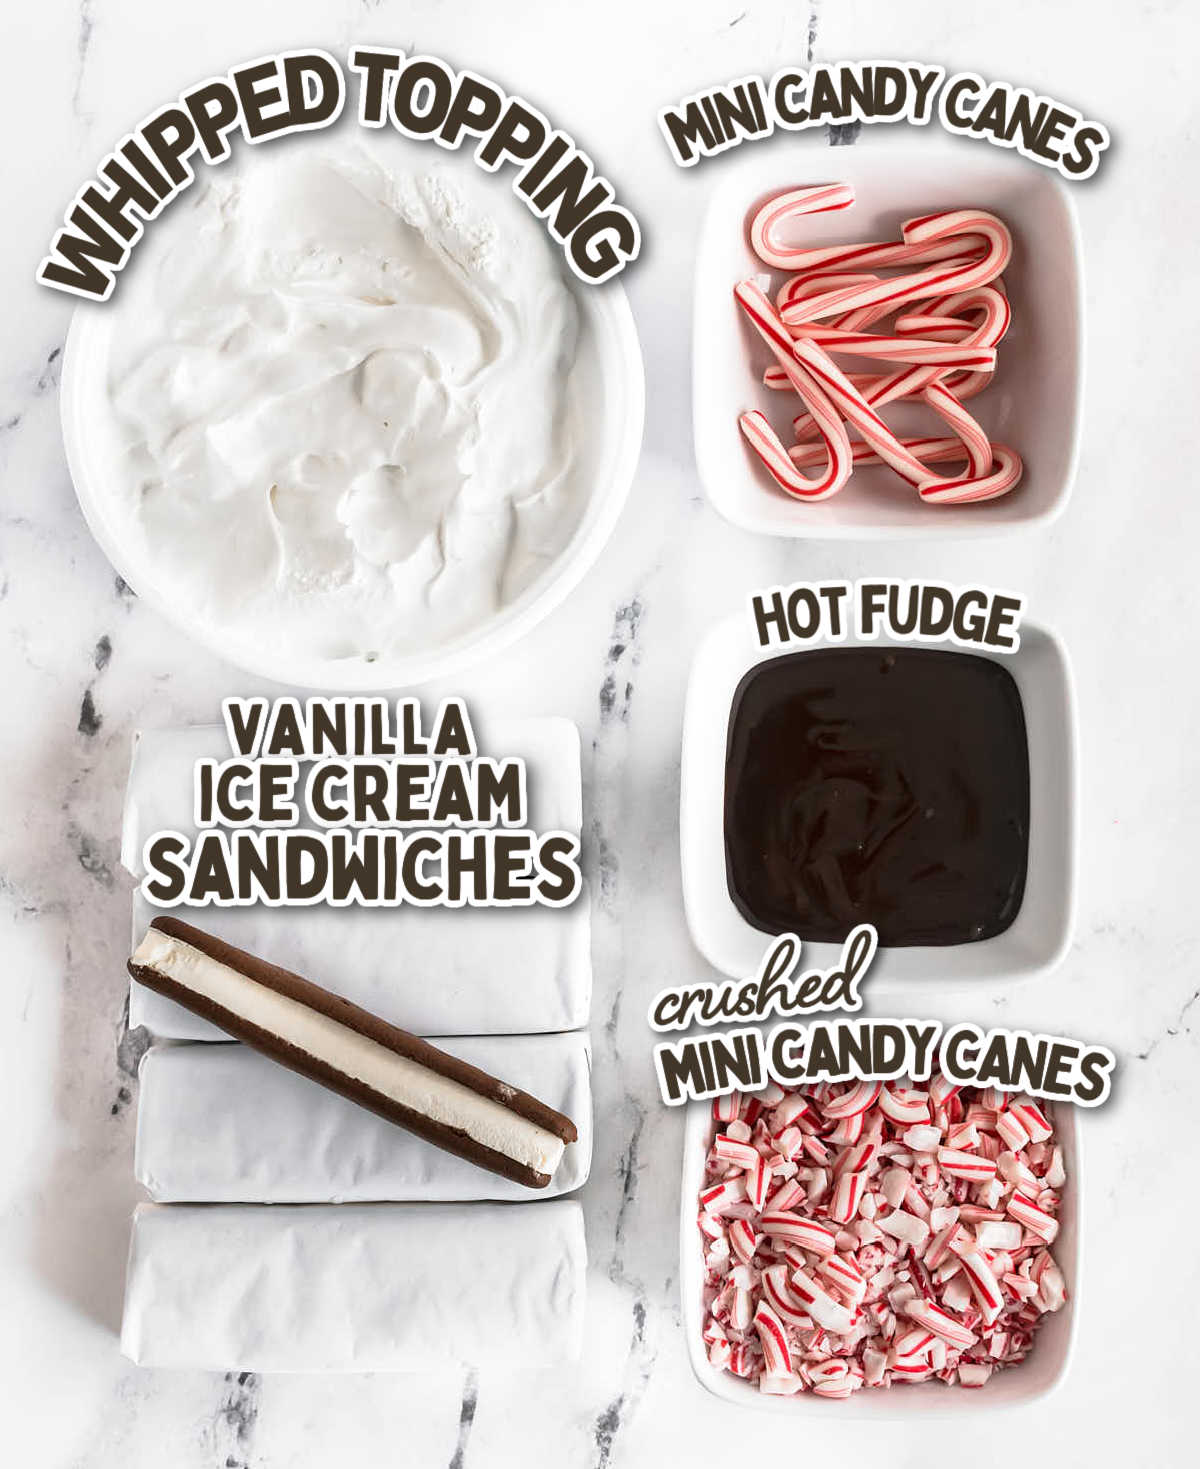
ICE CREAM SANDWICHES – I use classic vanilla ice cream sandwiches because they provide the perfect balance of creamy ice cream and soft chocolate cookies. Their rectangular shape makes them easy to layer in a baking dish, and their flavor pairs wonderfully with the peppermint and fudge. If you’d like to experiment, chocolate or mint-flavored ice cream sandwiches could work, but stick to ones with a sturdy cookie layer for the best texture.
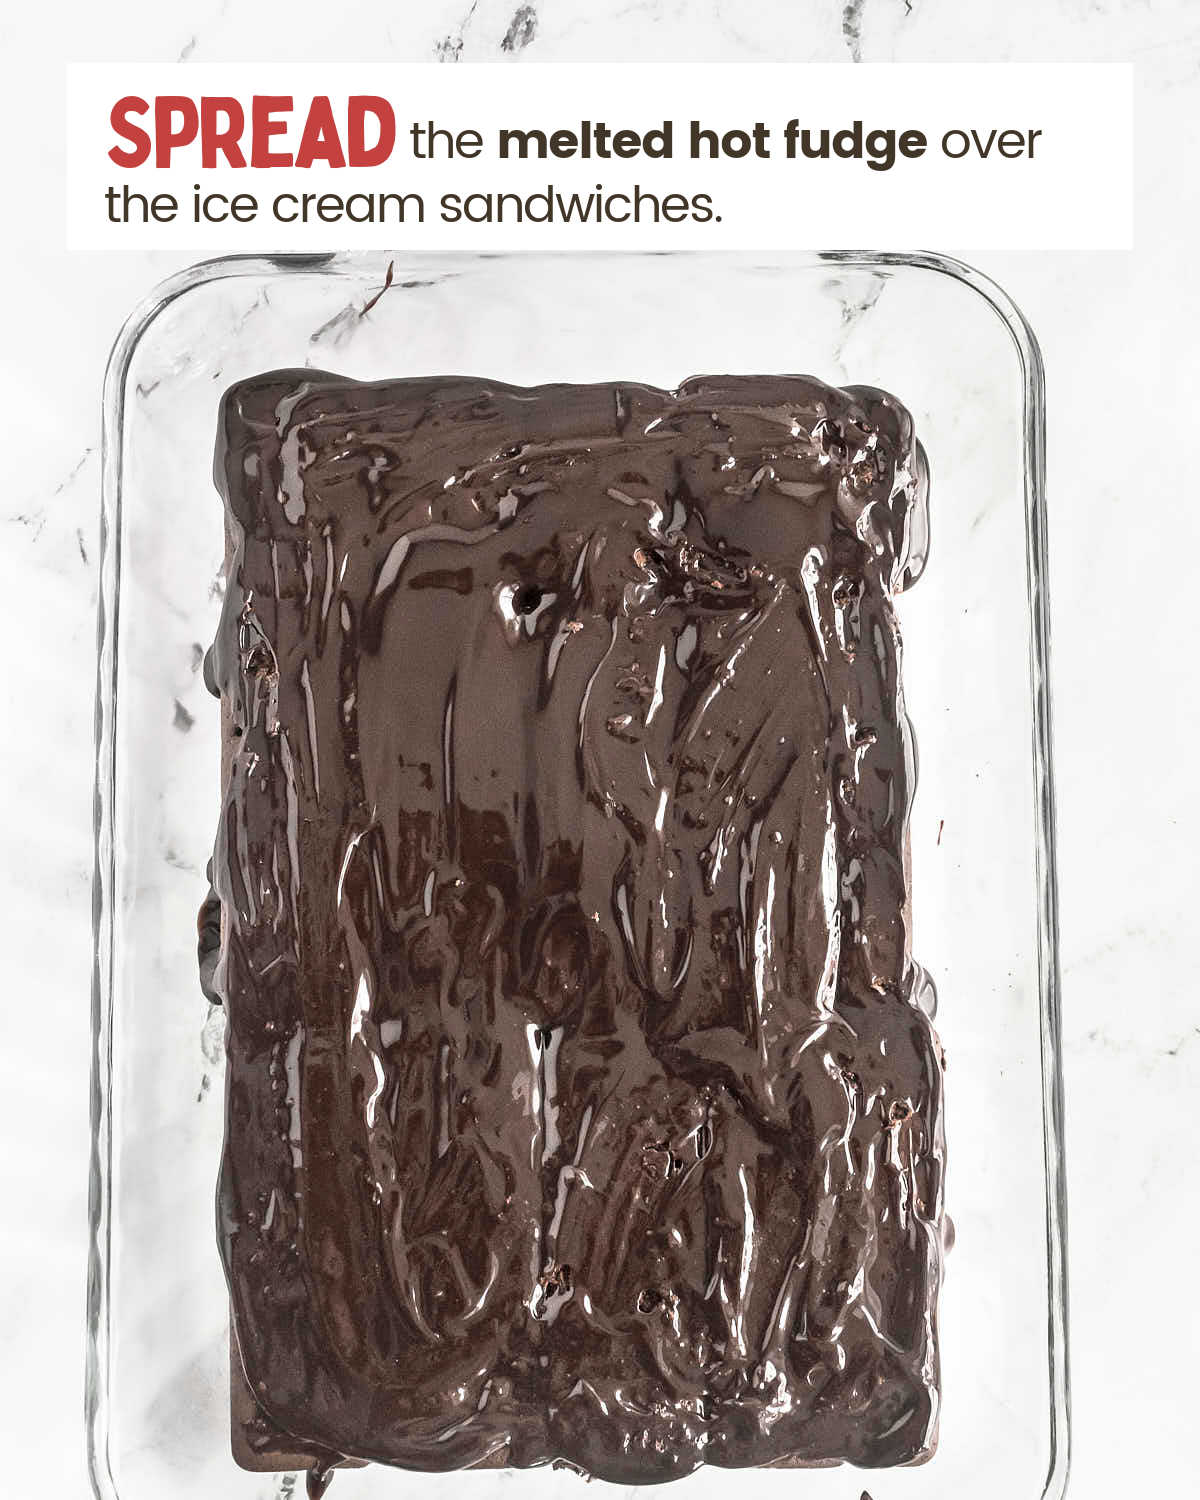
HOT FUDGE – The hot fudge adds a rich chocolate flavor and smooth, creamy texture that ties the dessert together. Use a high-quality microwavable fudge sauce for easy application. It’s important to avoid using caramel, as it doesn’t pair as well with the peppermint and can affect the dessert’s flavor balance. Warm the fudge until it’s just pourable, making it easier to spread evenly without melting the ice cream.
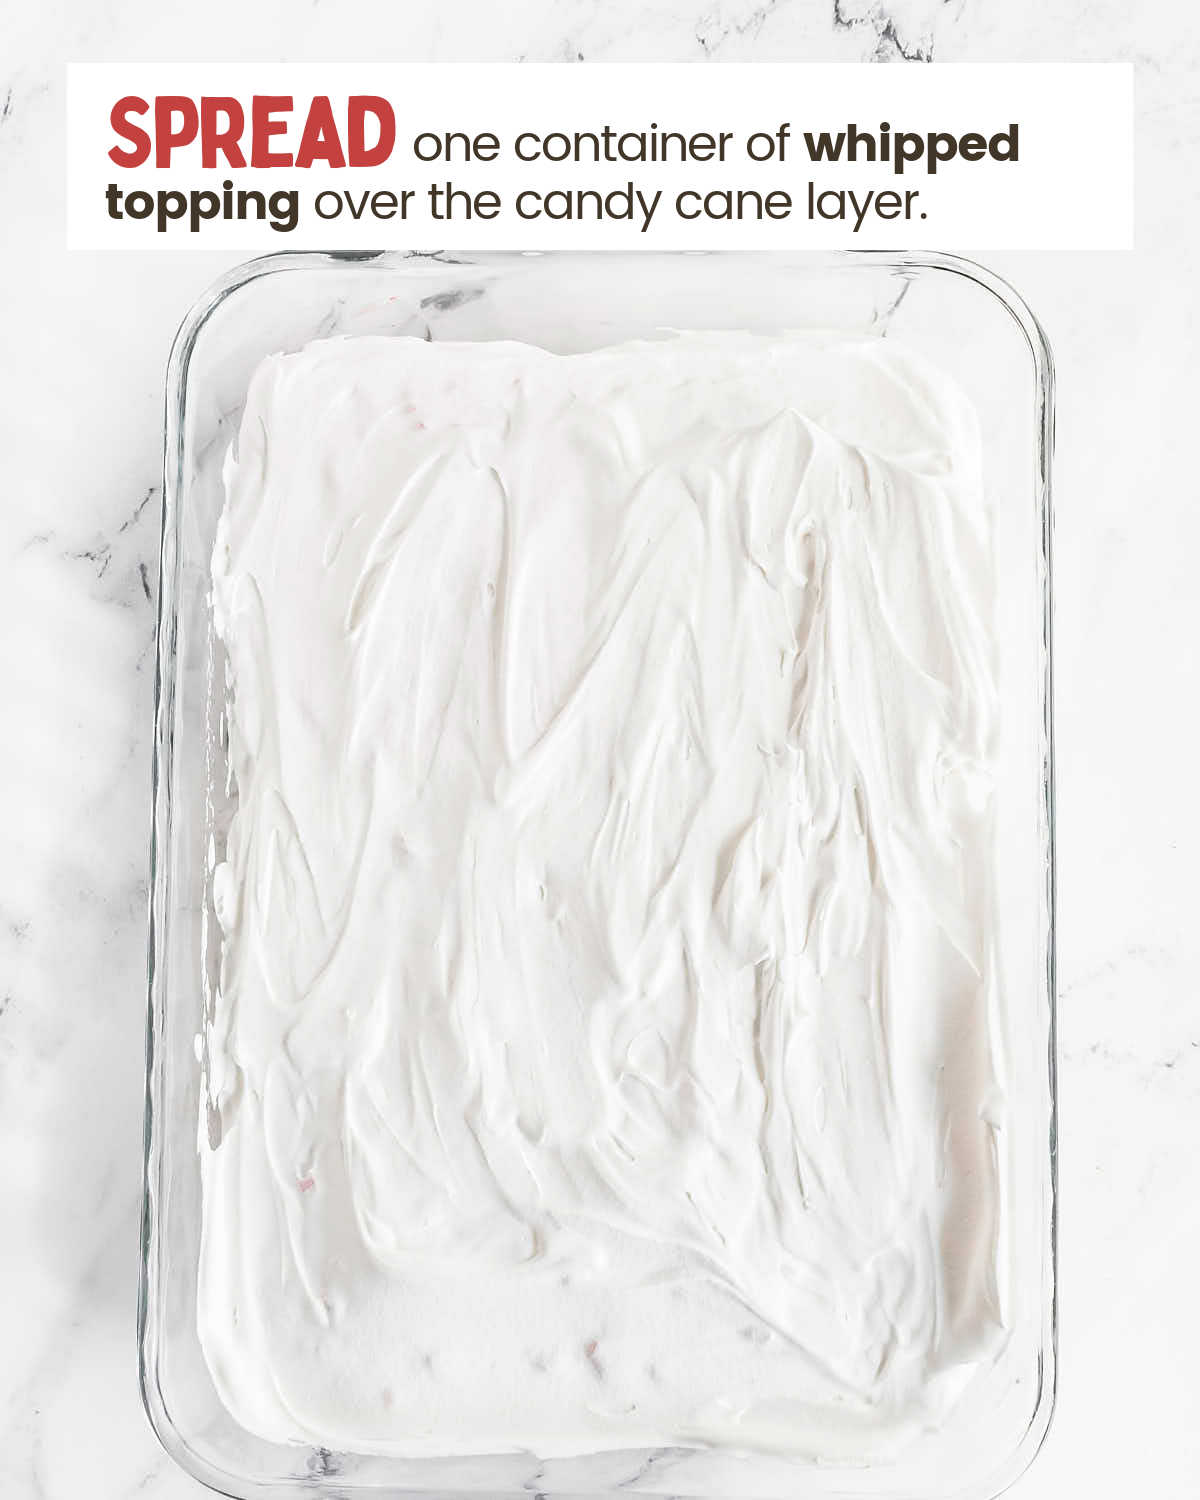
WHIPPED TOPPING – Thawed whipped topping creates a light and airy layer that complements the richness of the other ingredients. It also spreads easily, making assembly quick and stress-free. If you prefer homemade whipped cream, ensure it’s whipped to soft peaks for a similar consistency, but keep in mind that it may not hold up as well in the freezer.
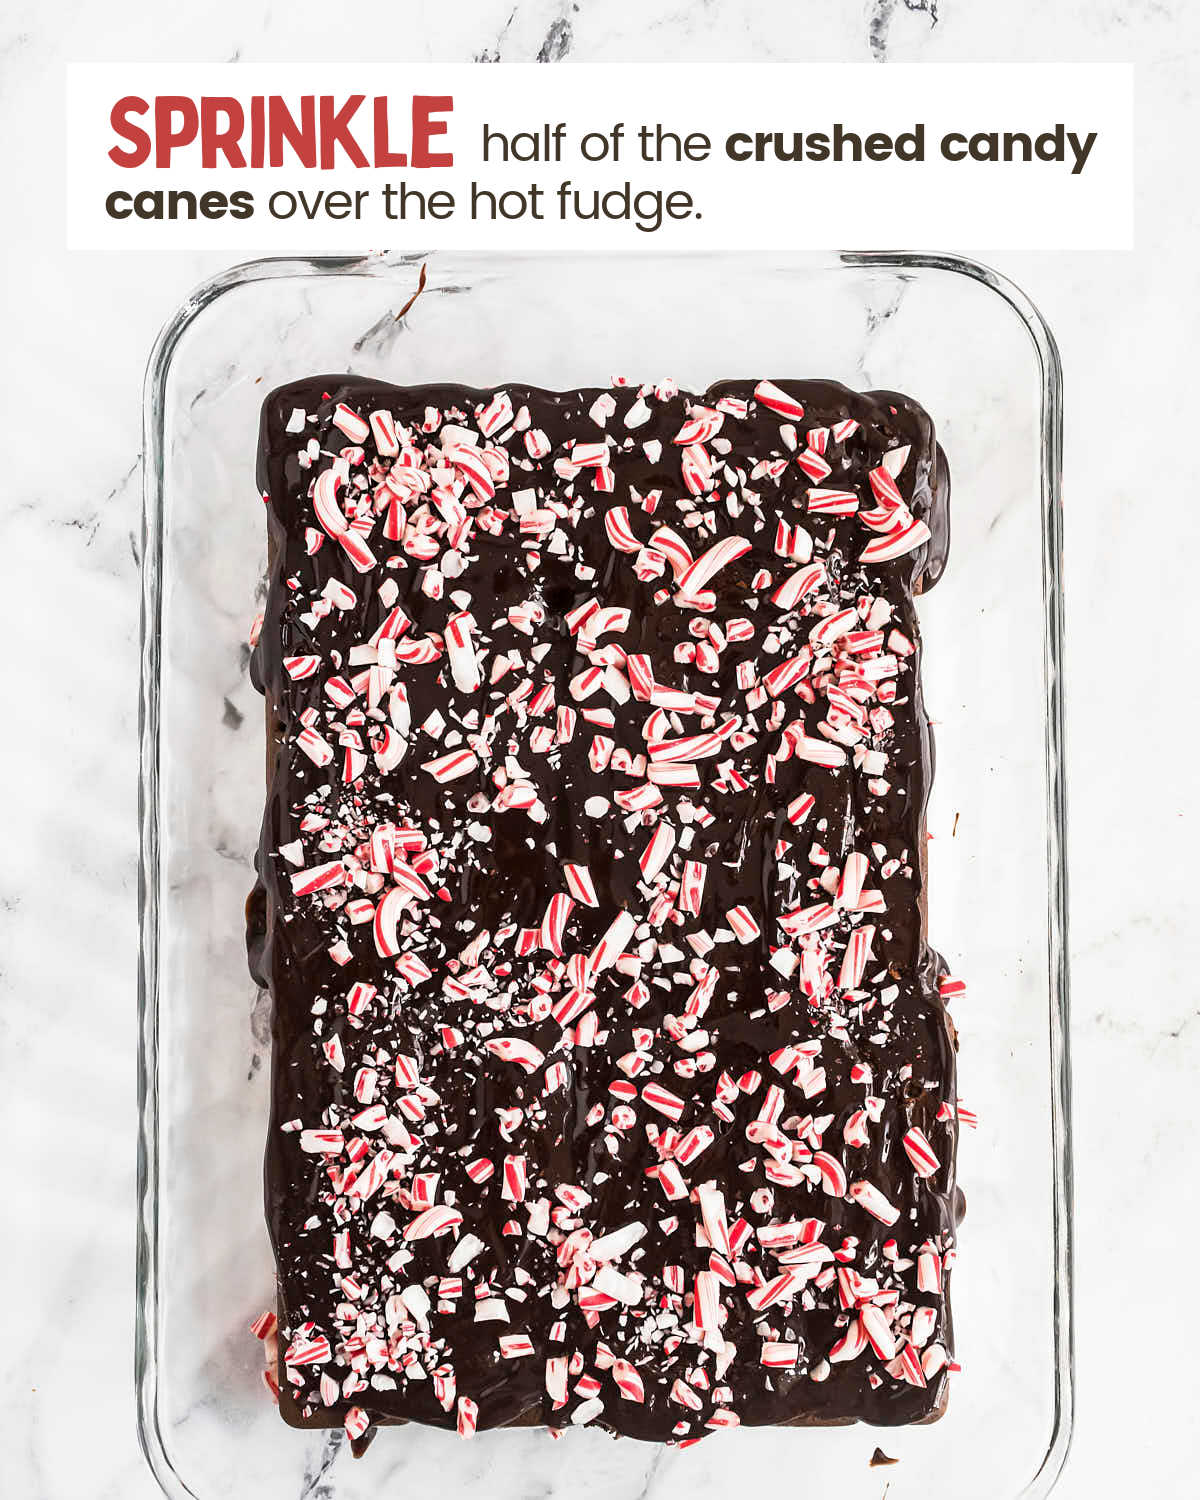
CANDY CANES – I use mini candy canes because they’re easier to crush into small, uniform pieces that sprinkle evenly over the layers. Their peppermint flavor is strong and consistent, adding a festive touch to the dessert. Larger candy canes can work, but they may require more effort to crush into manageable pieces, so mini ones are the best choice for convenience and texture.
How To Make A Christmas Icebox Cake
Please check the printable recipe card below for more detailed instructions.
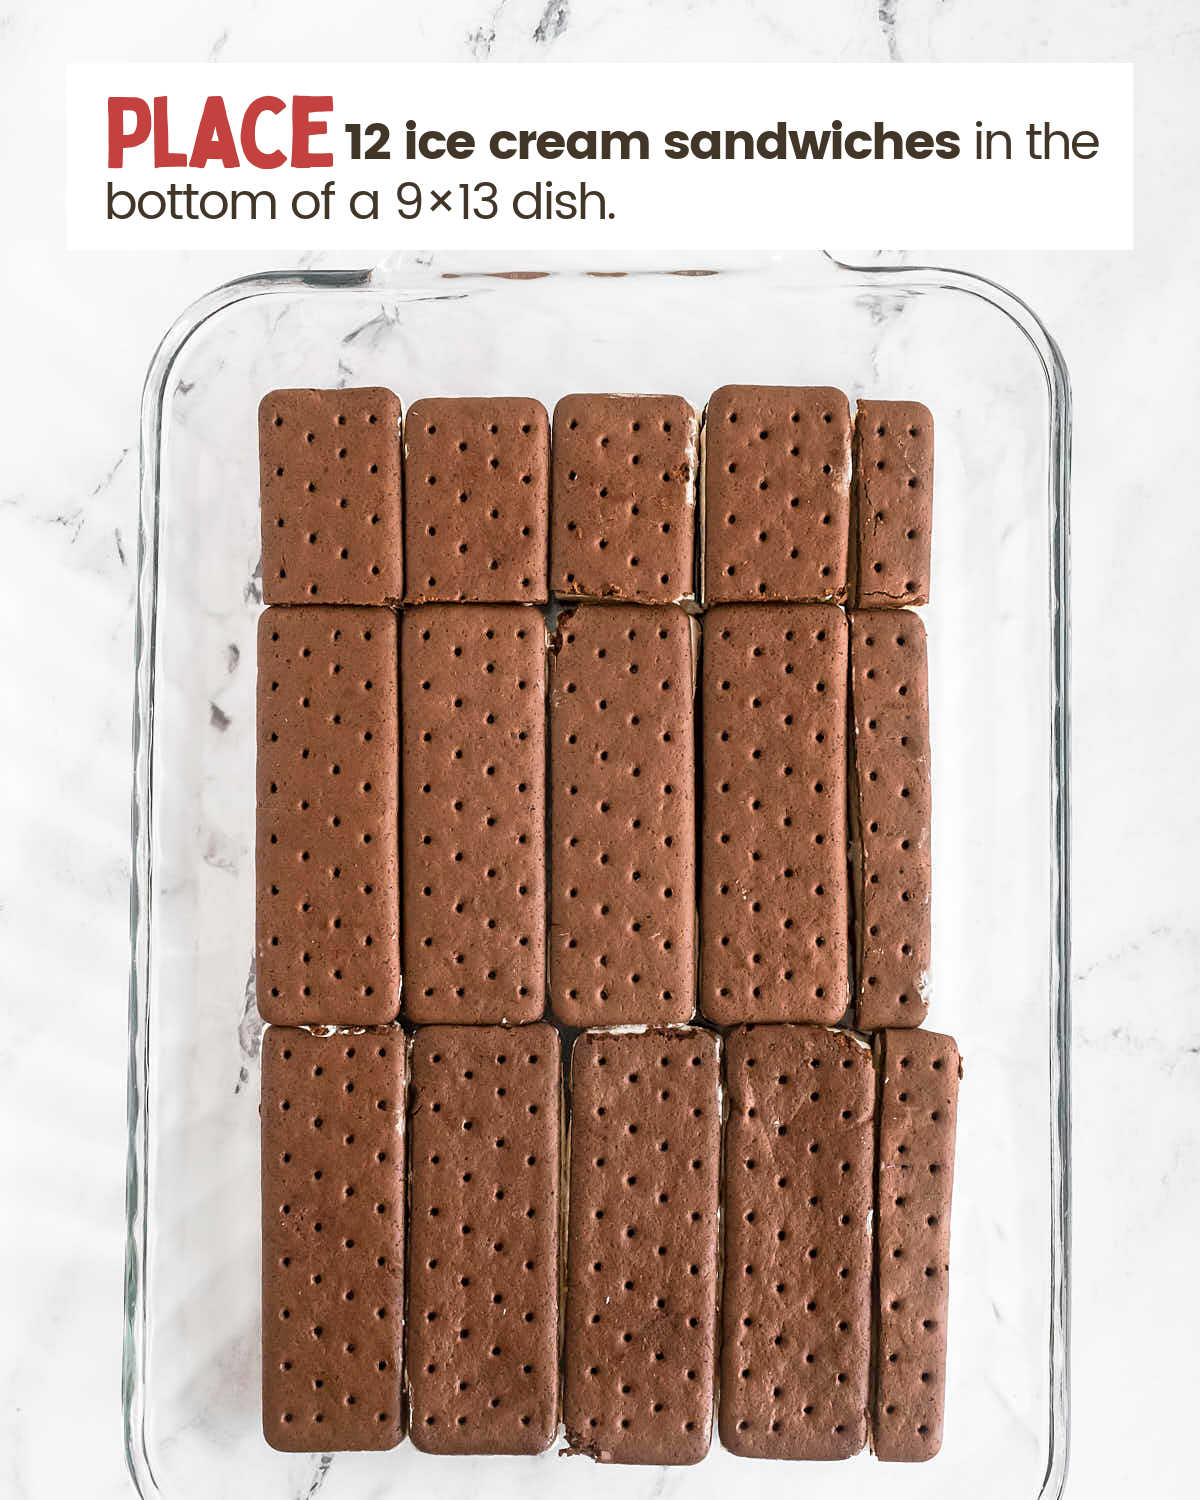

- Layer half the ice cream sandwiches in a baking dish.
- Spread warmed hot fudge over the sandwiches, sprinkle with crushed candy canes, and top with whipped topping.
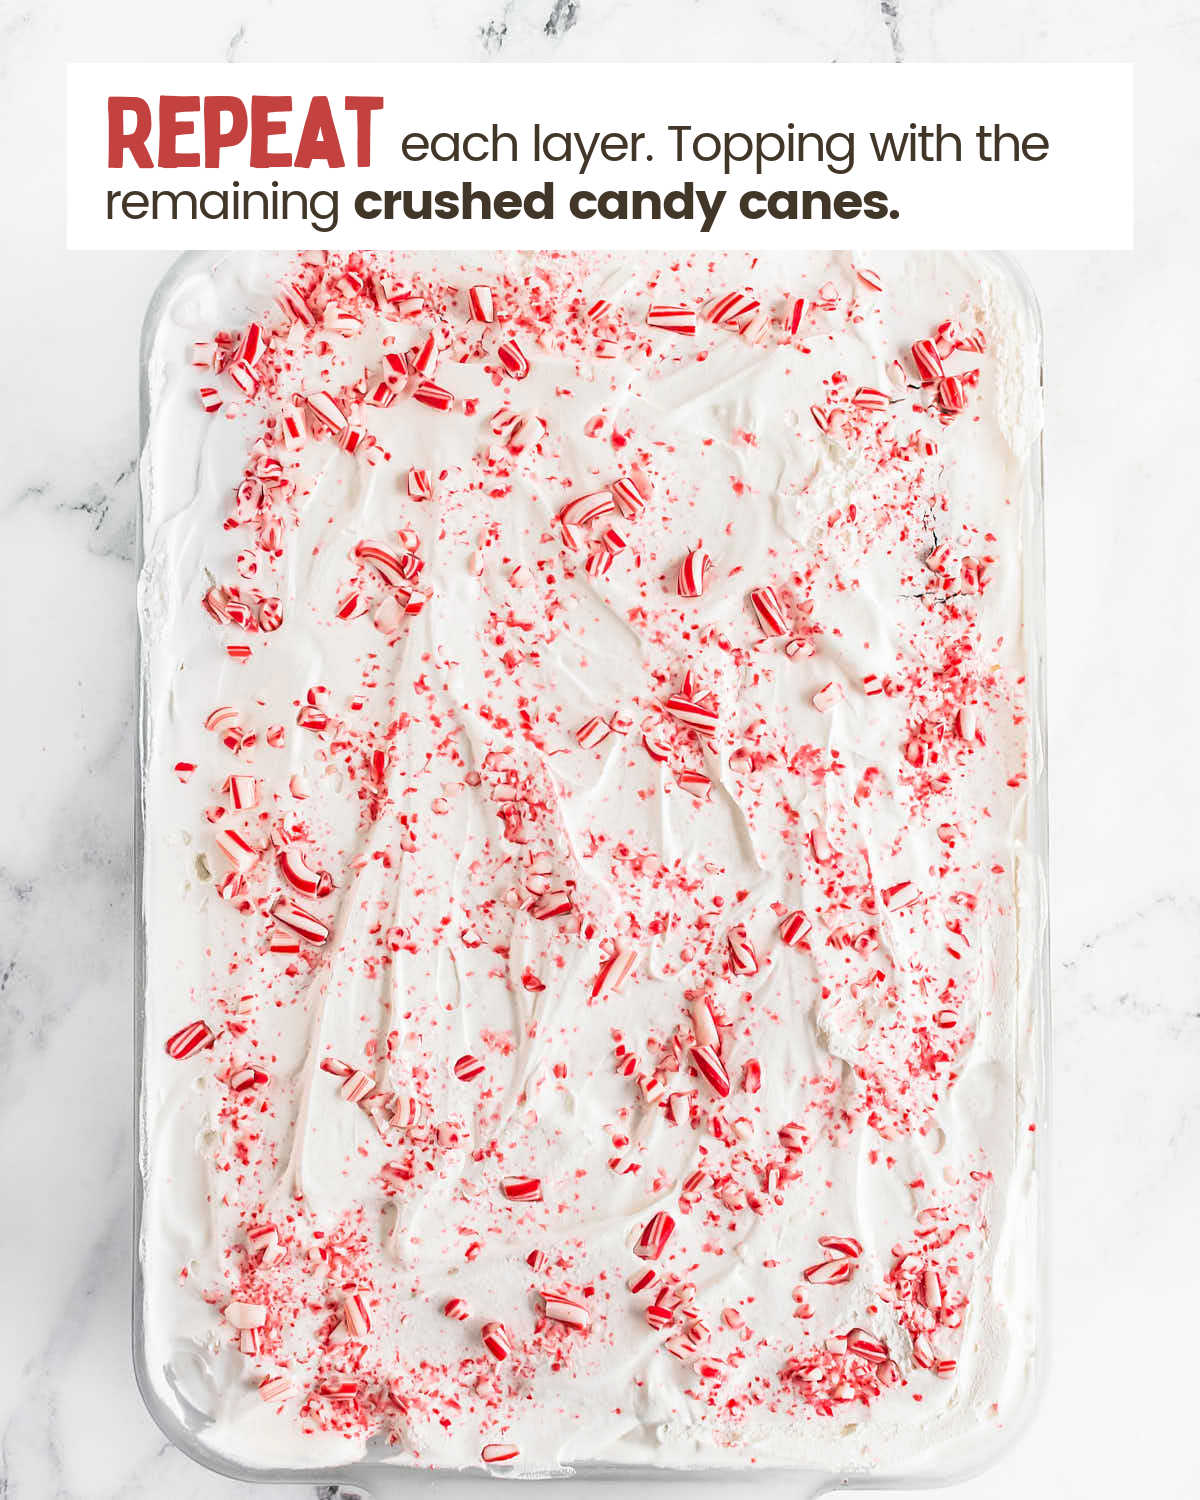
- Repeat the layers with the remaining ingredients.
- Freeze for 3 hours, decorate with candy canes, and serve slightly softened.
Leftovers and Storage
STORE – Cover the leftover cake tightly with foil or plastic wrap. Store in the freezer for up to 5 days.
FREEZE – For best results, slice into individual portions before freezing. Wrap each slice in plastic wrap to prevent freezer burn.
REHEAT – No reheating needed, but let the cake soften at room temperature for 10–15 minutes before serving.
MAKE AHEAD – Prepare the entire cake up to 2 days in advance. Add the decorative candy canes just before serving to keep them crisp.

Serving Suggestions
HOT CHOCOLATE – Pair with warm drinks like classic hot chocolate or peppermint-flavored cocoa.
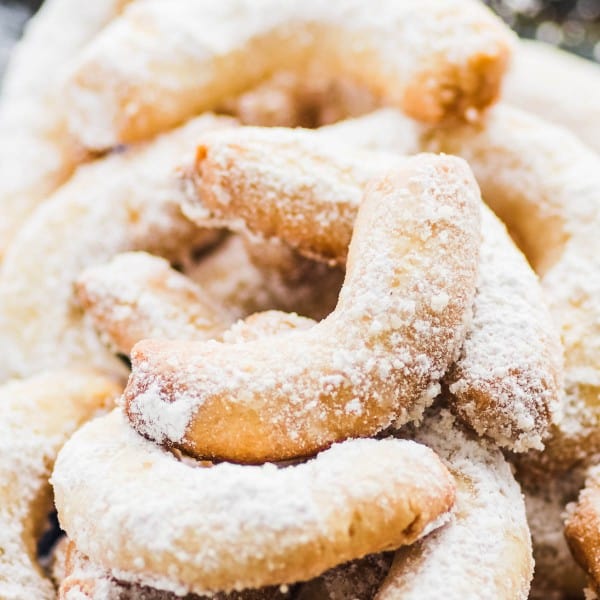
CHRISTMAS COOKIES – Serve alongside a platter of Vanillekipferl or German Spekulatius for a festive dessert table.
FRESH FRUIT – Add a refreshing touch with sliced strawberries or a side of raspberries.
More Easy and Delicious Christmas Recipes
Recipe Success Tips
HEAT THE FUDGE – Warm the hot fudge just until it’s pourable and easy to spread. Avoid overheating, as it can become too runny and start to melt the ice cream sandwiches.
SOFTEN BEFORE SERVING – Allow the cake to rest at room temperature for about 10 minutes before slicing. This softens the layers slightly, making it easier to cut cleanly without cracking.
CRUSH CANDY CANES WELL – For consistent layers, crush the candy canes into small, even pieces using a food processor or by sealing them in a bag and crushing with a rolling pin. This ensures the pieces are uniform and easier to spread evenly across the layers.
Commonly Asked Questions
Can I Use Chocolate Syrup Instead Of Hot Fudge?
Yes, chocolate syrup can easily be substituted for hot fudge. You do not need to heat chocolate syrup. Hot fudge needs to be heated because it is thicker and won’t spread very well unless it is hot. Chocolate syrup will spread smoothly directly out of the bottle.
Can I Use Peppermint Sprinkles Instead Of Crushed Candy Canes?
Yes, peppermint sprinkles will give you the same great peppermint crunch.
More Easy and Delicious No-Bake Recipes

Christmas Icebox Cake
Ingredients
- 24 vanilla ice cream sandwiches
- 1 15.5-ounce bottle hot fudge microwave hot fudge
- 2 8-ounce containers whipped topping thawed
- 32 mini candy canes 20 crushed, 12 uncrushed for decoration
Instructions
- Layer 12 ice cream sandwiches across the bottom of a 9×13 baking dish.
- Heat the hot fudge in the microwave until it becomes pourable. Spread it evenly over the ice cream sandwiches with a spatula.
- Sprinkle half of the crushed candy canes over the hot fudge to create an even layer.
- Spread one container of whipped topping over the candy cane layer, covering it completely.
- Repeat the layers: add another layer of ice cream sandwiches, hot fudge, crushed candy canes, and whipped topping.
- Decorate the top layer of whipped topping with the remaining crushed candy canes.
- Freeze the dessert uncovered for 30 minutes, then cover with foil and freeze for an additional 2 ½ hours.
- Remove the dessert from the freezer 10 minutes before serving to allow it to soften slightly for easy cutting.
- Cut the dessert into 12 pieces. If desired, add a dollop of whipped cream to each slice, then place a mini candy cane on top of each dollop or directly on the slice.
Nutritional Information
Nutritional Disclaimer
Cheerful Cook team members are not trained nutritionists or medical professionals. Calorie information and nutritional values are estimates. If you have nutritional concerns, we recommend using a nutritional calculator.
Maike Corbett grew up in German kitchens learning to cook and bake alongside her Omas before spending over a decade running full-service restaurants in the US. She founded Cheerful Cook in 2017 to share practical, tested comfort food recipes that actually work on busy weeknights, drawing on both her American restaurant experience and her German home-cooking roots. Her work has been featured on MSN, Yahoo, the Associated Press, and other major media outlets.